Service Key & JWT Authentication Tokens
View, copy and regenerate your service key and/or JWT Authentication Tokens
Understanding the role of Service Key and JWT Auth Credentials
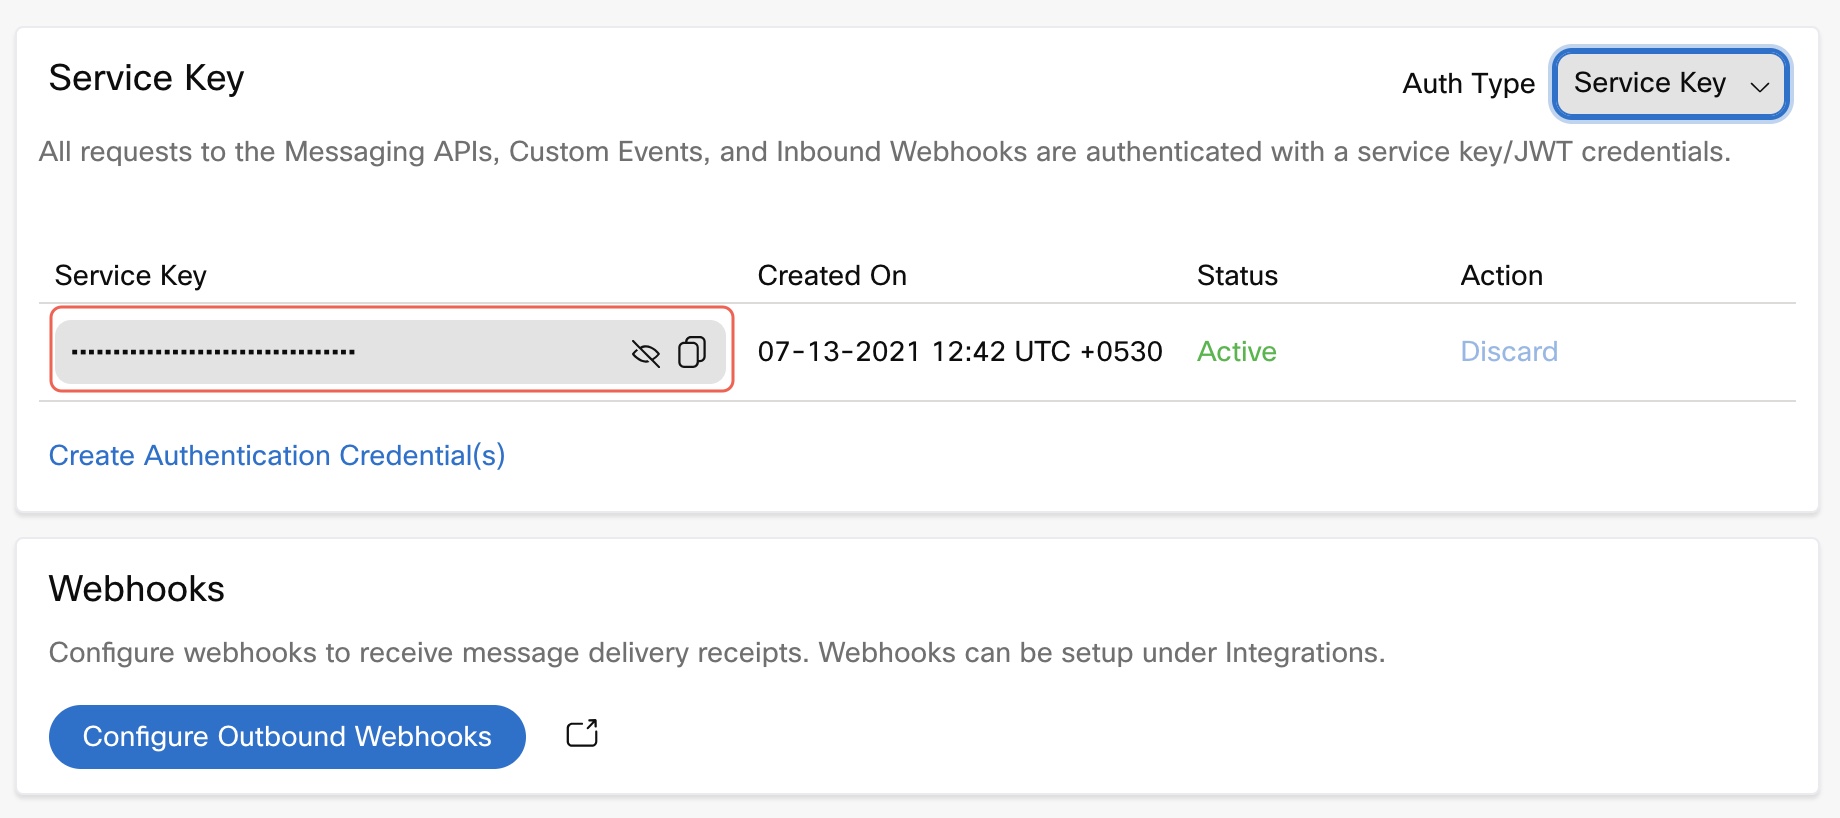
Every Service in Webex Connect provides authentication credentials (a unique service key and JWT auth credentials) that can be used to authenticate and authorize all external requests to invoke Messaging APIs, Custom Event API and Inbound Webhooks. These credentials are accessible under the API tab within a Service.
Further, you can configure Outbound Webhooks to receive delivery receipts for the messages and/or voice calls associated with a Service.

Accessing Service Keys, JWT Authentication Credentials, and Configuring Outbound Webhooks
Service Key and JWT Authentication Tokens
If you pass both JWT Authentication and Service Key in an API request, the JWT Authentication takes priority.
By default, the Service Key and JWT Authentication Tokens are masked. Only tenant Owners, Full Access Users, and Limited Access Users can see the Service Key and JWT Authentication Tokens by clicking the Show Icon (eye icon) next to these.
Generating JWT Tokens
Generating the JWT Token
Webex Connect uses a subset of the JWT fields, described here:
alg
A string used in the header, identifying the algorithm used to encode the payload. The alg value is always HS256 when exchanging messages with Business Chat.iss
A claim that is a string identifying the principal that issued the JWT. The value is always the Service ID when exchanging messages with API V2.iat
A claim that is a numeric date—that is, an integer—identifying the time at which the JWT was issued. The value is the number of seconds from 1970-01-01T00:00:00Z UTC until the specified UTC date and time, ignoring leap seconds. For more information, see the Terminology section in RFC 7519.exp (optional)
A claim that is a numeric date—that is, an integer—identifying the time at which the JWT will expire. The value is the number of seconds from 1970-01-01T00:00:00Z UTC until the specified UTC date and time, ignoring leap seconds. For more information, see the Terminology section in RFC 7519. The expiry time should be greater than the issued at timestamp.A Service Secret is a Base64-encoded string. Decode the string before using the key to sign the JWT. You must include the service secret as a Base-64-encoded string.
JWT Token Expiry
The JWT token expires after 60 minutes from the time that you have generated the token.
Use any third-party tool like jwt.io to generate the JWT key. Here is a sample payload for JWT authorization:
{
  "alg": "HS256",
  "typ": "JWT"
}

{
  "iss": "<your service key>",
  "iat": 16112812000, //issued at epoch timestamp
  "exp": 16112813000  // expires at epoch timestamp
}

HMACSHA256(
  base64UrlEncode(header) + "." +
  base64UrlEncode(payload),

<your-256-bit-secret>

) // select the secret base64 encoded checkbox and click ShareJWT
After you have generated the JWT token, you can use it in your API request as a header parameter in the following format:

Header Parameters in API
Rotating authentication credentials periodically
Apart from the service key and the JWT Authentication token automatically generated when a service is created, the Webex Connect platform provides the ability to generate a second service key/JWT token in addition to the one(s) currently in use. This allows you to have an extra key/JWT auth credentials allowing you to rotate the keys periodically as per security best practices.
Service Key and JWT Tokens Security
The service key and JWT Authentication tokens must be stored in a secure environment and must not be shared with unauthorized users. If you suspect that a service key or JWT authentication tokens have been compromised, you can regenerate the service key/JWT auth credentials for the concerned Service.
Creating an Extra Service Key
To create another Service Key:
- Go to the API tab within the service for which you want to create another service key.
- Select Service Key in the Auth Type drop-down list.

Create Authentication Credentials
- Click Create Authentication Credential(s). The Webex Connect platform generates a service key.

Creating a Service Key
Discarding an existing Service Key
If you no longer require a service key, you can discard it. When you discard a service key, its status changes to _Inactive _and you can _Reactivate _it at any point.
An inactive service key leads to the failure of any API calls and/or existing event scheduler configurations that use this service key. After you discard a service key, make sure that you save (again) the event scheduler configurations that use this service key to avoid any interruptions in the event scheduler triggers.
To discard a Service Key:
- Click Discard against the required service key.
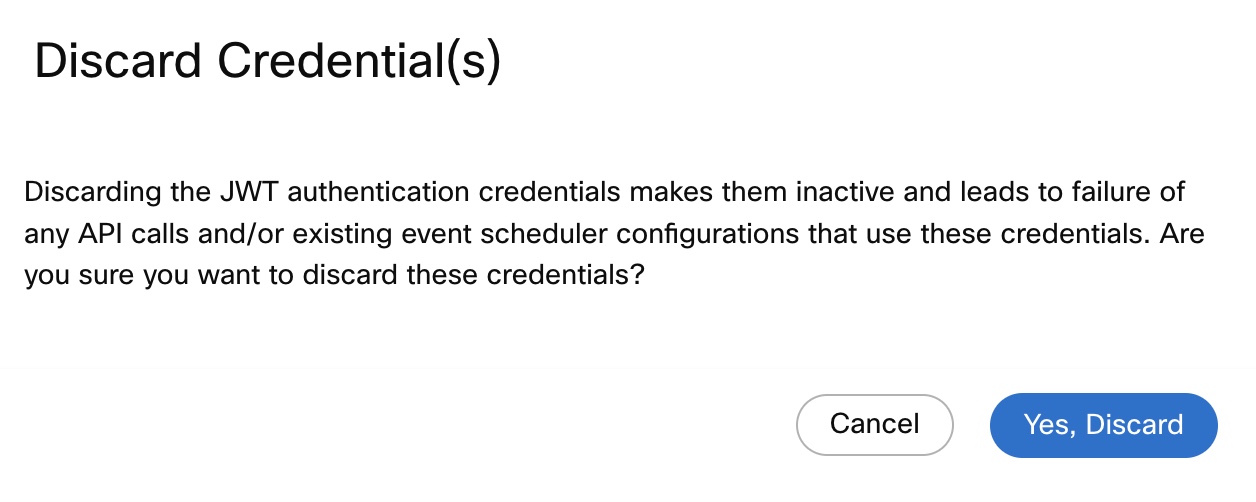
- Click Yes, Discard in the confirmation message that appears to discard and move the service key to _Inactive _status.

Discarding Service Key Credentials
Note
At any point, you can have only one service key in Inactive _status. The Webex Connect platform mandates that at any point there is at least one service key that is _Active. When you discard a service key, the Discard action for the other _Active _service key is automatically disabled.

Discarding a JWT Auth credentials
Reactivating a Service Key
You can only reactivate a service key that is in _Inactive _status. To reactivate an _Inactive _service key:
- Click Reactivate for the Inactive service key.
The service key is reactivated and moves to _Active _status.
Deleting a Service Key
You can only delete a service key that is in _Inactive _status. To delete an _Inactive _service key:
- Click the Delete icon against the Inactive service key.

Deleting a Service Key
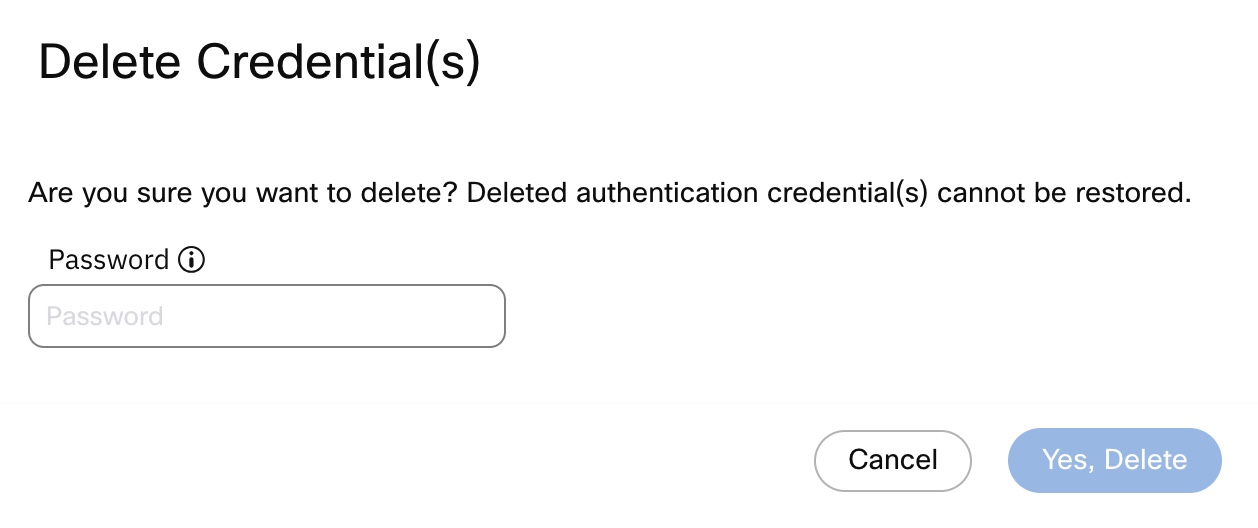
- Enter the password and click Yes, Delete in the confirmation dialog. The service key gets deleted.

Deleting Service Key Credentials
Creating an Extra Pair of JWT Tokens
To create another JWT Token:
- Go to the API tab within the service for which you want to create another JWT Authentication token.
- Select JWT Token in the Auth Type drop-down list.
- Click Create Authentication Credential(s). The Webex Connect platform generates a JWT Authentication token.
Discarding a JWT Token
If you no longer require a JWT Token, you can discard it. When you discard a JWT Token, its status changes to _Inactive _and you can _Reactivate _it at any point.
An inactive JWT Token leads to the failure of any API calls and/or existing event scheduler configurations that use this JWT Token. After you discard a JWT Token, make sure that you save (again) the event scheduler configurations that use this service key to avoid any interruptions in the event scheduler triggers.
To discard a JWT Token:
- Click Discard against the required JWT Token.
- Click Yes, Discard in the confirmation message that appears to discard and move the JWT Token to _Inactive _status.
Note:
At any point, you can have only one JWT Token in Inactive _status. The Webex Connect platform mandates that at any point there is at least one JWT Token that is _Active. When you discard a JWT Token, the Discard action for the other _Active _JWT Token is automatically disabled.
Reactivating a JWT Token
You can only reactivate a JWT Token that is in Inactive status. To reactivate an Inactive JWT Token:
- Click Reactivate for the Inactive JWT Token.
The JWT Token is reactivated and moves to _Active _status.
Deleting a JWT Token
You can only delete a JWT Token that is in _Inactive _status. To delete an _Inactive _JWT Token:
- Click the Delete icon against the _Inactive _JWT Token.
- Enter the password and click Yes, Delete in the confirmation dialog. The JWT Token gets deleted.
Updated 5 months ago
