Call Patch Node
Understand what a Call Patch node is and how to configure it
The Call Patch node is used to merge the ongoing call with another call. This node exists only within the Voice Node Group. Based on your use case you can decide which nodes exist in the node voice group.

Call Patch Node
Node Configuration
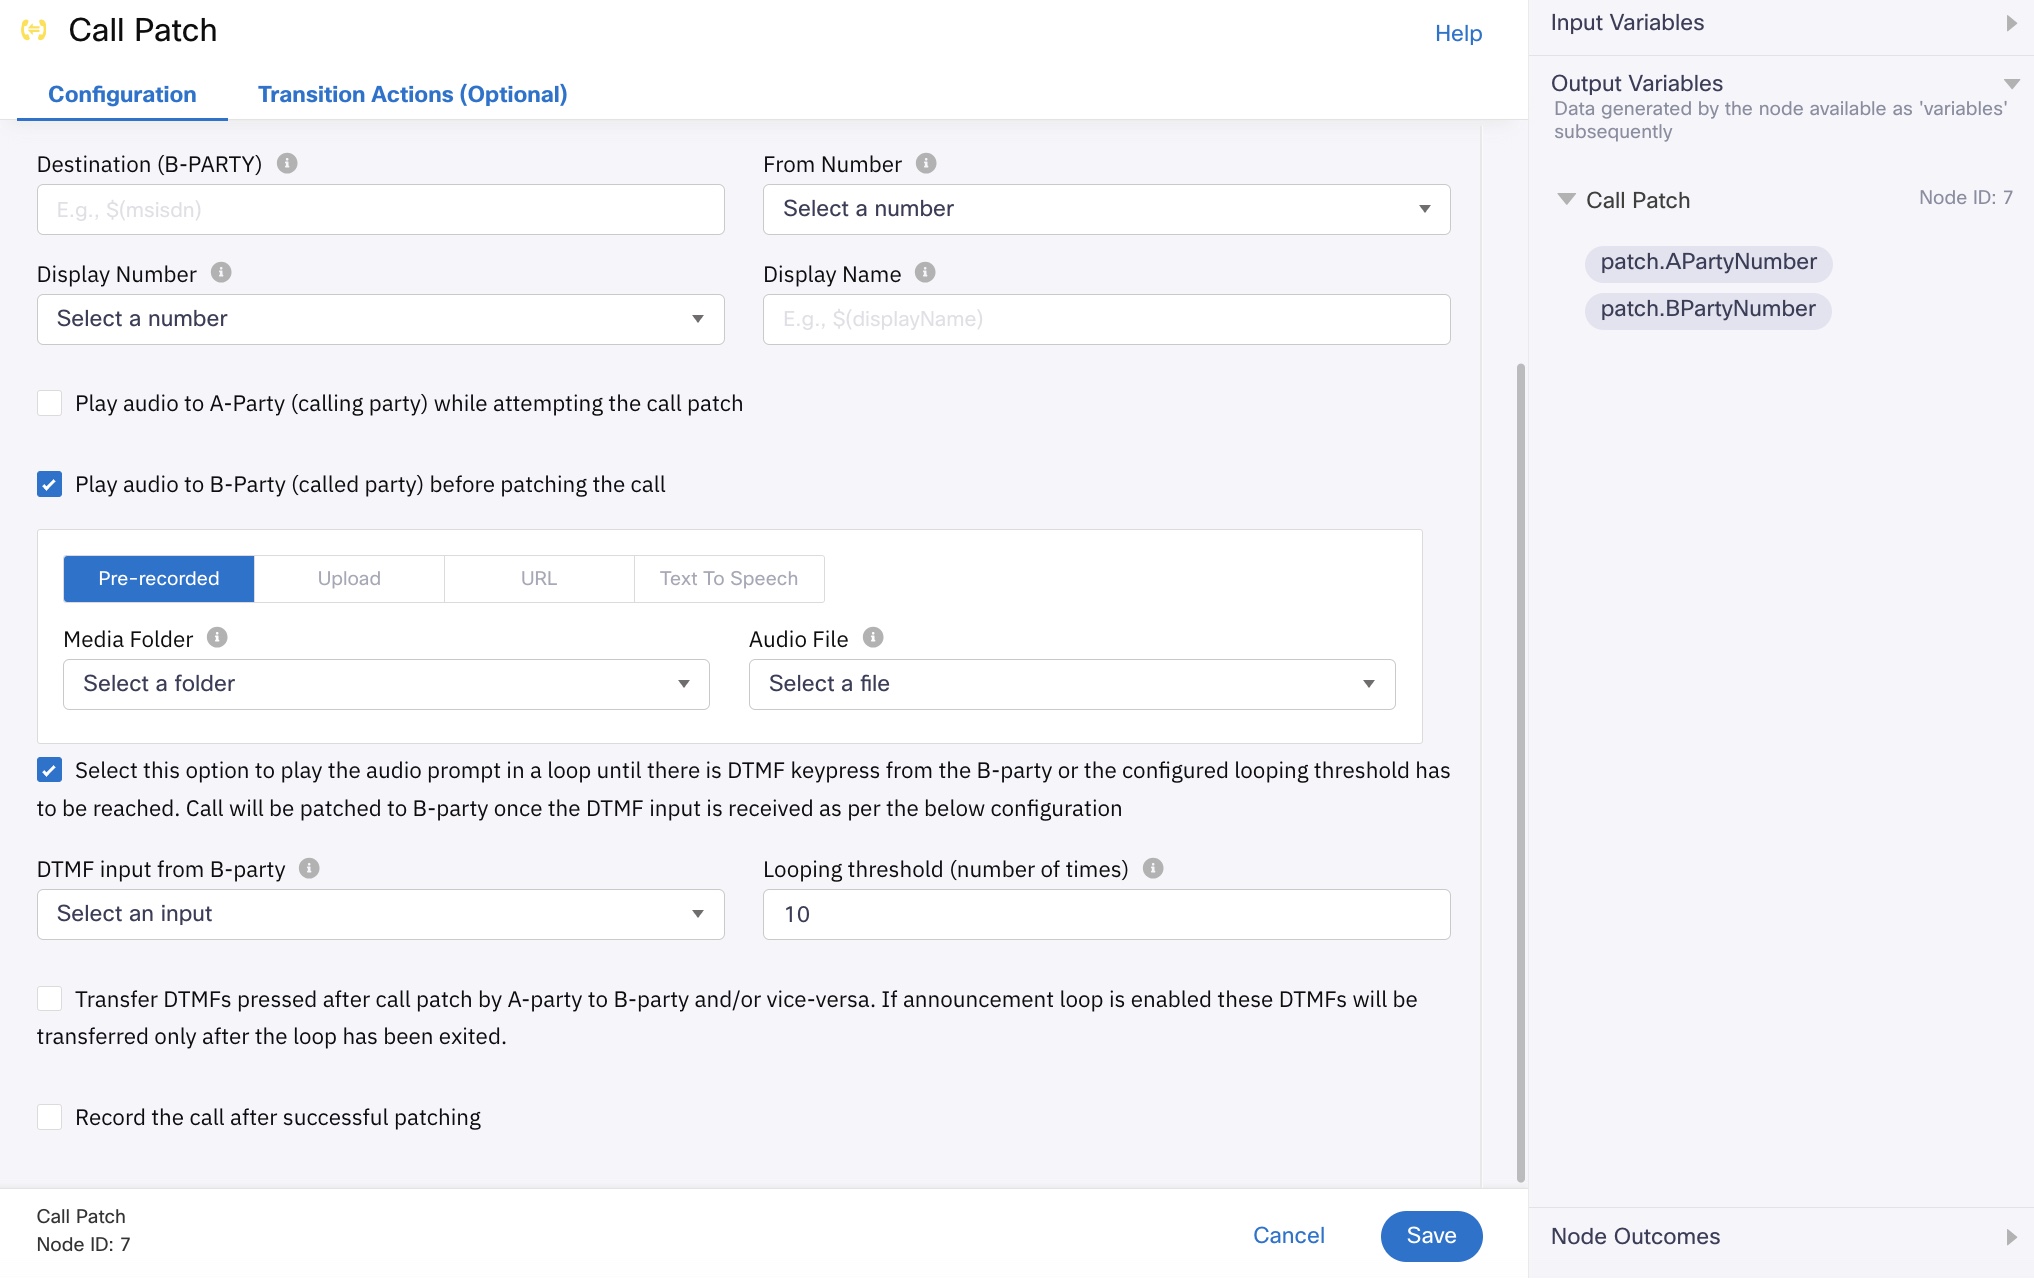
Drag-and-drop the node on to the visual flow builder and double-click it to open the configuration window.
- Click the Play Audio toggle button ON if you want to play audio to the user before proceeding with the recording. This button is OFF by default. This is an optional step.
If you want to play audio, see the Play Node section for steps about configuration. - Enter the Destination (B-PARTY). This is the number to which Webex Connect will make the call and it will be a two-party conference.
Number Format
The Destination number should be in E.164 format. In case of any errors in format the node will exit through ErrorEdge.
- Select the Display Number from the drop-down list box. This is the phone number that is displayed to the customer. Only voice numbers provisioned to your account under Assets > Numbers are listed in this drop-down list box.
- Enter Display Name. It will be enabled when the display number or display name is enabled at the call user node. Enter a specific business name to be displayed during a call on the handset of the customer. The field limit is 10 digits.
Conditions
- The Display Number and Display Name fields are disabled by default. Please reach out to your account manager if you want to enable these features.
- These features are not supported by all the carriers and this information must be communicated by the carriers.
- Check Play audio to the A party (calling party) while attempting the call patch. Select the required Jingle File. This is the audio prompt that will be played to A-party while patching the call. This is an optional step.
- Check Play audio to the B party (calling party) before patching the call. Select the required Announcement File. This is the audio prompt that will be played to B-party while patching the call. This is an optional step.
- Check the option to play the audio prompt in loop until there is DTMF keypress from the B-party or the configured looping threshold is reached. The call will be patched to B-party once the configured DTMF input is received. If the DTMF input is not received before the configured looping, the flow exits through the onNoAnswer edge. This is an optional step. It is specific to light weight contact centers. One example of a use case is that of a call patched to a contact center who in turn routes it to their agents or associates with a minor time gap. This feature allows for the prompt to be looped multiple times before the agent answers the call. Pressing the configured DTMF key provides a confirmation to the system that the agent has heard the message.
Looping Threshold Configuration
Configure the looping threshold carefully keeping in view the use case requirement. A high value can lead to the prompt being played for a long time leading to one voice line being occupied for a long time unnecessarily in case the DTMF press to stop the loop isn't received from the B-party. The Looping threshold allows you to set the number of times the looping is performed.

Call Patch Node Configuration
- Check Transfer DTMFs pressed after call patch by A-party to B-party and/or vice versa. If announcement loop is enabled these DTMFs will be transferred only after the loop has been exited if you want to mandate customer's every DTMF key input to be transferred to the agent. If the option is not selected, no DTMF inputs from the customers will be considered for transfer to the agent. This option is useful for cases where the agent is required to transfer the call to the payment IVR and DTMF key inputs are required from the customers.
- Check Record the call upon successfully patching both calls to record the call once it gets connected to the B party. The recording is saved to Voice recordings in the Tools section with the configured prefix and a unique node transaction id (NodeTID). You can download or ship them to FTP/SFTP/S3 location.
- Click Save to complete the configuration.
Input Variables
You can see a list of all the flow variables available for use within this node under the Input Variables pane. You can also search for a variable using the Search field.
You can see the list of variables that you explicitly create and configure for this node under the Custom Variables pane. You can also add a custom variable to the flow using the Add New Custom Variable button. For more information, see Custom Variables.
Output Variables
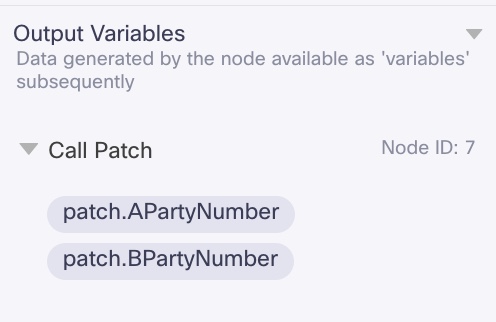
You can see the data that this node generates as output variables. These variables are available for use in subsequent nodes. The following are the standard output variables for the Call Patch node:
- patch.APartyNumber - stores the number from which the outbound call is in progress
- patch.BPartyNumber - stores the number to which the ongoing call is patched.

Output Variables
Node Outcomes
You can see the list of possible node outcomes for this node under this pane. You can customize the node labels using the Edit (pencil) icon. The node exits through one of the node edges corresponding to the outcome of the node.
| Node Edge | Node Event/Outcome |
|---|---|
| Success (green) | > * onSuccess - the flow exits through this node outcome when the ongoing call is successfully patched with another call |
| Timeout (yellow/amber) | > * onNoAnswer - the flow exits through this node outcome when the user does not answer the call |
| Error (red) | > * onError - the flow exits through this node outcome when there is an error in patching the call |
Transition Actions
Use this tab to configure the transition actions for On-enter/On-leave events. However, configuring transition actions is optional. For detailed instructions about configuring the transition actions, see Node Transition Actions.
Updated 5 months ago
