Using Custom Node to configure your own integrations
Custom node allows you to add new system integrations and make them available as a resusable node across flows. Here's how you can use it.
Step 1: Go to Integrations
- Hover over Assets and click Integrations from the menu bar on the left to navigate to the Integrations screen.
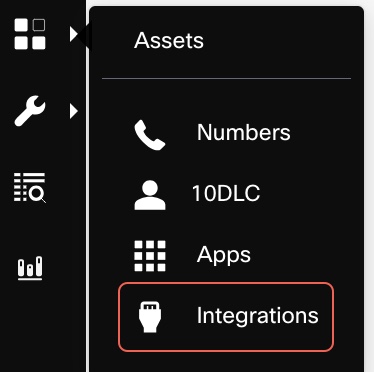
Navigate to the Integrations screen by selecting Integrations from the Assets menu.
Step 2: Add a custom node
- Click ADD INTEGRATION button and select CUSTOM NODE from the drop-down.
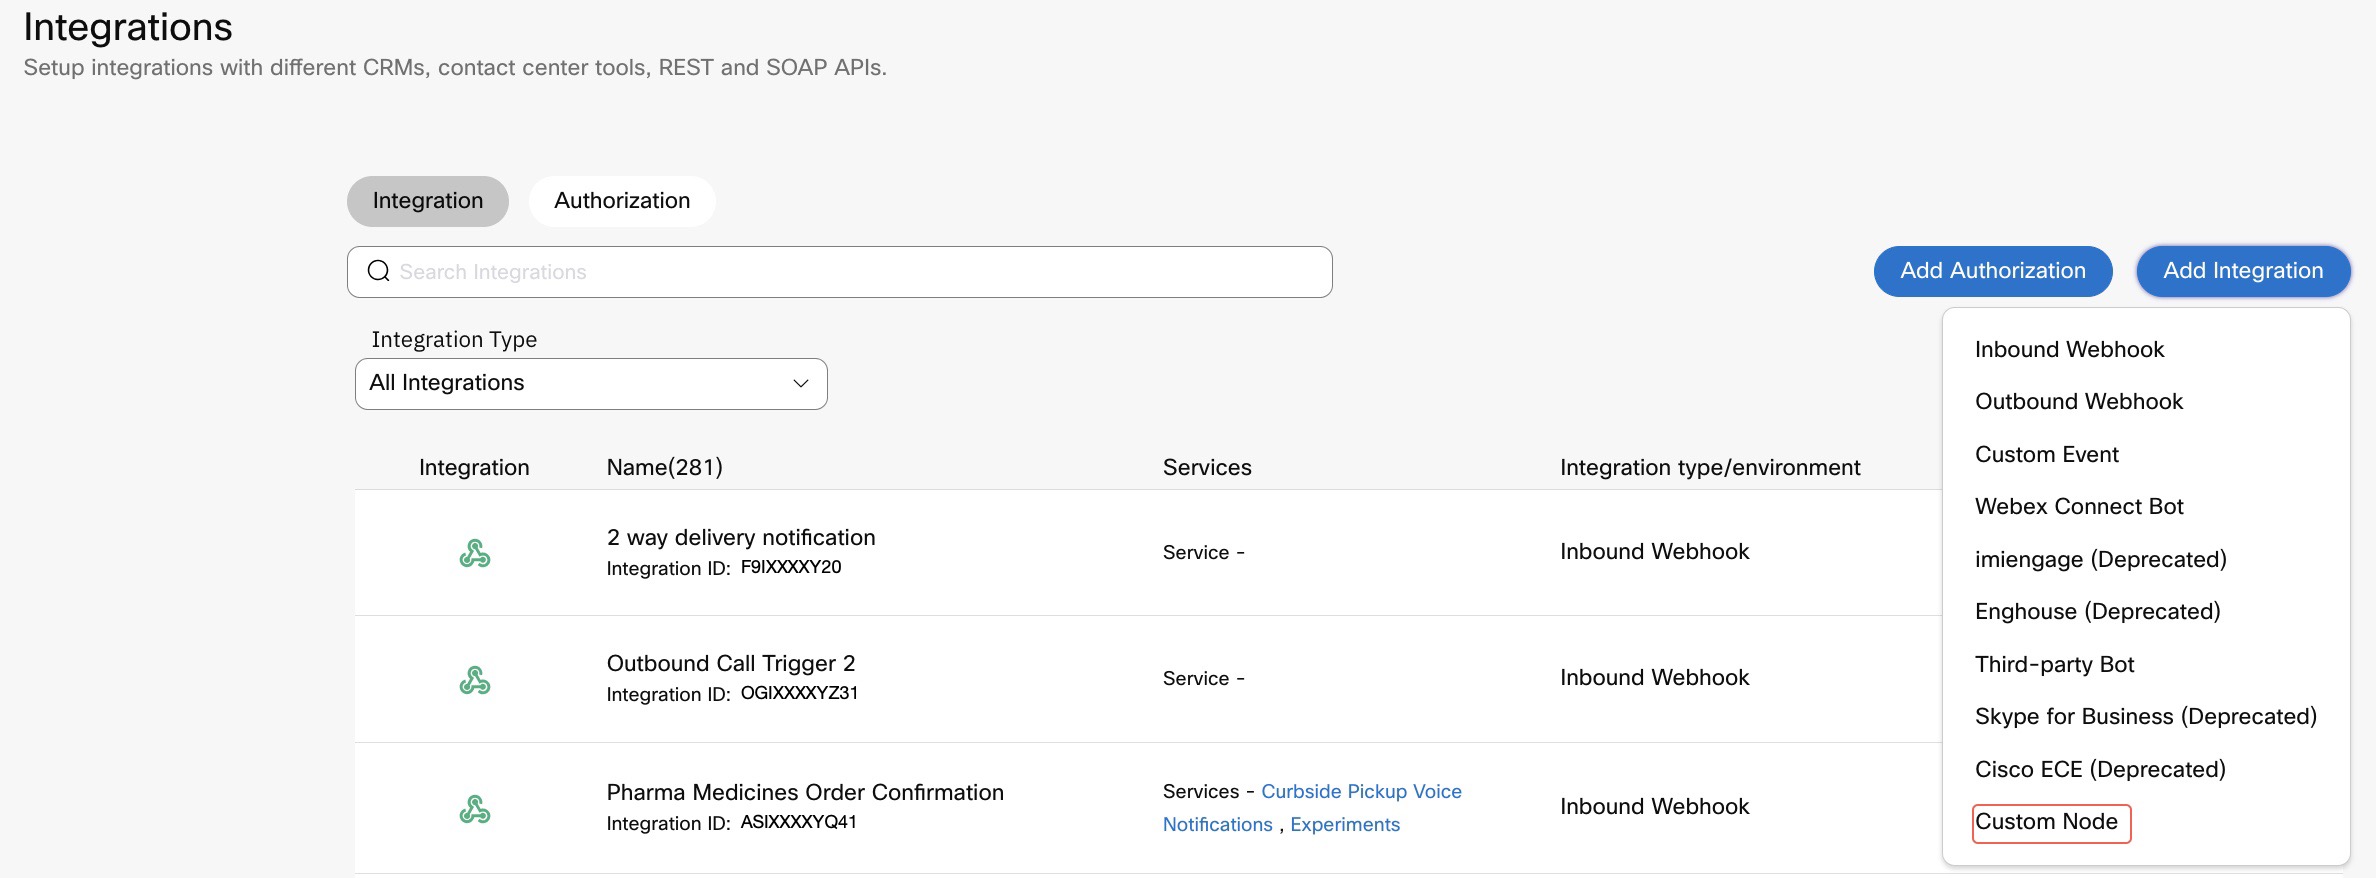
Adding a custom node by selecting it from the ADD INTEGRATION drop-down menu.
Once you click the Custom Node option, a 'Create new custom node' pop-up appears as shown below. As you would notice, Webex Connect enables you to integrate with both Rest API and Soap API compliant systems.
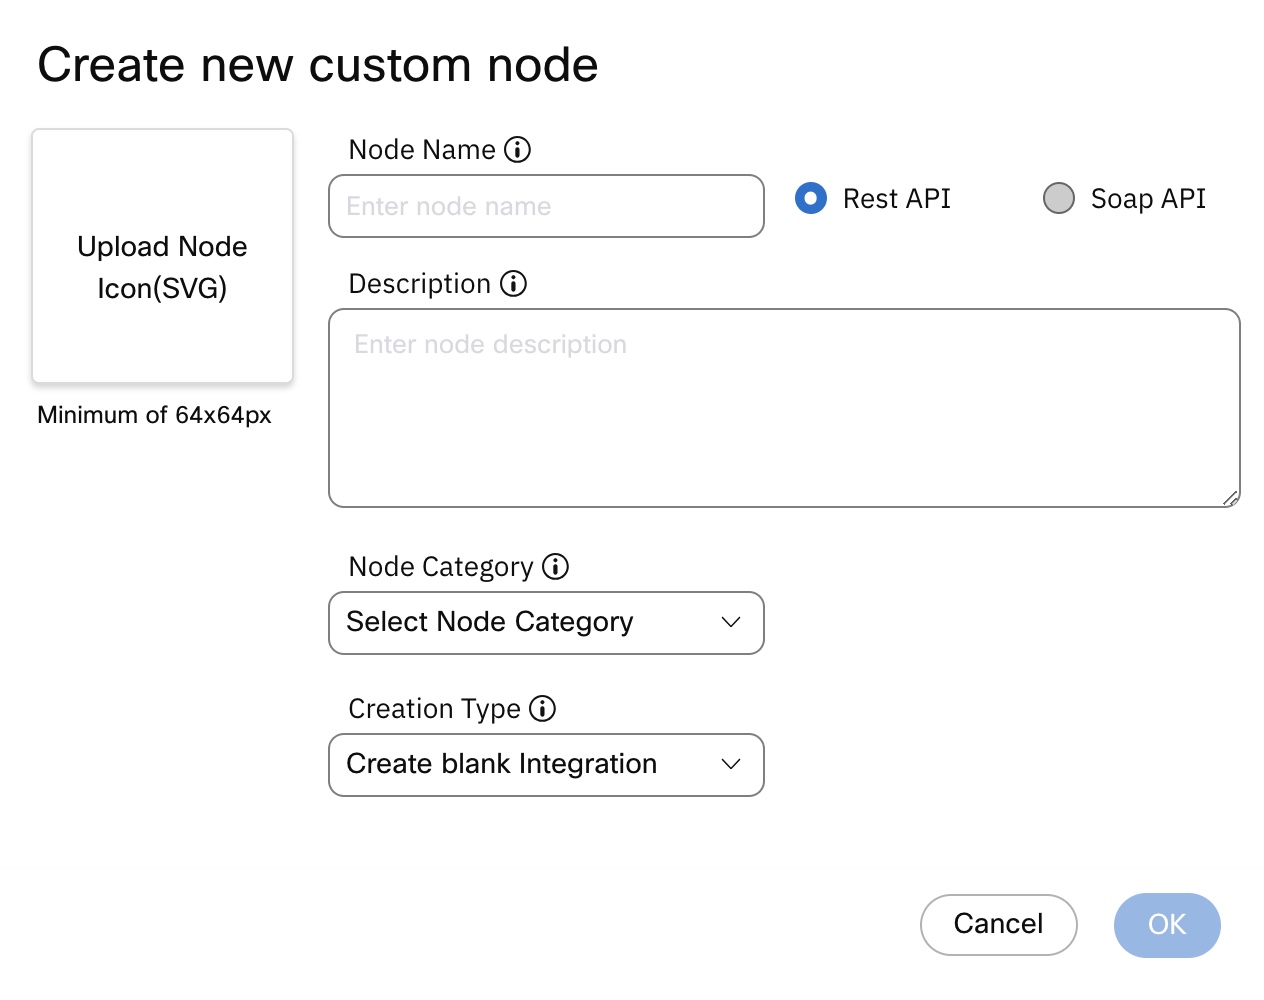
Pop-up window for creating a new custom node after selecting the Custom Node option.
Provide a user friendly node name and description. Upload a relevant SVG image for your integration.
In this example, we are going to show how you can integrate the REST API integration option to configure a reusable integration with IBM Watson Tone Analyzer API.
Note:
The following integration follows the IBM Watson Tone Analyzer API reference.
Step 1: Configure the Watson REST API under the SETTINGS tab
- Enter a name in the Request Name field on the Request Details window.
- Choose POST as the TYPE from the drop-down.
- Enter the API Resource URL: https://cloud.ibm.com/apidocs/tone-analyzer in the Resource URL field as available on IBM Watson API reference.
- Configure the request parameter version as follows:
- Enter “version” in the Parameter field
- Choose DYNAMIC from the Parameter value type drop-down.
- Enter “version” in the Field Value field.

Configuration screen for setting up Request Details in custom node.
Step 1.1: Configure the Authorization
- Choose BASIC AUTH as the Authorization Type.
- Configure the User Name
- Enter username in the Username field.
- Choose DYNAMIC as the Parameter value type from the drop-down.
- Enter Username in the Field name field.
- Assign a Password
- Enter the password in the Password field.
- Choose DYNAMIC as the Parameter value type from the drop-down.
- Enter Password in the Field name field.

Configuration screen for setting up Authorization in custom node.
Step 1.2: Configure the Headers
- Enter Content-Type as the Parameter.
- Choose Static from the Parameter value type drop-down.
- Enter application/json under the Parameter value field.

Configuration screen for setting up Headers in custom node.
Step 1.3: Configure the Body
- Choose JSON(application/json) from the drop-down.
- Enter the code as shown below:
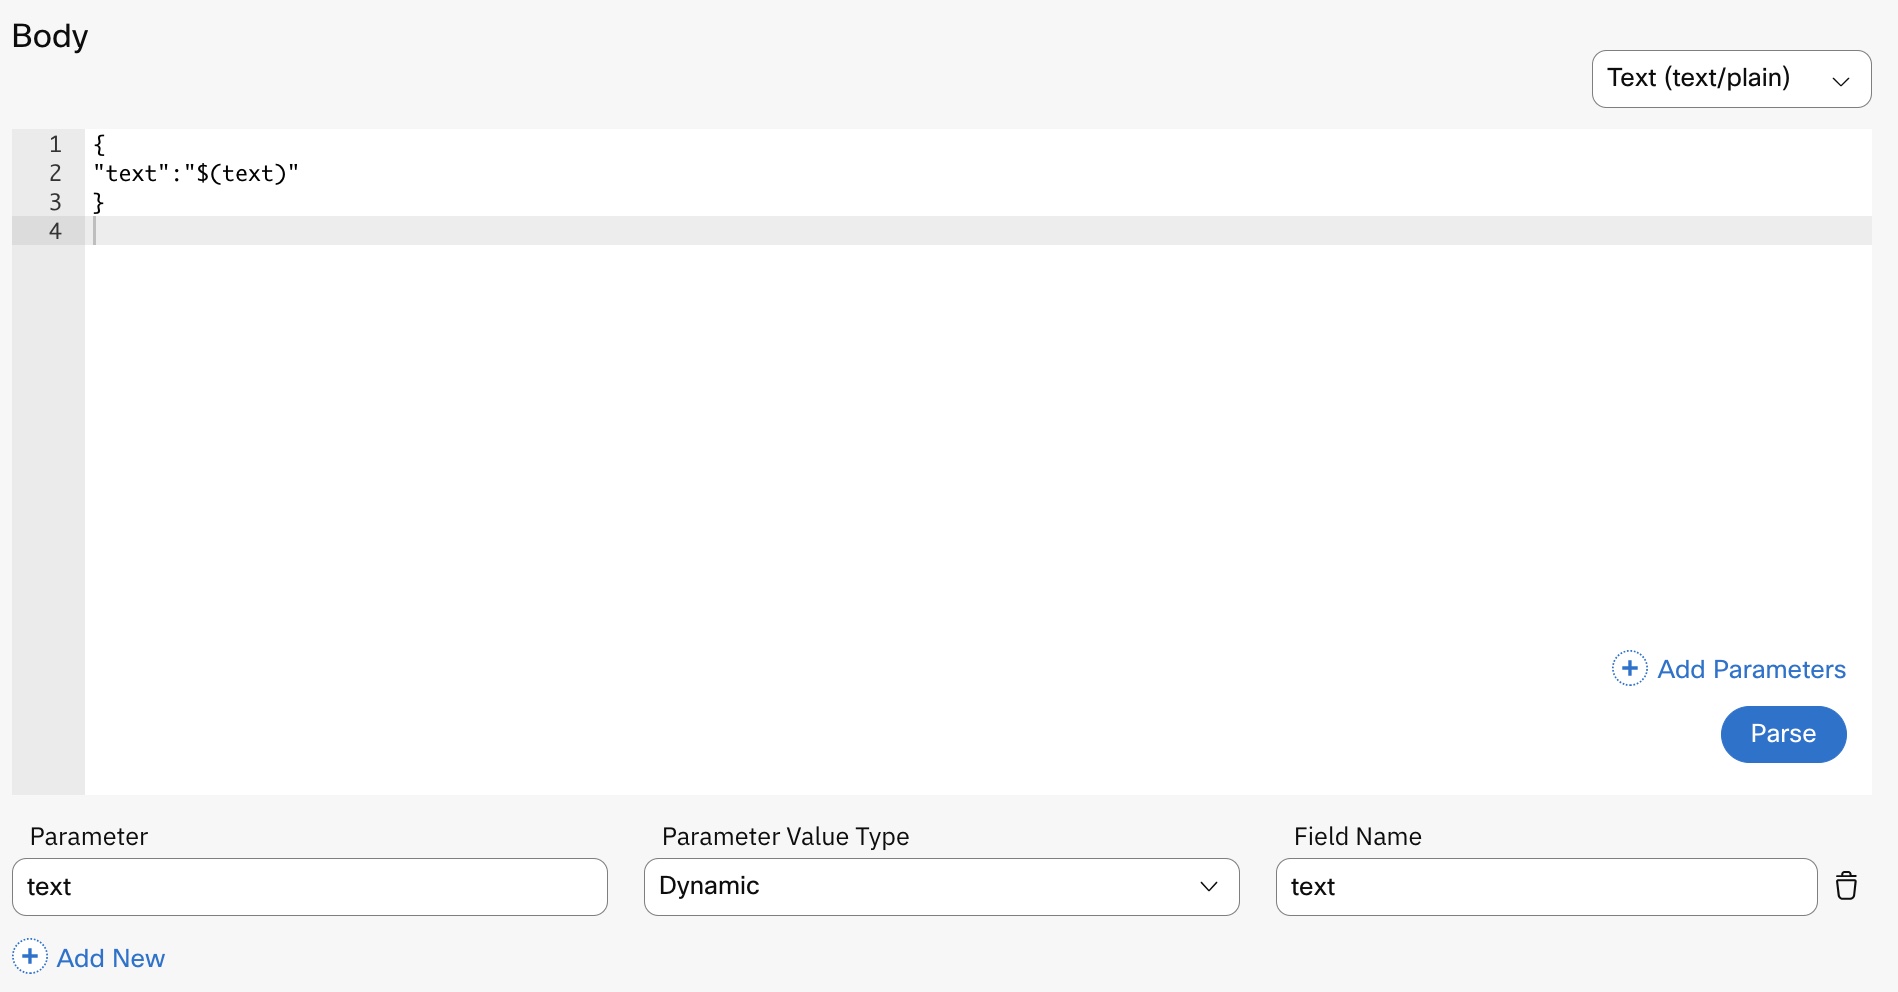
Configuration screen for setting up request Body.
{
"text":"$(text)"
}
- Enter text under the Parameter field.
- Choose DYNAMIC as the Parameter value type from the drop-down.
- Enter text under the Field Value field.
Step 1.4 : Configure the Response
- Configure a node event for the success response :
- Enter success under the Node Event field.
- Choose HTTP Status from the drop-down.
- Choose equals from the drop-down.
- Enter the value 200 in the Value field.
- Choose Success from the Node Edge drop-down.
- Click Add New and configure another node event for an error response
- Enter error under the Node Event field.
- Choose HTTP Status from the drop-down.
- Choose not equals from the drop-down.
- Enter the value 200 in the Value field.
- Choose Error from the Node Edge drop-down.

Configuring the node events in the Response section.
3.Map the response object to a node variable
- Enter ToneId in the Parameter Name field.
- Choose Body from the drop-down.
- Enter $.document_tone.tones[0].tone_id under Response Path field.
- Click Add New from the bottom.
- Enter ToneName in the Parameter Name field.
- Choose Body from the drop-down.
- Enter $.document_tone.tones[0].tone_name in the Response Path field.
- Click Add New from the bottom.
- Enter ToneScore in the Parameter Name field.
- Choose Body from the drop-down.
- Enter $.document_tone.tones[0].score in the Response Path field.

Configure Response Path
Step 2: Configure the NODE UI Tab
- Enter a name in the INFORMATION TEXT field (e.g., Authentication).
- Choose Text box from the Field Type drop-down under Username.
- Check the Mandatory parameter checkbox.
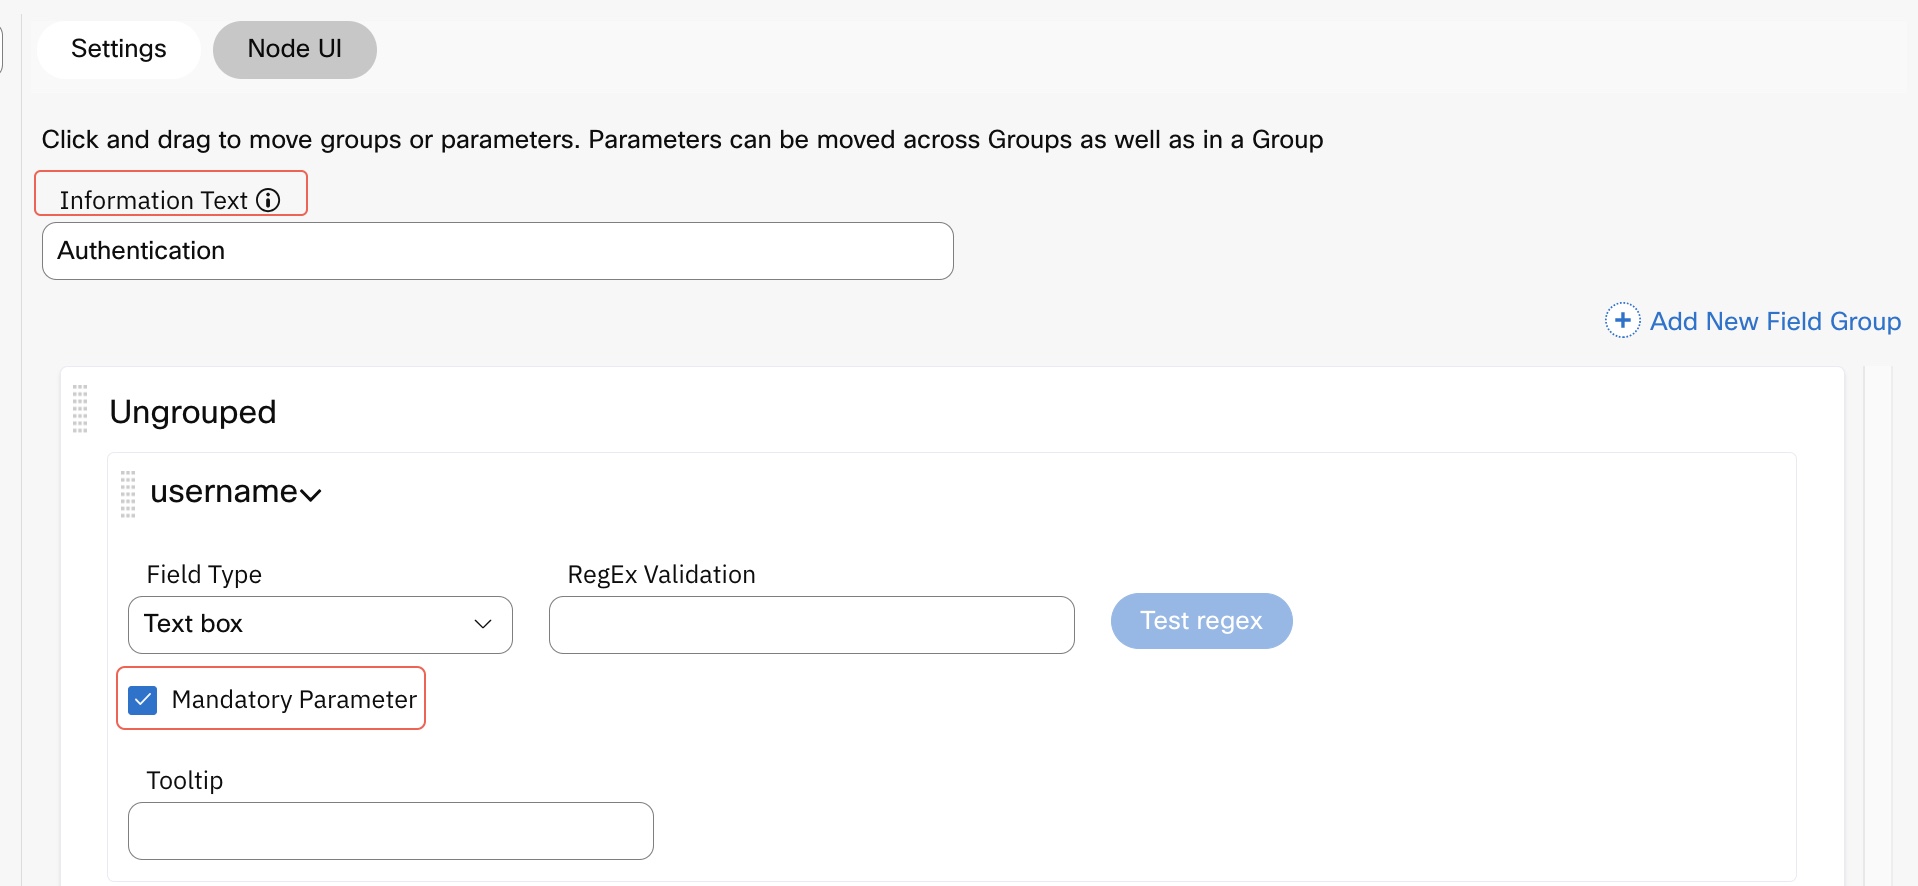
Node UI
- Choose Text box from the Field Type drop-down under Password.
- Check the Mandatory parameter checkbox.
- Choose Text box from the Field Type drop-down under version.
- Check the Mandatory parameter checkbox.
- Choose Text box from the Field Type drop-down under user input.
- Check the Mandatory parameter checkbox.
- Click SAVE at the bottom of the screen.
Updated 11 months ago
