Creating a Brand
Understand how to create a Brand
To create a brand on the Webex Connect platform:
- In the Brands & Campaigns (10DLC) page, click Create New Brand.

Screenshot displaying a List of Brands.
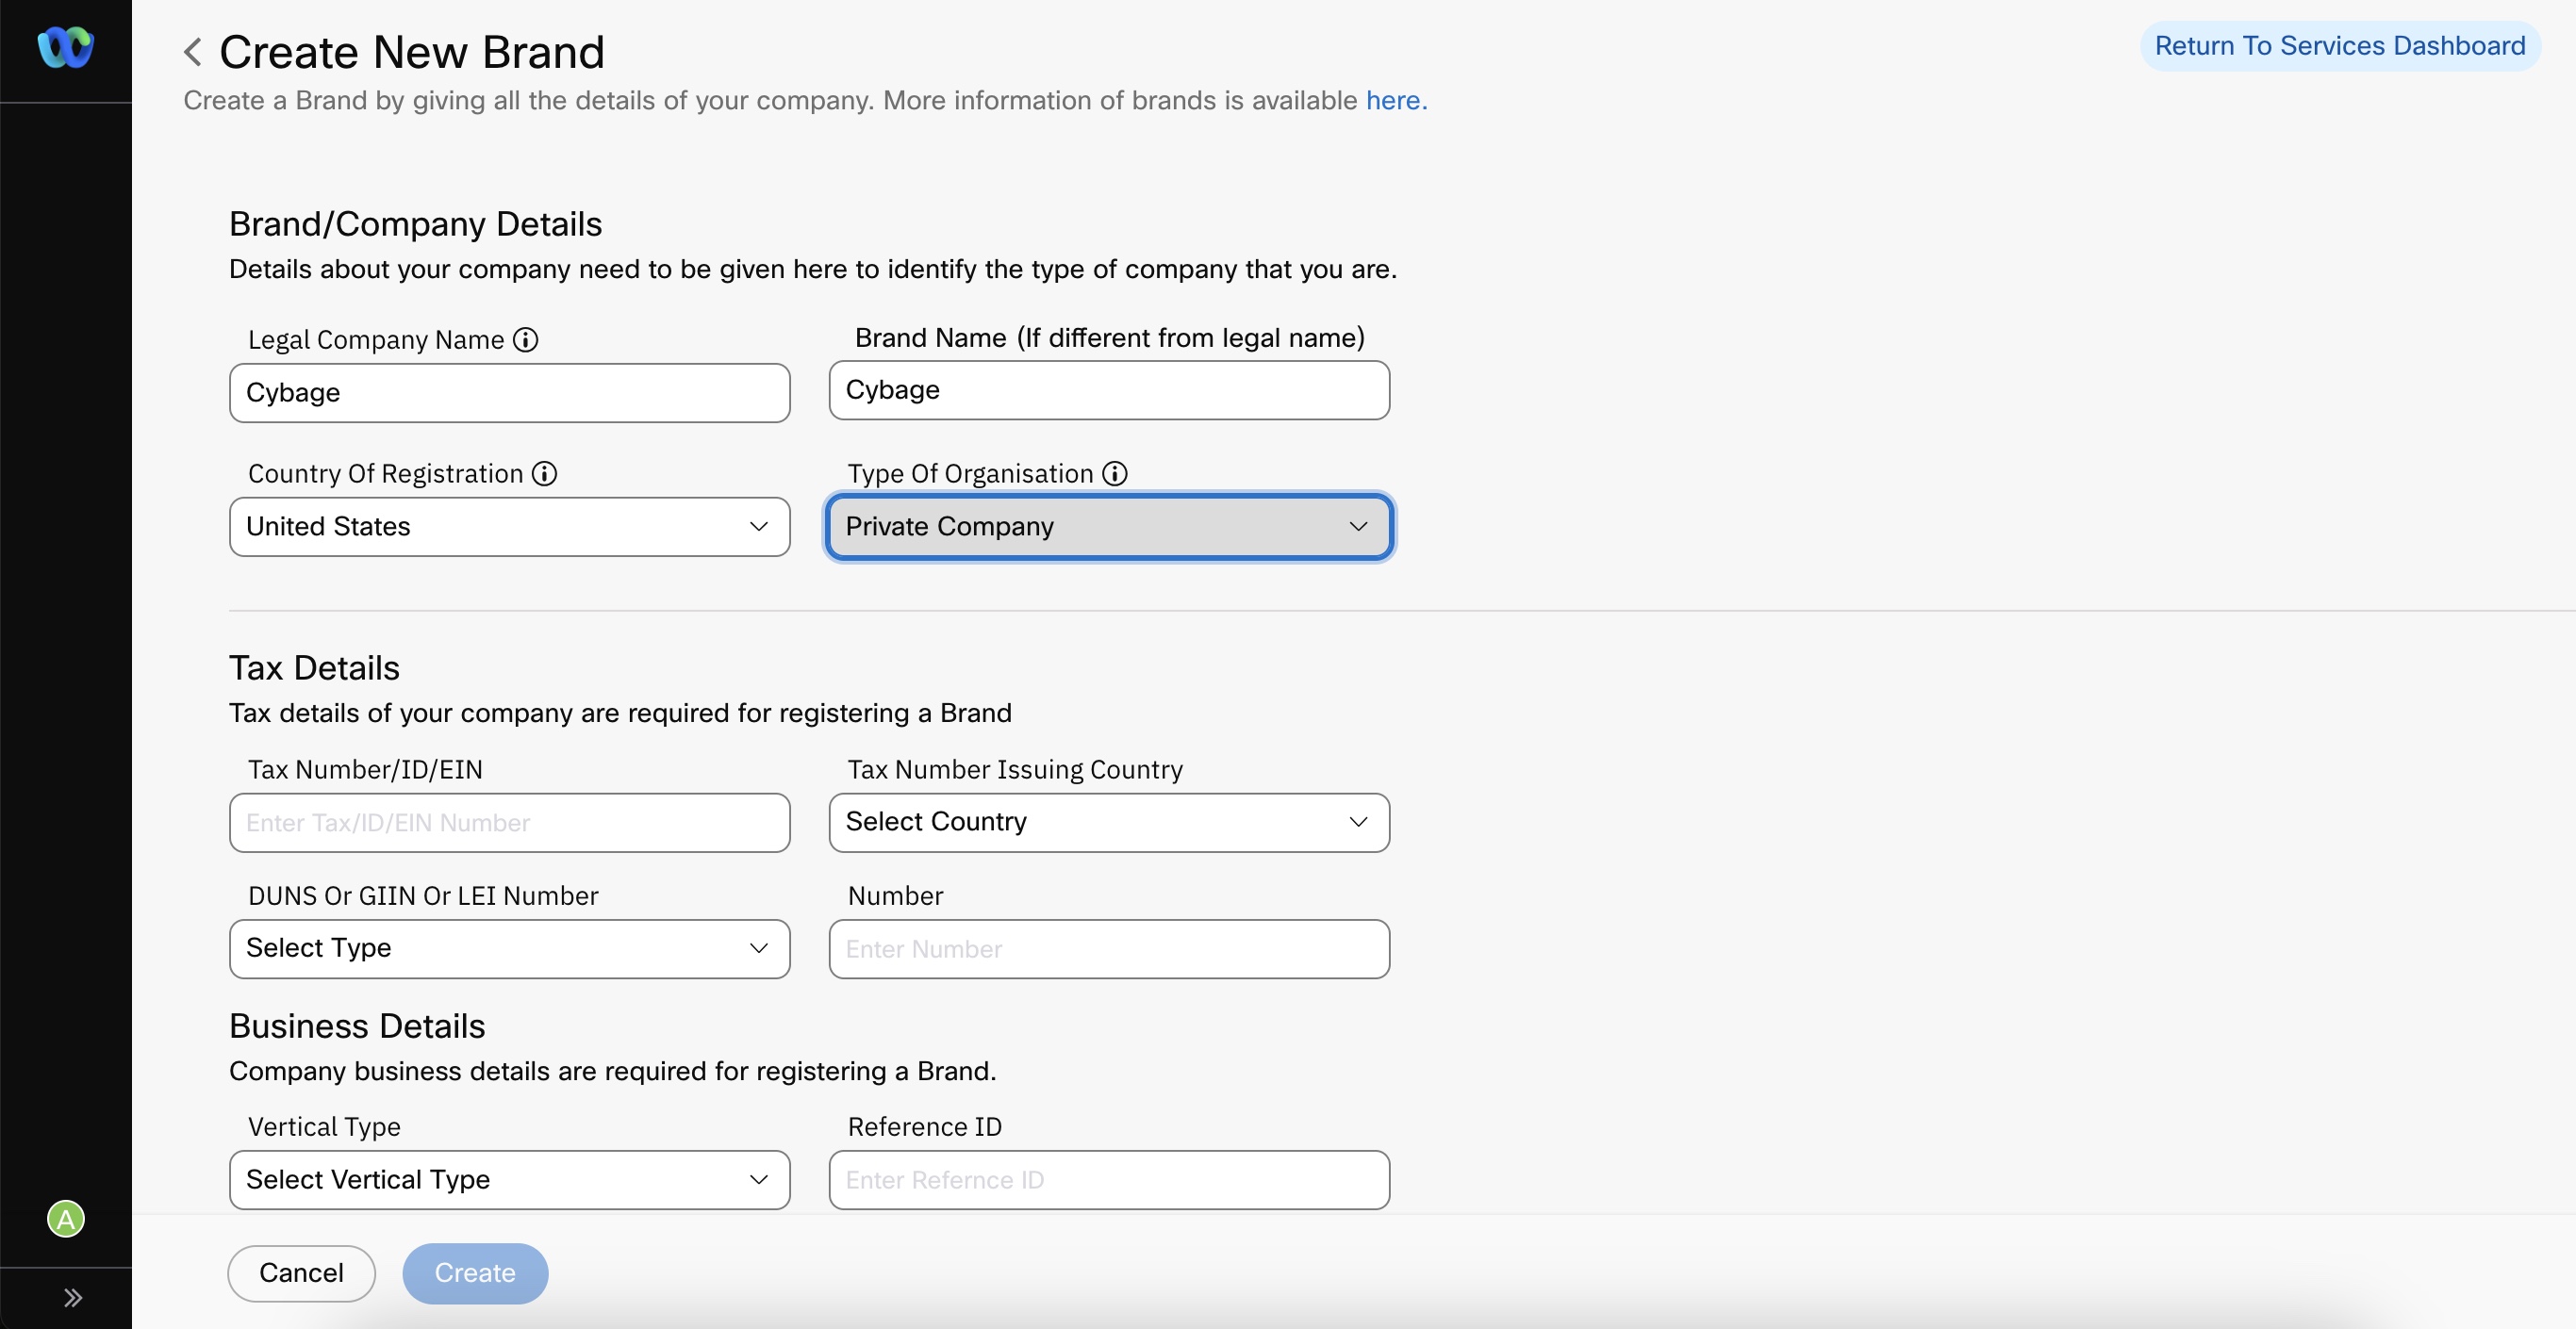
- Enter details or select an option from the drop-down menu:

Screenshot of Create the New Brand Page.
-
Legal Company Name
-
Brand Name
-
Country of Registration
-
Type of Organization
-
Publicly Traded Company
-
Private Company
-
Non-profit organization
-
Government
-
Sole Proprietor (Temporarily not available)
-
Note
While creating a Brand, the Sole Proprietor option is temporarily not visible under Type of Organisation.
-
Enter details for the remaining sections and fields.
Identity verification requirement for new and existing brands
Effective October 17, 2024, The Campaign Registry (TCR) has introduced a new brand identity verification process for Publicly Traded Companies (public, for-profit Brands). This will require all new and existing brands to complete the new identity verification process when creating new Campaigns.
When registering a Brand, you must provide the email ID for the Business Email Address field on the Create Brand page. This email id will be used for verifying your identity via 2FA.For more information on the exact steps, please click here.
-
Click Create.
The create button is enabled only when correct details are filled in for all the mandatory fields.
After the Brand form is successfully submitted, the status of the brand can be seen on the Brand Listing page and the Brand Management page. In addition, the tenant owner, the tenant user, and the Support contact provided in the Brand Creation Form will receive Brand status email notifications.
Mandatory Fields
For information on the mandatory fields for each organization type, refer to Details for Creating Brands.
Updated 3 months ago
