Using Branch Node to build a flow with conditional branching
Branch node allows you to add alternative paths within a flow based on real-time conditional checks (e.g. if-then-else scenarios). Here's is how you can use the Brand Node.
The Branch node can be used in the start (after the first node that's used to trigger the flow) or anywhere in the middle of a flow.
Step 1 – Add the Branch Node
Drag and drop the Branch node from the Nodes palette to the left on to the flow canvas.
Step 2 – Configure the branch flow
Drag-drop the Branch node into the flow builder. Double-click the Branch node to configure.
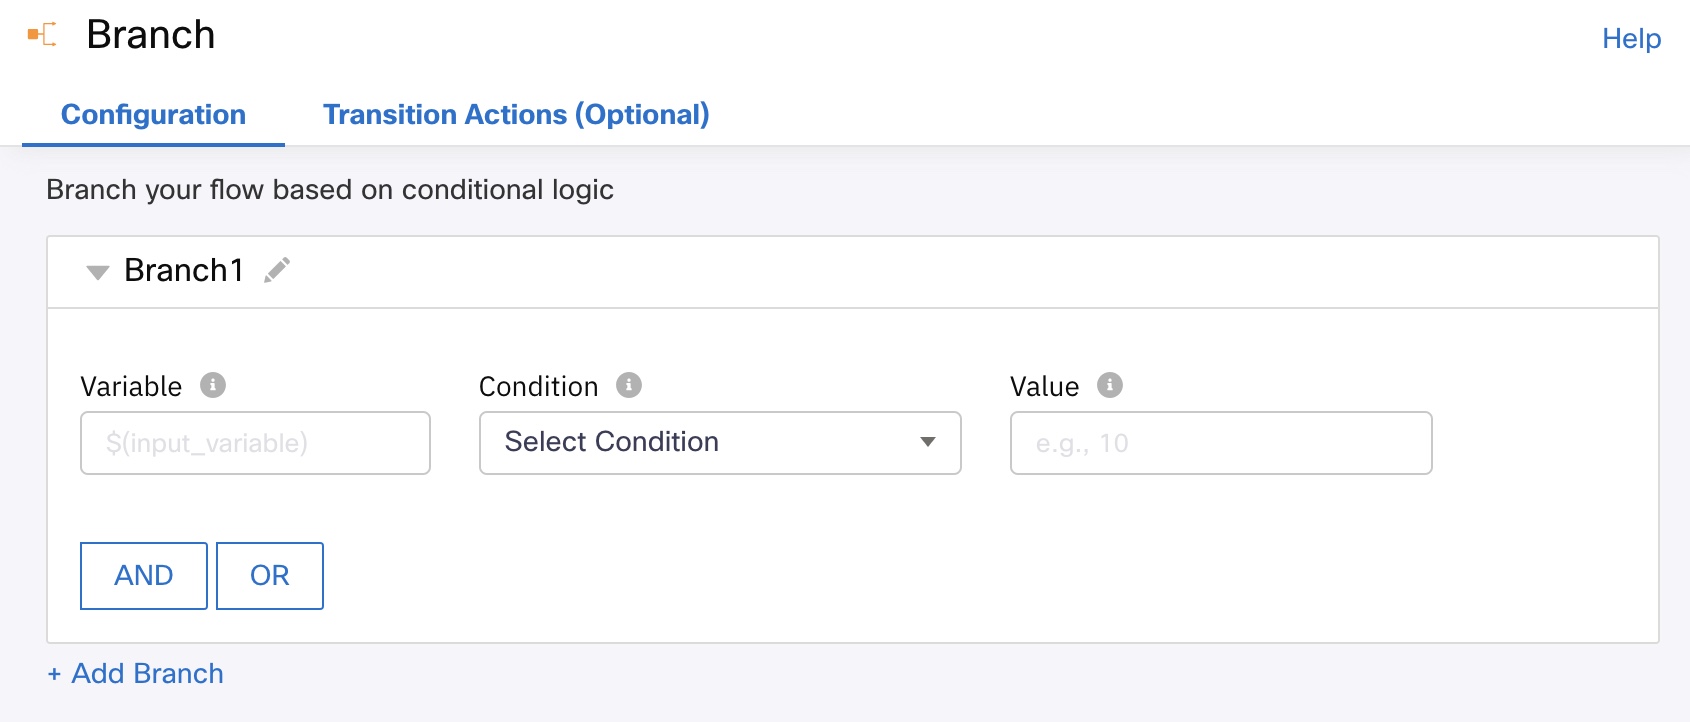
- Name the branch node in Branch1 field. For example, Positive Feedback.
- Enter the conditional variable name in the input variable field. The value of the conditional variable will decide which path is to be executed.
- Select the Condition as Equals from the drop-down.
- Enter the required number in the VALUE field. For example, 10.

Setting up a branch node with conditions in a flow builder.
- Click ADD BRANCH to add a new branch and repeat the steps from 1-4 with a different match condition for the new branch.
You can add multiple branches this way with a business logic. Rename the default flow if needed.
Note
The default branch is named as "none of the above" which can be updated to the needed value
Updated 9 months ago
