Sending automated SMS using Webex Connect Visual Flow Builder
Learn how to send an SMS using Webex Connect Visual Flow Builder
Prerequisites
Step 1: Create a Service
Create new service from the Services Dashboard. If this is the first time you are creating a service in Webex Connect, refer to the tutorial.
Step 2: Get a phone number
A phone number is needed for sending and/or receiving messages from your customers using Webex Connect. You can skip this step if you already have a number.
Here's a quick tutorial on Buy a Phone Number using Webex Connect
Step 3: Create a Flow to Send SMS
1. Create a New Flow
For detailed steps on creating a new flow, refer here.
2. Select the custom event as the event trigger on the trigger category selection page
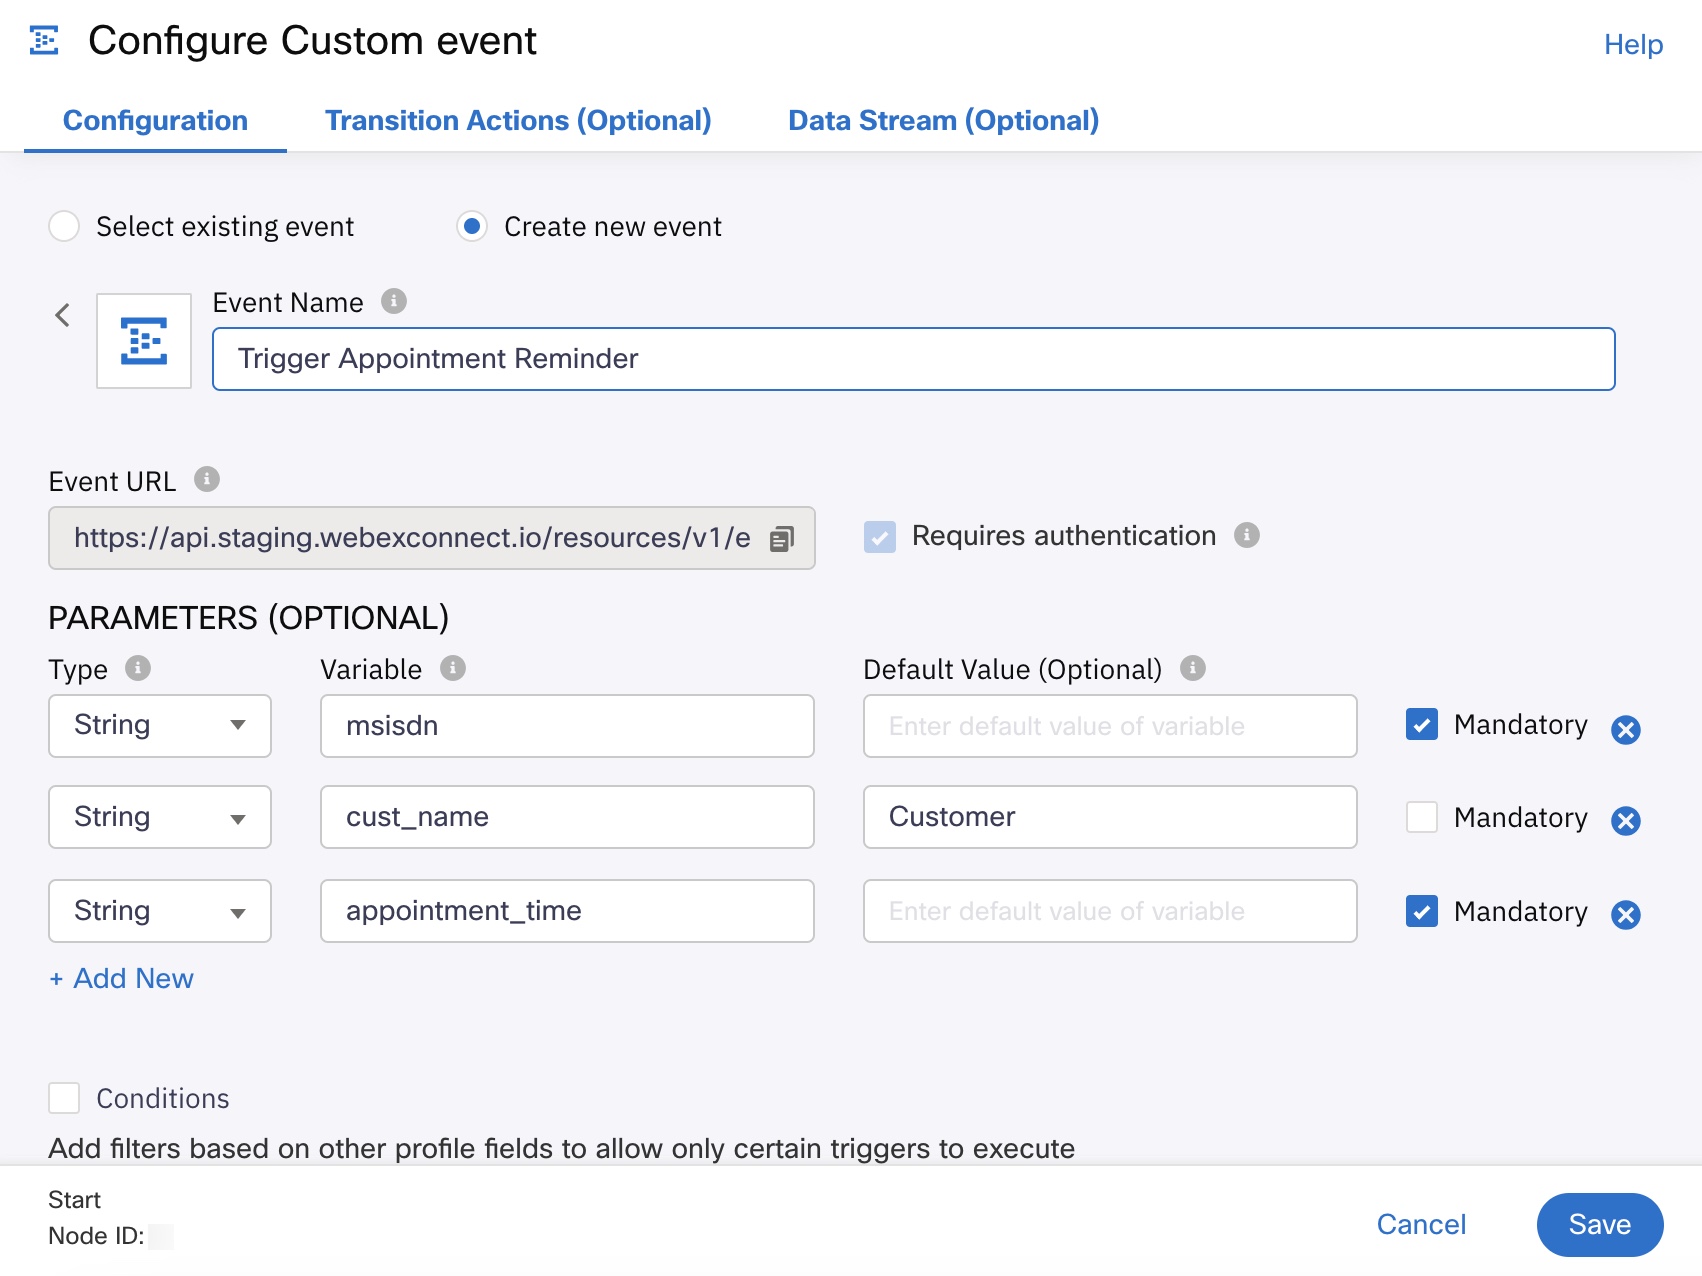
- On the next window, configure your custom event. Select radio button "Create New Event"
- Name the custom event. Next, define the parameters to be used in this event.
- Under the PARAMETERS (OPTIONAL) section, choose the TYPE as String from the drop-down.
- Enter msisdn as the variable.
- Check the Mandatory box.
- Click on +ADD NEW to define another parameter & define all the parameters as follows
| TYPE | VARIABLE | MANDATORY |
|---|---|---|
| String | msisdn | Yes |
| String | cust_name | No |
| String | appointment_time | Yes |

Screenshot of Configuring Custom Event Page.
3. Build the Flow
- You will arrive at the Visual Flow Builder screen with the custom event node already present in the flow builder.
- Drag and drop a Send node from the node palette to the left of the screen, under the Channels tab.
- Connect the custom event node with the Send node by dragging the green dot towards the Send node.
- Double-click on the Send node to configure its parameters. You will arrive at the configuration window.
- Here, enter $(msisdn) in the DESTINATION field.
- Note: MSISDN stands for Mobile Station ISDN number, which refers to the mapping of the telephone number to SIM card.
- Select the sender id from the drop-down under FROM NUMBER
- Type the message that you wish to send to your customers in the MESSAGE section and click on SAVE to save these settings.
Step 4 : Configure the 'onsuccess' event
Click here for detailed steps on configuring onsuccess event for SMS node.
Step 5 : Configure the 'onerror' event
Click here for detailed steps on configuring onerror event for SMS node.
Publish the Flow
Click here to know more about publishing a flow.
Step 7: Invoke the flow using Postman
Click here for steps on testing using postman
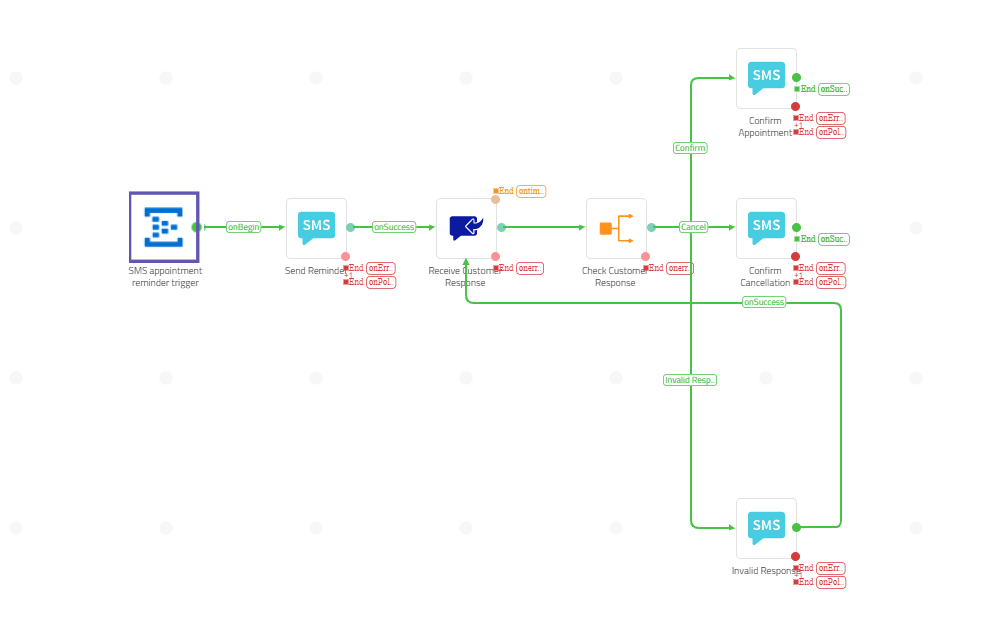
Here's how the complete flow will look:

Screenshot of Sample Flow.
Updated 5 months ago
