Voice Recordings
All voice recordings from multiple flow nodes can be accessed.
All the recordings from voice flows and APIs will be accessible on the Voice Recordings page.
- Flows: Includes recordings from the Call Patch and Record nodes.
- V1 API: Includes both the full call recording and individual action-level recordings (e.g., Play, Record, Call Patch, and Call Transfer).
Using the Settings, you can backup or store the voice recordings on FTP/SFTP/S3 servers.
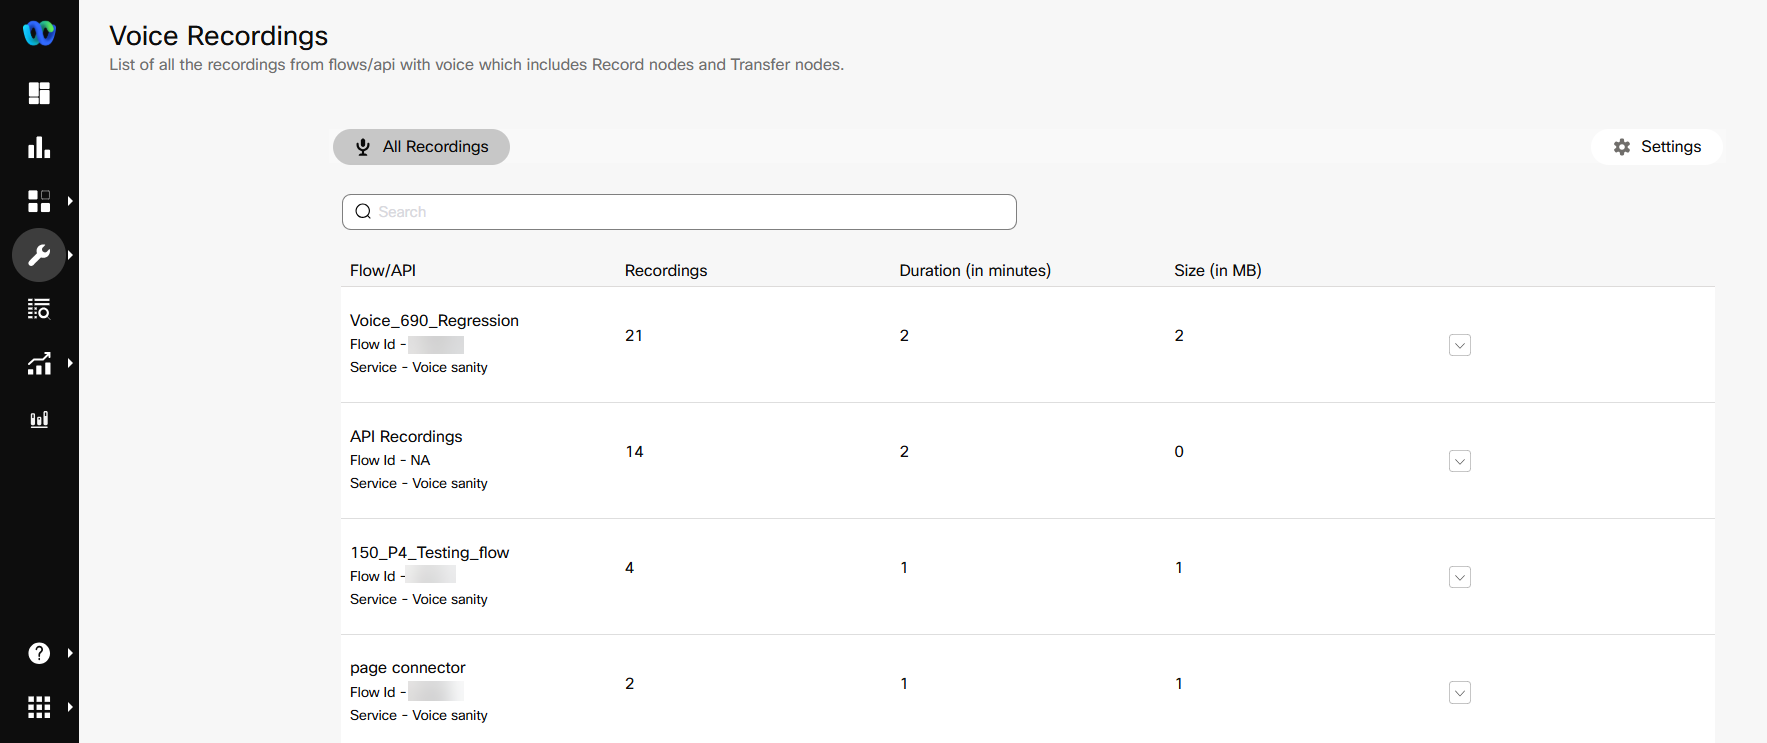
Voice Recordings
Listen to and download recordings of a flow. These recordings will be available for 30 days from the generation date.
You can now provide an email/a notify URL to get notifications on the file exports scheduled on Voice Recordings. The notification is triggered at the end of each export cycle, relaying the outcome of the file export process.

Screenshot of Flow Recordings
To access the recordings:
- Go to the Tools > Voice Recordings.
- Navigate to the Settings tab.
- Select the File Destination.
- For none, enable the required voice recordings. Only the enabled voice recordings will be saved to the configured location.
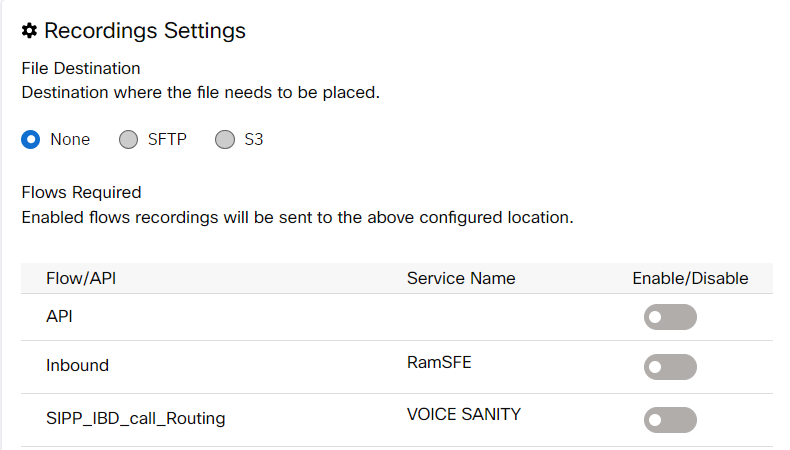
Screenshot of Recordings Settings
- For FTP, enter the following details and enable the required voice recordings. Only the enabled voice recordings will be saved to the configured location.
(i) User Name - the user name used to login to the FTP server
(ii) Password - the password used to login to the FTP server
(iii) Host Name - the hostname of the FTP server
(iv) Path Name - the folder path on the FTP server
(v) Port Name - the port number for the FTP server.
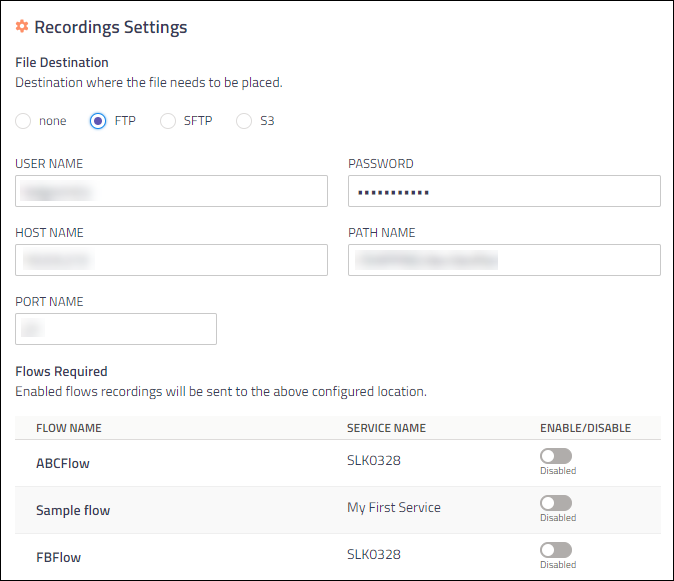
Screenshot of FTP Server Settings
Note
The FTP feature is no longer supported for new configurations, because Data sent via FTP is vulnerable to sniffing, spoofing, and brute force attacks, among other basic attack methods.
The feature will work as is for the existing customers.
- For SFTP, enter the following details and enable the required voice recordings. Only the enabled voice recordings will be saved to the configured location.
(i) User Name - the user name used to login to the SFTP server
(ii) Password - the password used to login to the SFTP server
(iii) Host Name - the hostname of the SFTP server
(iv) Path Name - the folder path on the SFTP server
(v) Port Name - the port number for the SFTP server.
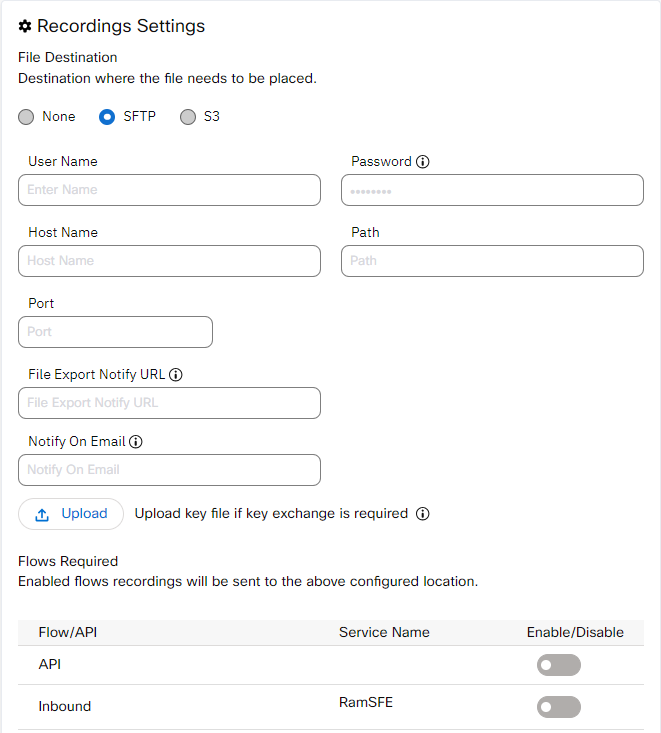
Screenshot of SFTP Settings
Note
You can upload the private key (example: AWS based Open SSH key files like rsa512.ppk, rsa256.ppk, ecdsa521.ppk, ecdsa384.ppk, ecdsa256.ppk, ed25519.ppk, ECDSAprivate.ppk, EDDSA255private.ppk) for SFTP configuration, when you select the File Destination as SFTP using the Upload button.
- For S3, enter the following details and enable the required voice recordings. Only the enabled voice recordings will be saved to the configured location.
- User Name - the user name used to login to the Amazon Simple Storage Service (S3) console.
- Bucket Name - the unique DNS compliant for your new bucket. A bucket consists of file folders or store objects.
- Access Key - the access key used to login to the S3 console.
- Secret Key - the secret key used to login to the S3 console.
- Region - the region of the S3 console.
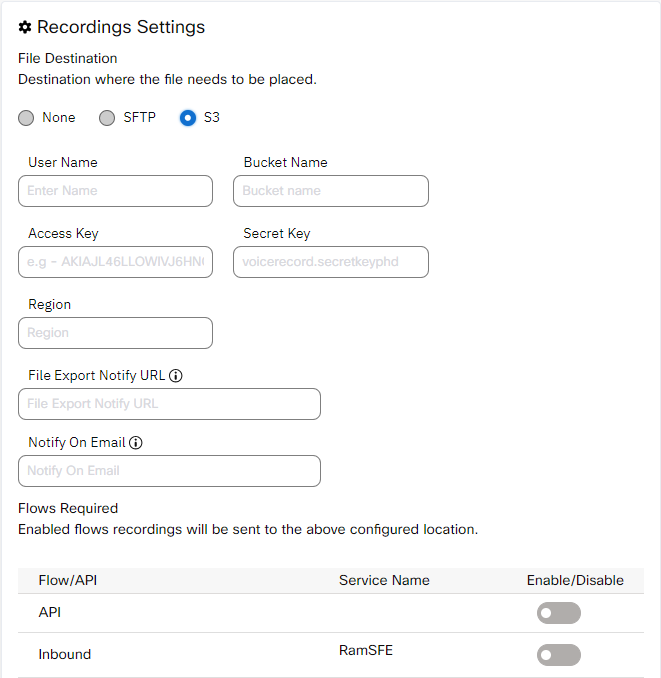
S3 Console Settings
- Enter a URL for File Export Notify URL, to which a notification is sent when a new log file is generated. If an invalid URL is passed in API request or via a variable, then such request will not be considered eligible for retries.
- Enter an email address for Notify on Email, to which a notification is sent when a new log file is generated.
- Click Save.
The selected voice recordings are backed up to the configured location on a daily basis.
Updated 3 months ago
