
Serve and engage your customers on the most popular social messaging channel available in the market today.
With more than 2 billion monthly users and counting, WhatsApp is arguably the most popular consumer messaging and communication app in the market today. This tutorial walks you through the process of configuring your WhatsApp Business Account on Webex Connect.
Register for an Official Account on WhatsApp
Embedded Sign-Up for WhatsApp Asset Creation
Please note that we now support and recommend WhatsApp Embedded Sign-Up for adding new WhatsApp assets on Webex Connect. Manual onboarding option that we supported previously is being phased out and may no longer be available in your tenant. If you need assistance in setting up a WABA, please reach out to the Support Team using the details mentioned in the ‘Contact Support’ section within your ”Webex Connect account.
You can use a phone number that is already registered in the Android, iPhone, or Business application versions of WhatsApp. However, in order to register this phone number with us, you need to follow the steps below to delete the WhatsApp account associated with that phone number mentioned here
Configure WhatsApp App Asset on Webex Connect
- To configure the WhatsApp app, sign in to the Webex Connect platform, go to Assets > Apps .

-
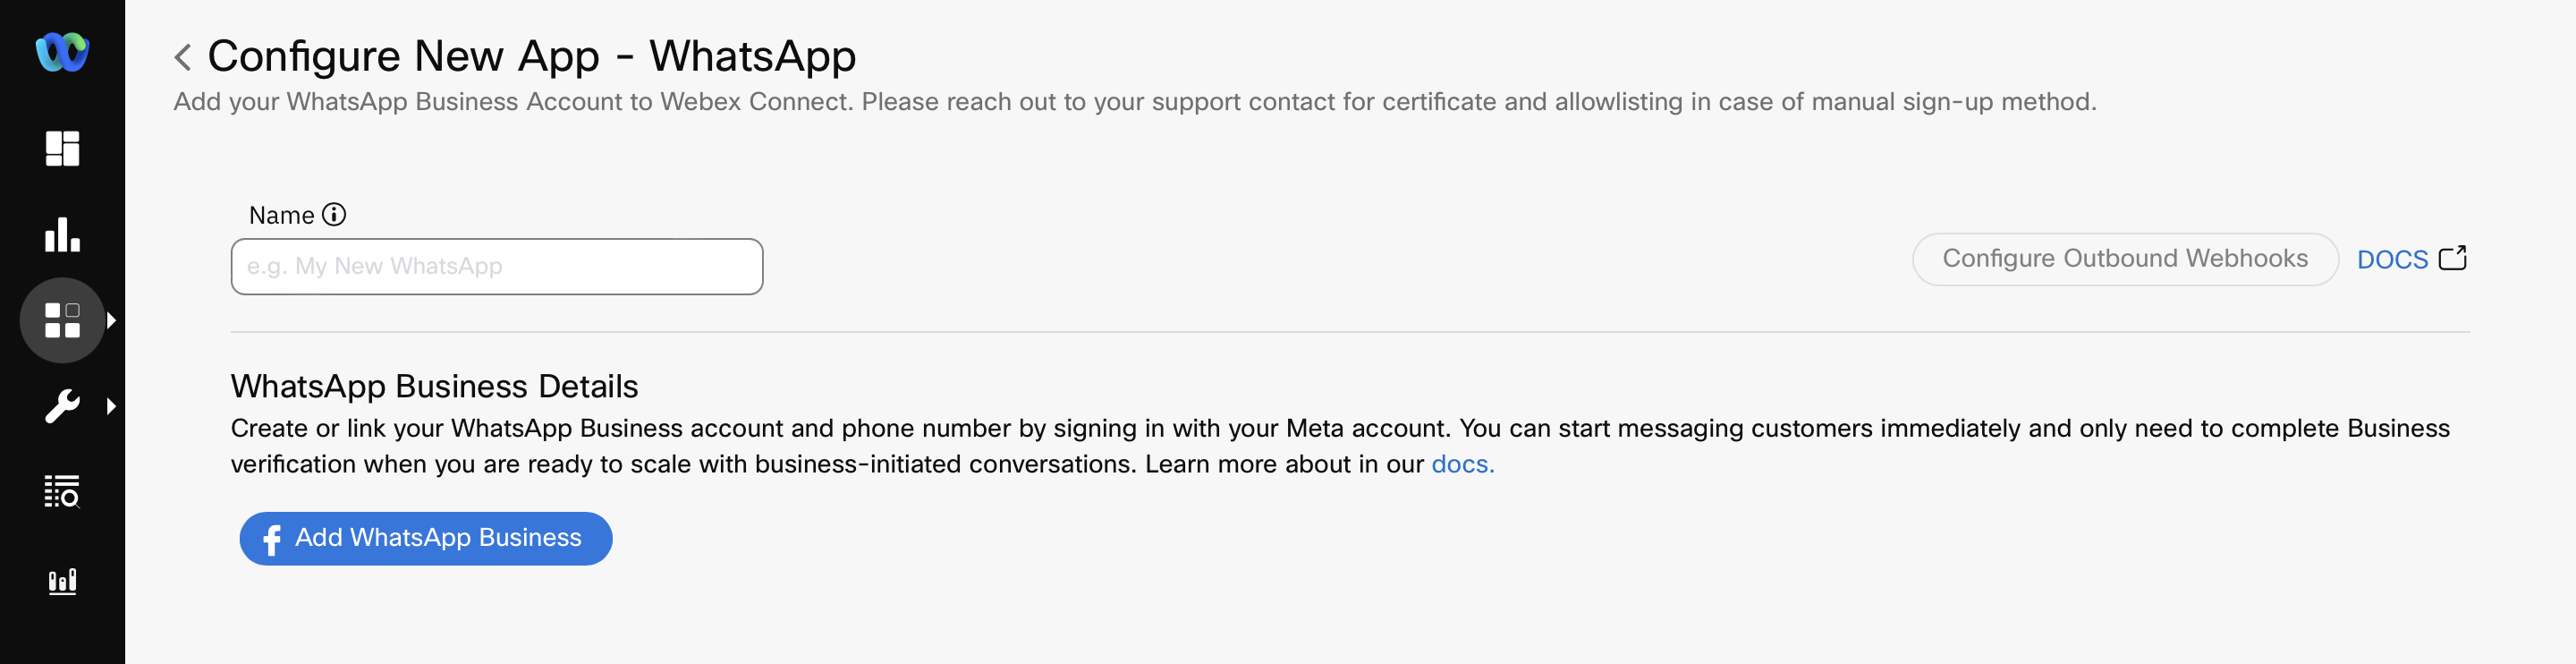
On the Apps page, click the Configure New App button and choose WhatsApp from the drop-down list of apps.

-
Enter the name of the WhatsApp account in the Name field on the Configure New App page.
-
Select the Sign-up Method: Sign-up with Facebook (Embedded Sign-up Onboarding) or Manual.

If you selected Sign-up with Facebook in the step 4 above, follow the below embedded signup process.
Disabled Manual Onboarding
Manual onboarding may be disabled for your tenant, please proceed with embedded signup to onboard your WhatsApp business.
The following is the screen for tenants with disabled manual onboarding.
Embedded Sign-up
Using the embedded signup feature, the Business can onboard to the WhatsApp Business Platform directly from the Webex Connect WhatsApp App Creation page.
Embedded Signup reduces onboarding time from days to minutes by simplifying the process and having all the steps (i.e., connecting WhatsApp Business Manager accounts, creating WhatsApp Business Accounts (WABAs), verifying phone numbers) in a single flow.
Prerequisites
The following are the prerequisites for WhatsApp onboarding using embedded signup method:
- A valid Meta user account.
- A valid phone number.
- You should not have any personal WhatsApp account or WhatsApp Business App associated with this number. To migrate a number, you must first delete that WhatsApp account. For more information, refer to this link.
- You also must have this number handy, because you’ll receive an SMS or a voice call during the verification process.
- The number must not be a short code or a toll-free number incapable of receiving an OTP message.
- Registering 1-800 and Toll Free Numbers: Phone numbers behind an IVR system can be registered, but must be able to accept calls from international numbers and be able to redirect the OTP message on SMS or Voice to a real person.
To register a phone number that is behind an IVR system you will need to create an allowlist of the WhatsApp number you will receive a call from on your phone number behind an IVR system, please reach out to your support contact for more information.
- Registering 1-800 and Toll Free Numbers: Phone numbers behind an IVR system can be registered, but must be able to accept calls from international numbers and be able to redirect the OTP message on SMS or Voice to a real person.
- In addition, you should be ready with the following details:
- Business Phone Number
- Company Name
- Representative’s Email Address
- Address
- City
- State / Province / Region Country
- Website
- Business number Display Name
- Business Category
- Business Description
Embedded Sign-up Onboarding
- Select Sign-in with Facebook on Select Sign-up Method within the WhatsApp apps page to start with the onboarding process. If Manual Onboarding is disabled you can directly click on Add WhatsApp Business option as mentioned in step 2.
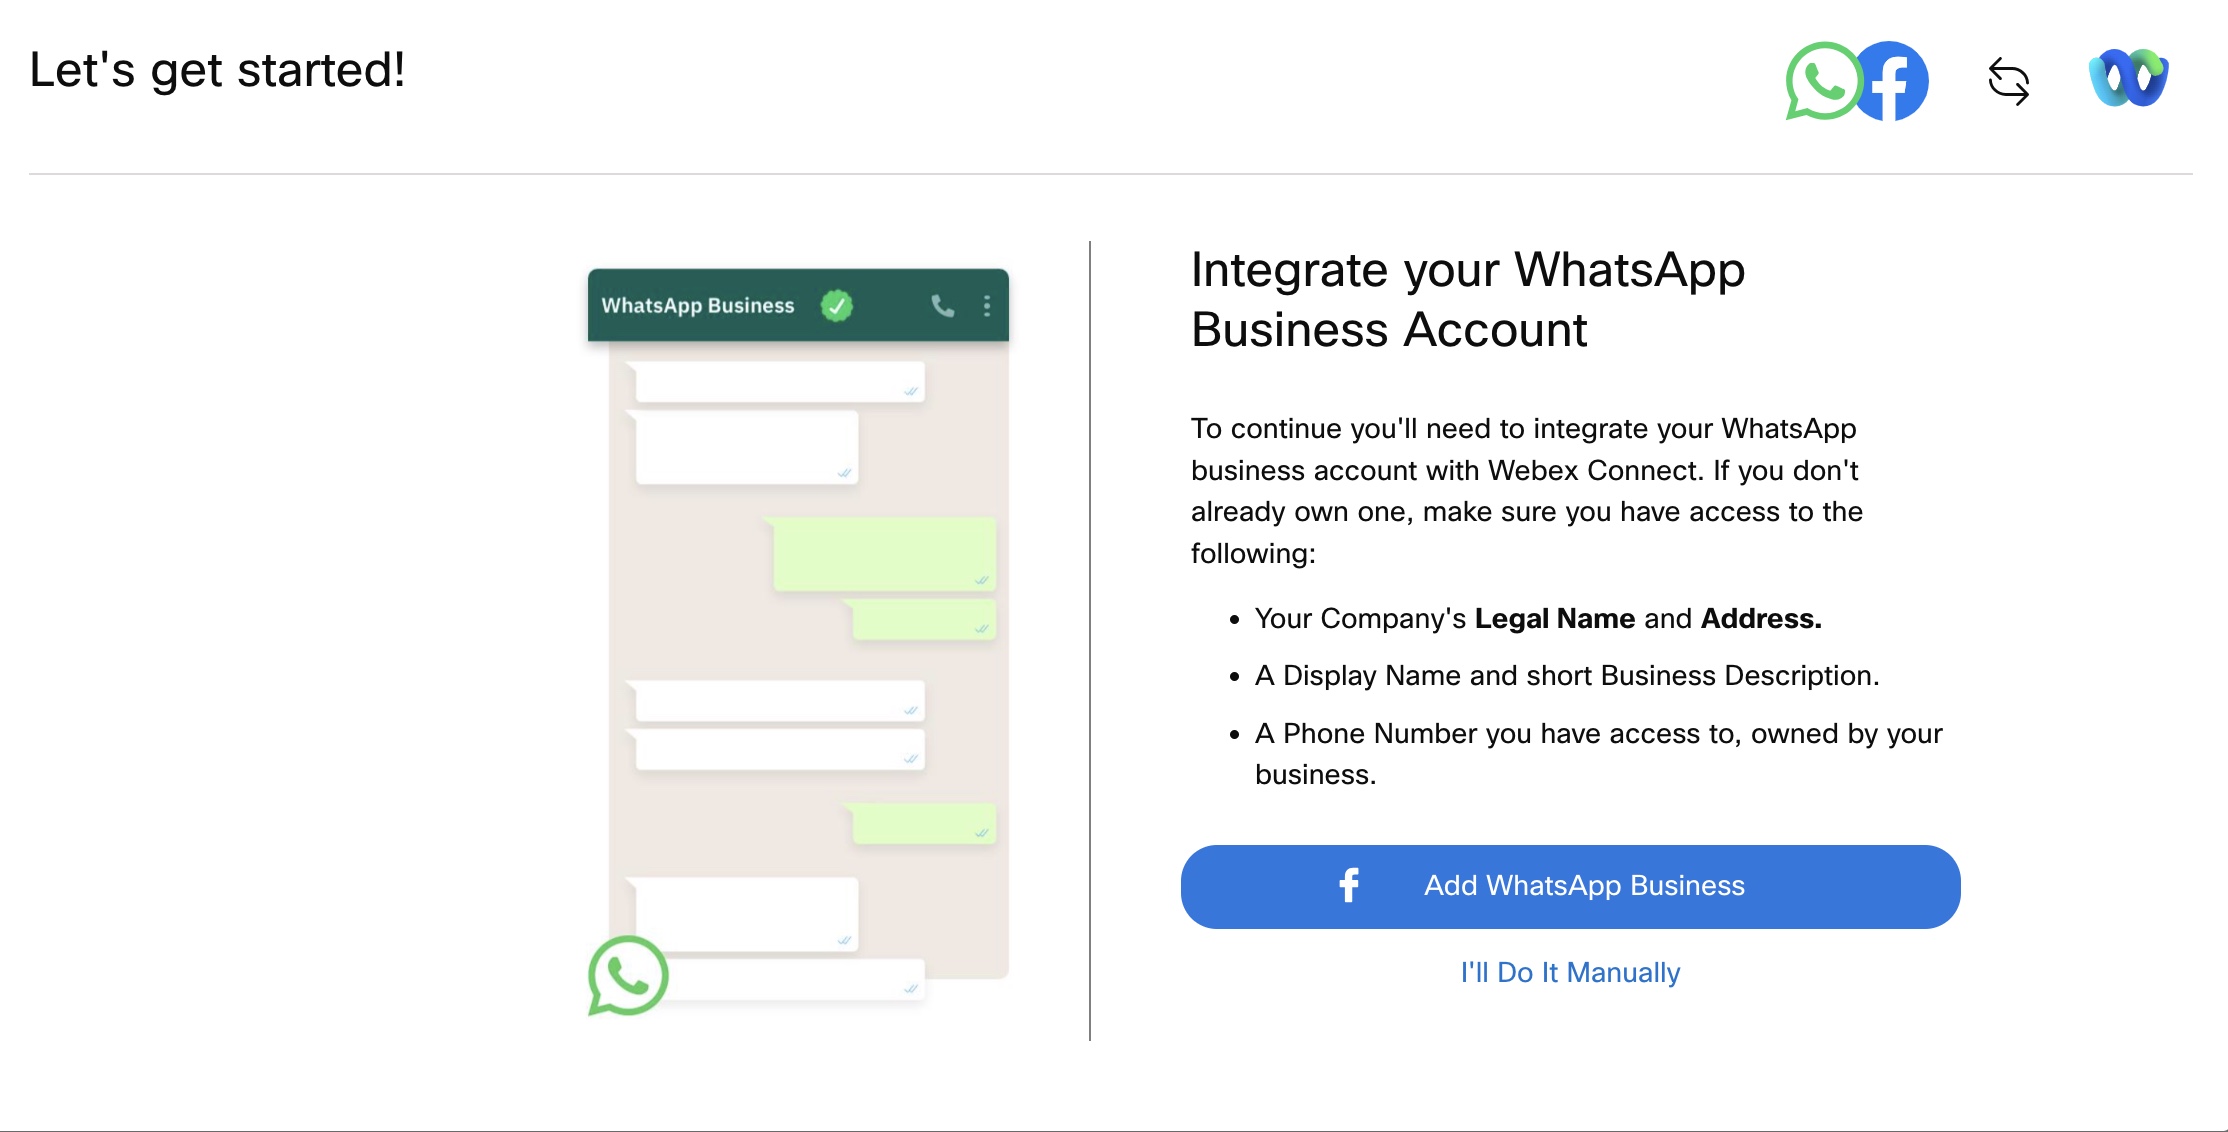
- Click Add WhatsApp Business. You can use the existing account or create a new account.
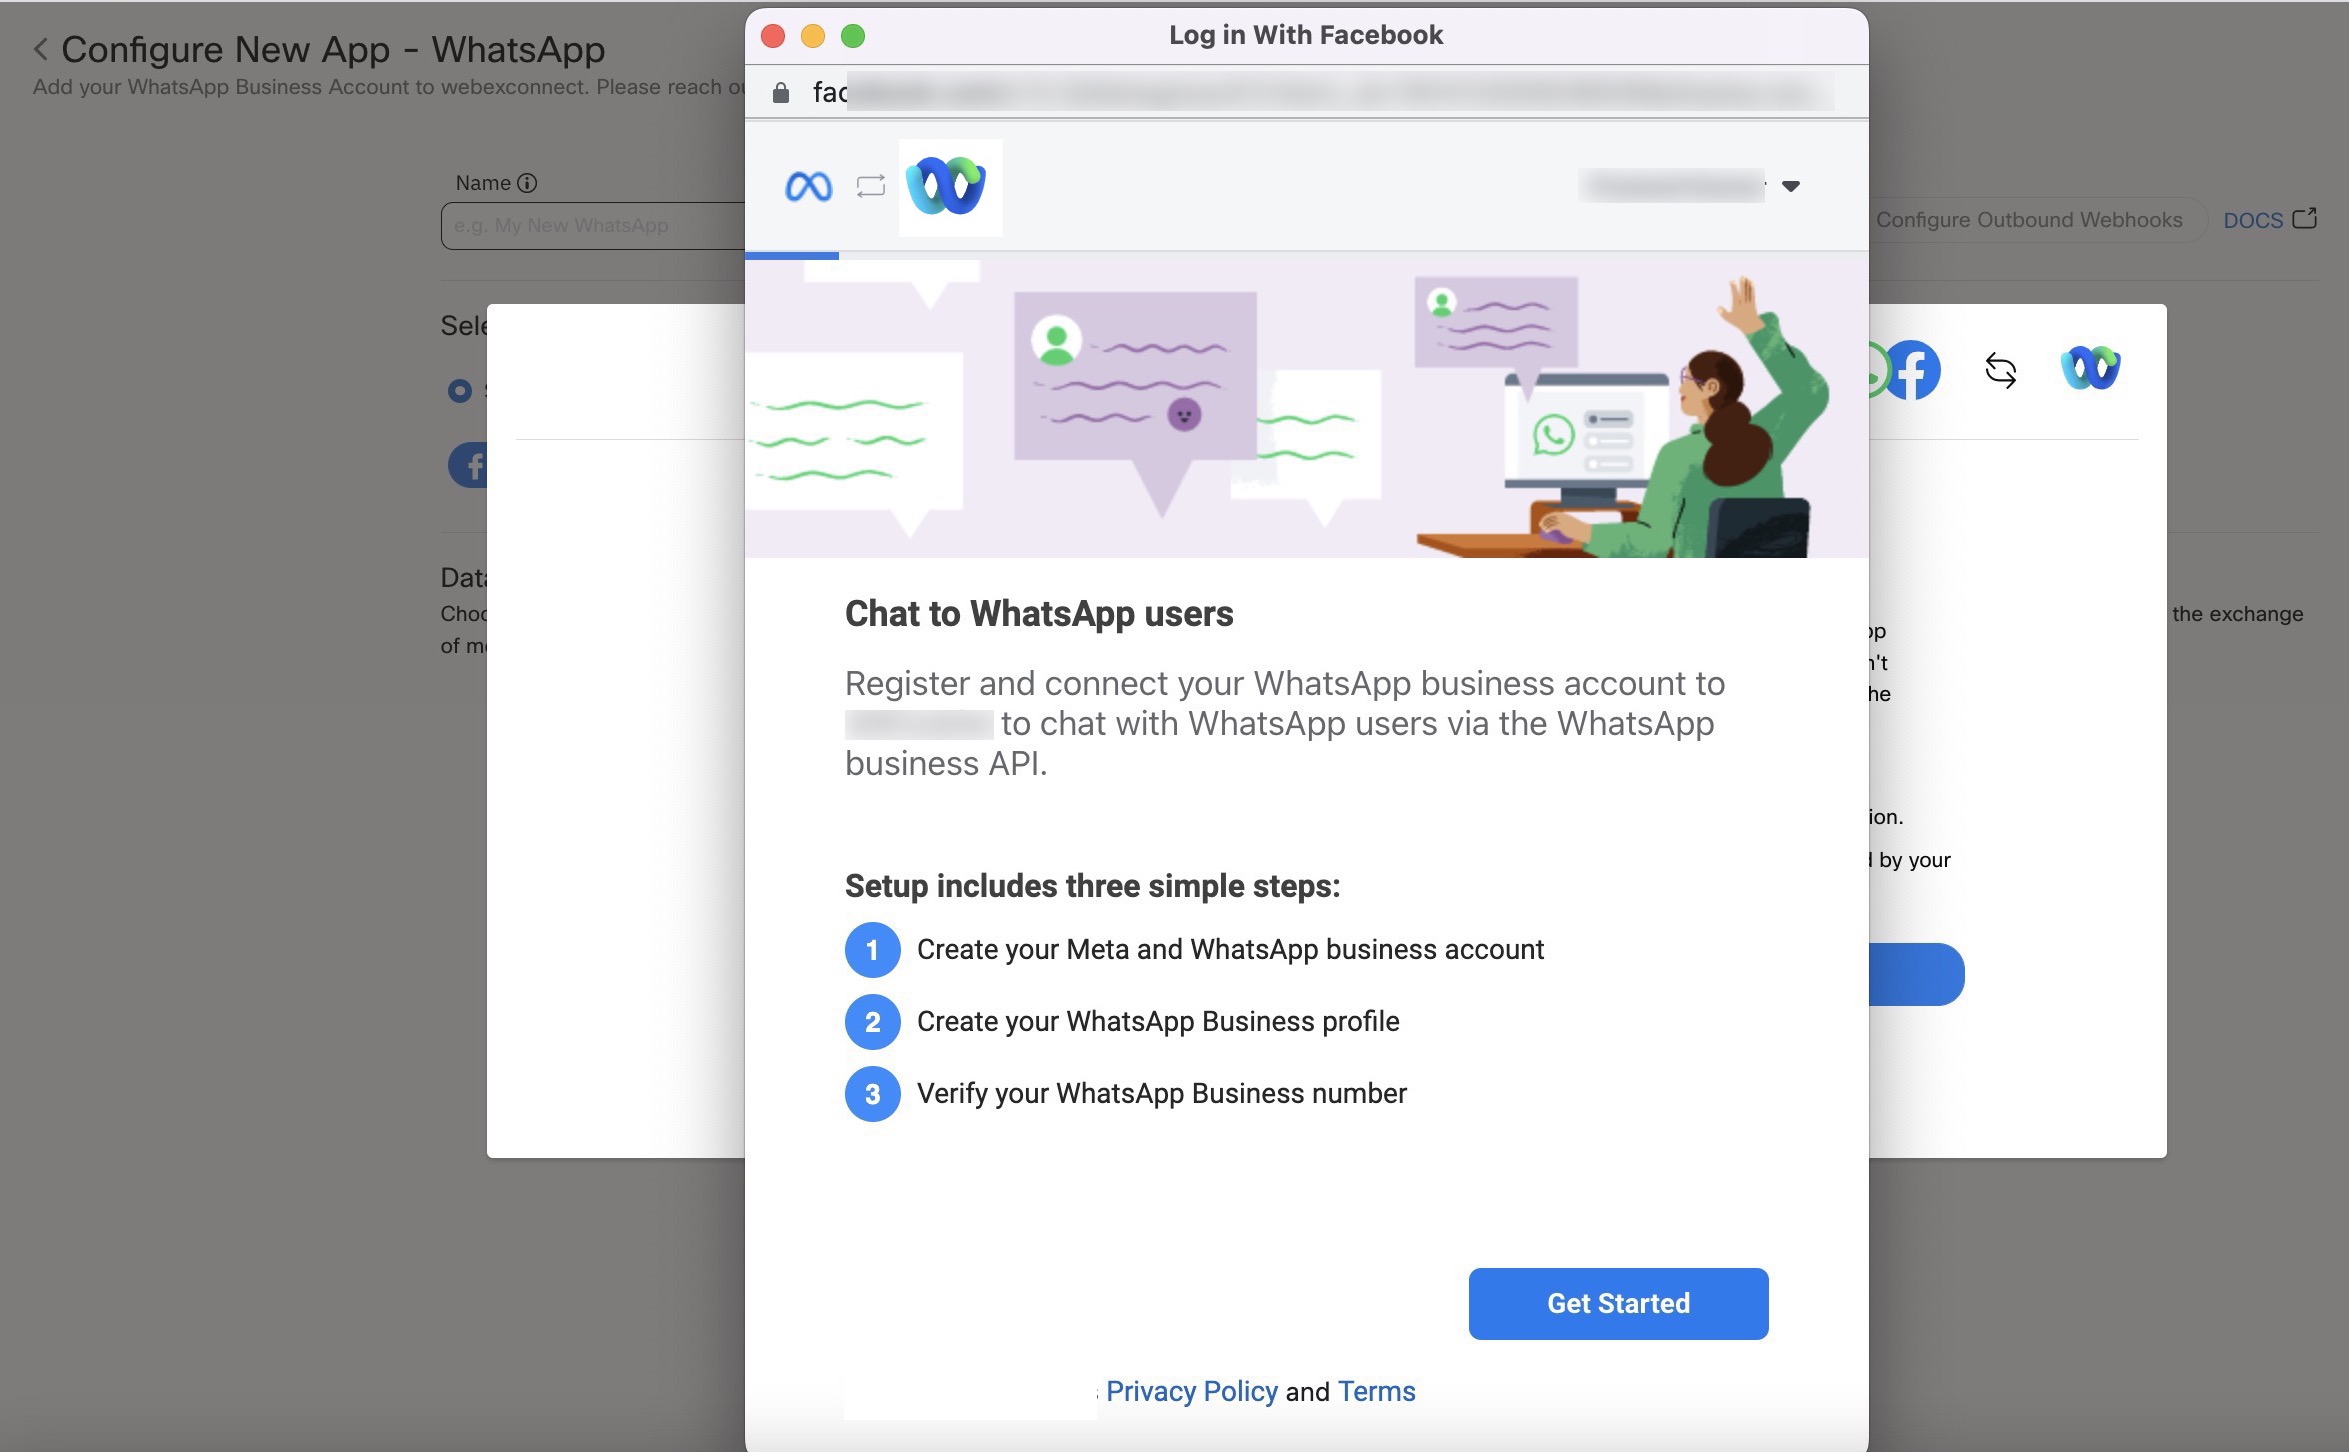
- Click Get Started.
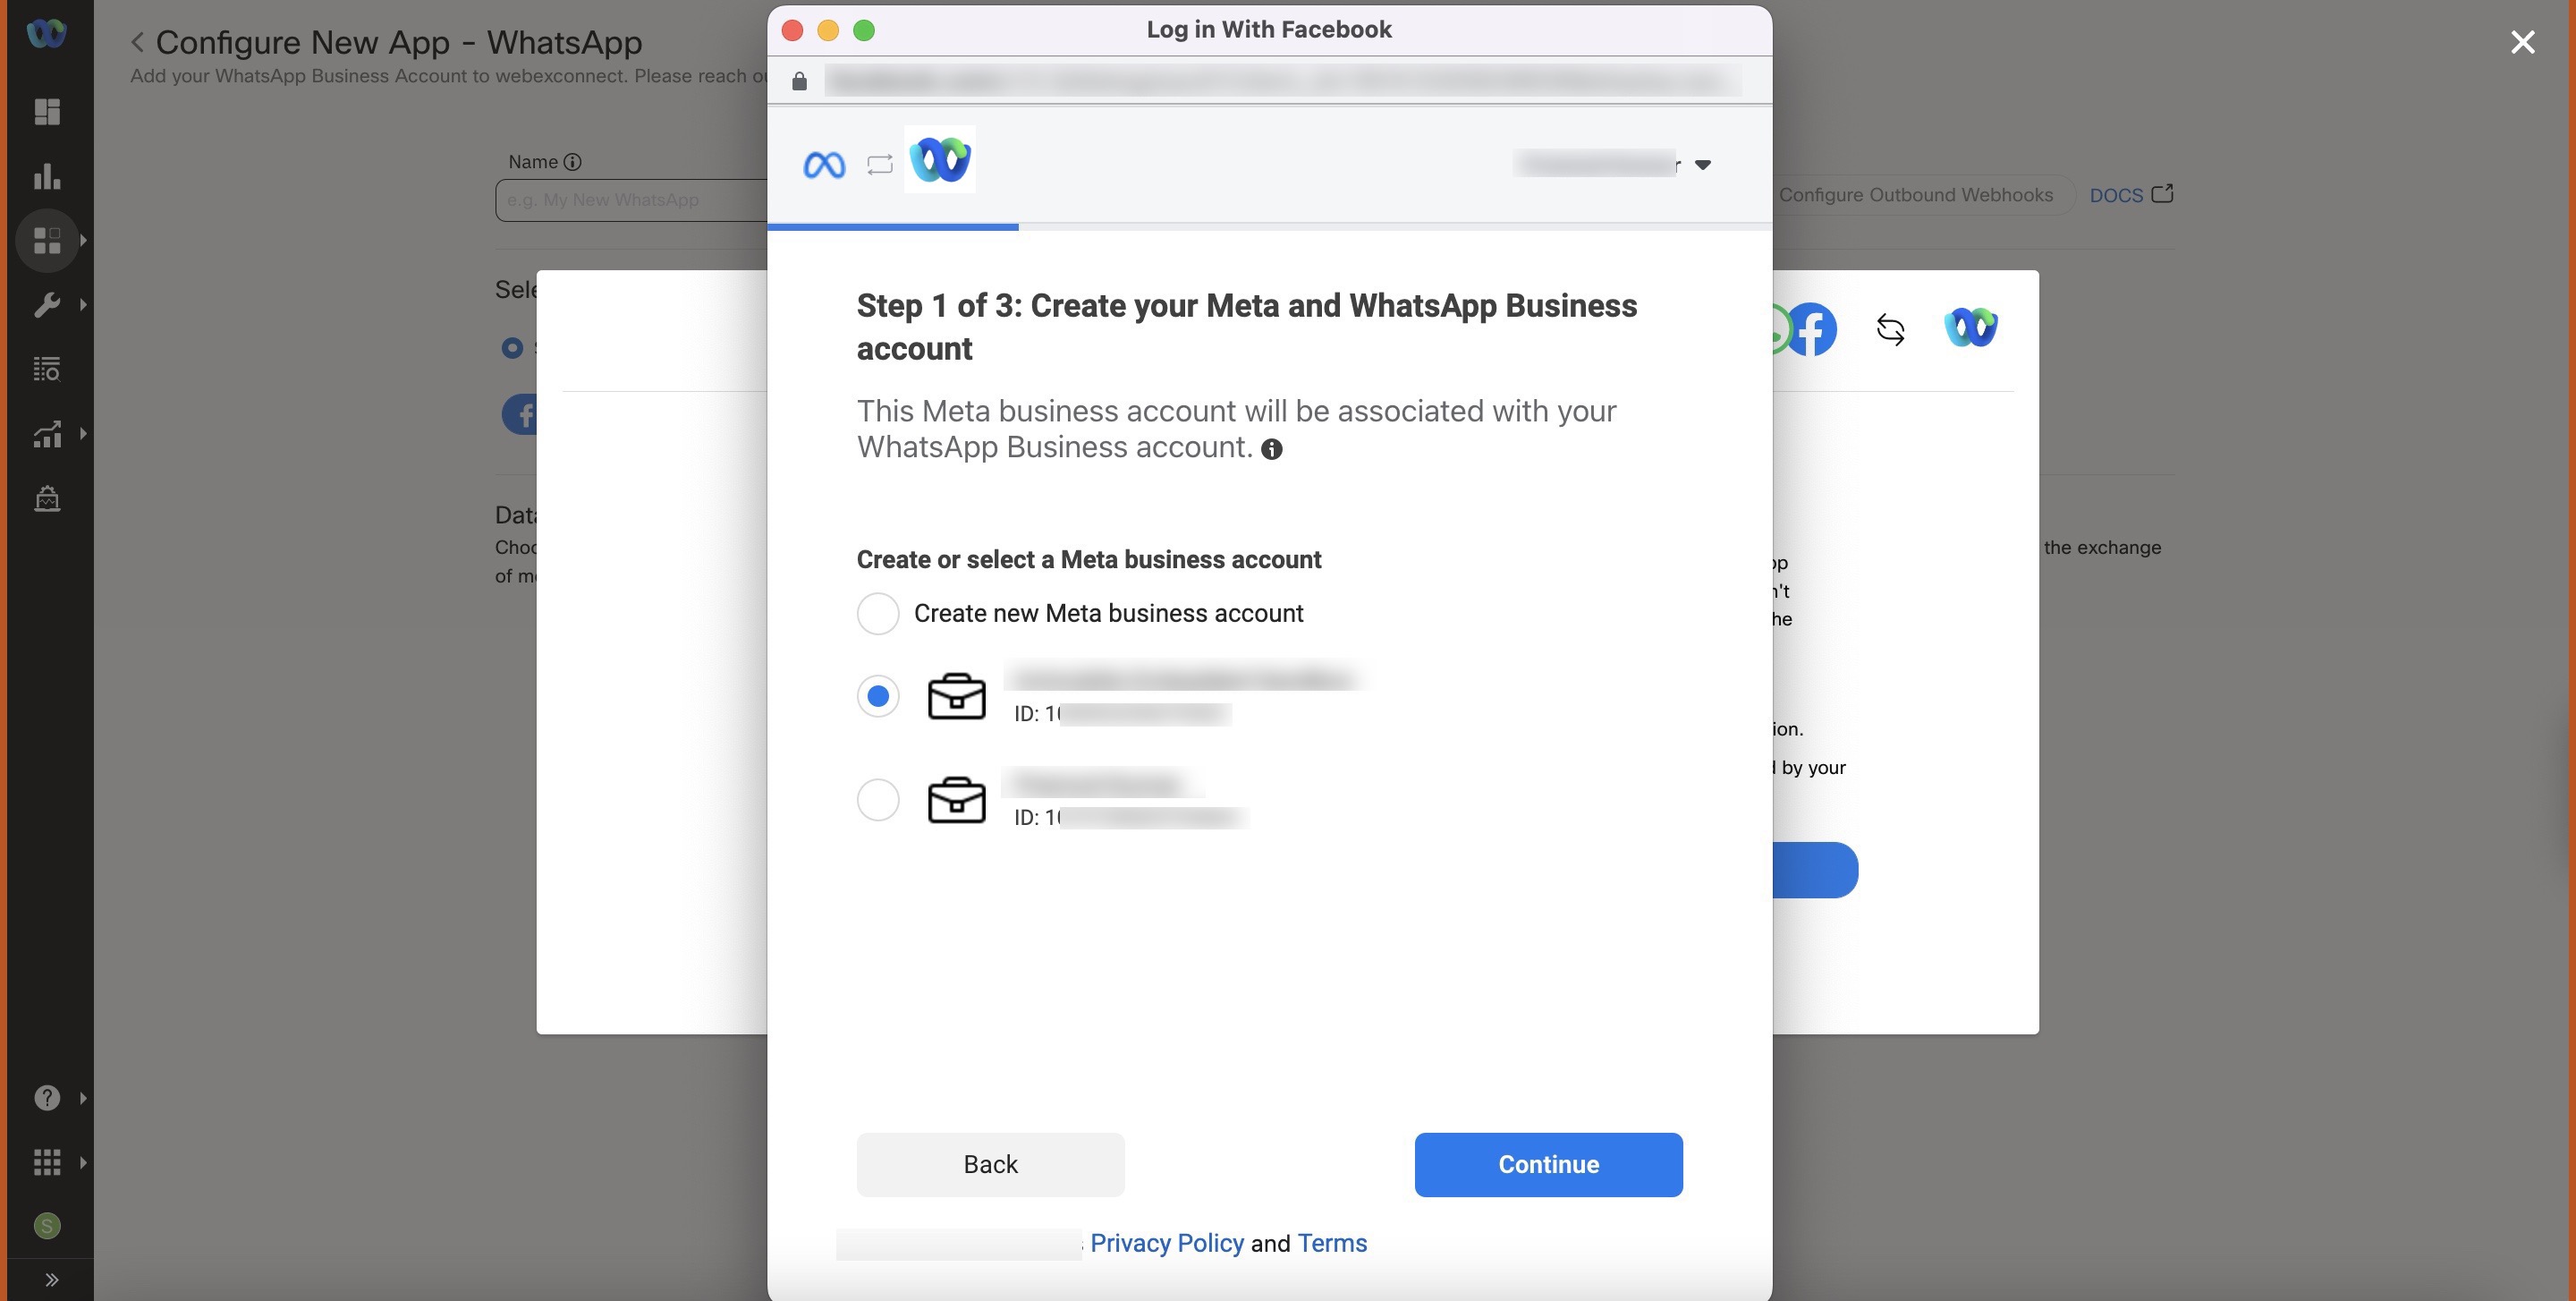
- Click Continue.
- Select the existing Meta Business Account or Create a new Meta business account.

- Click Continue.
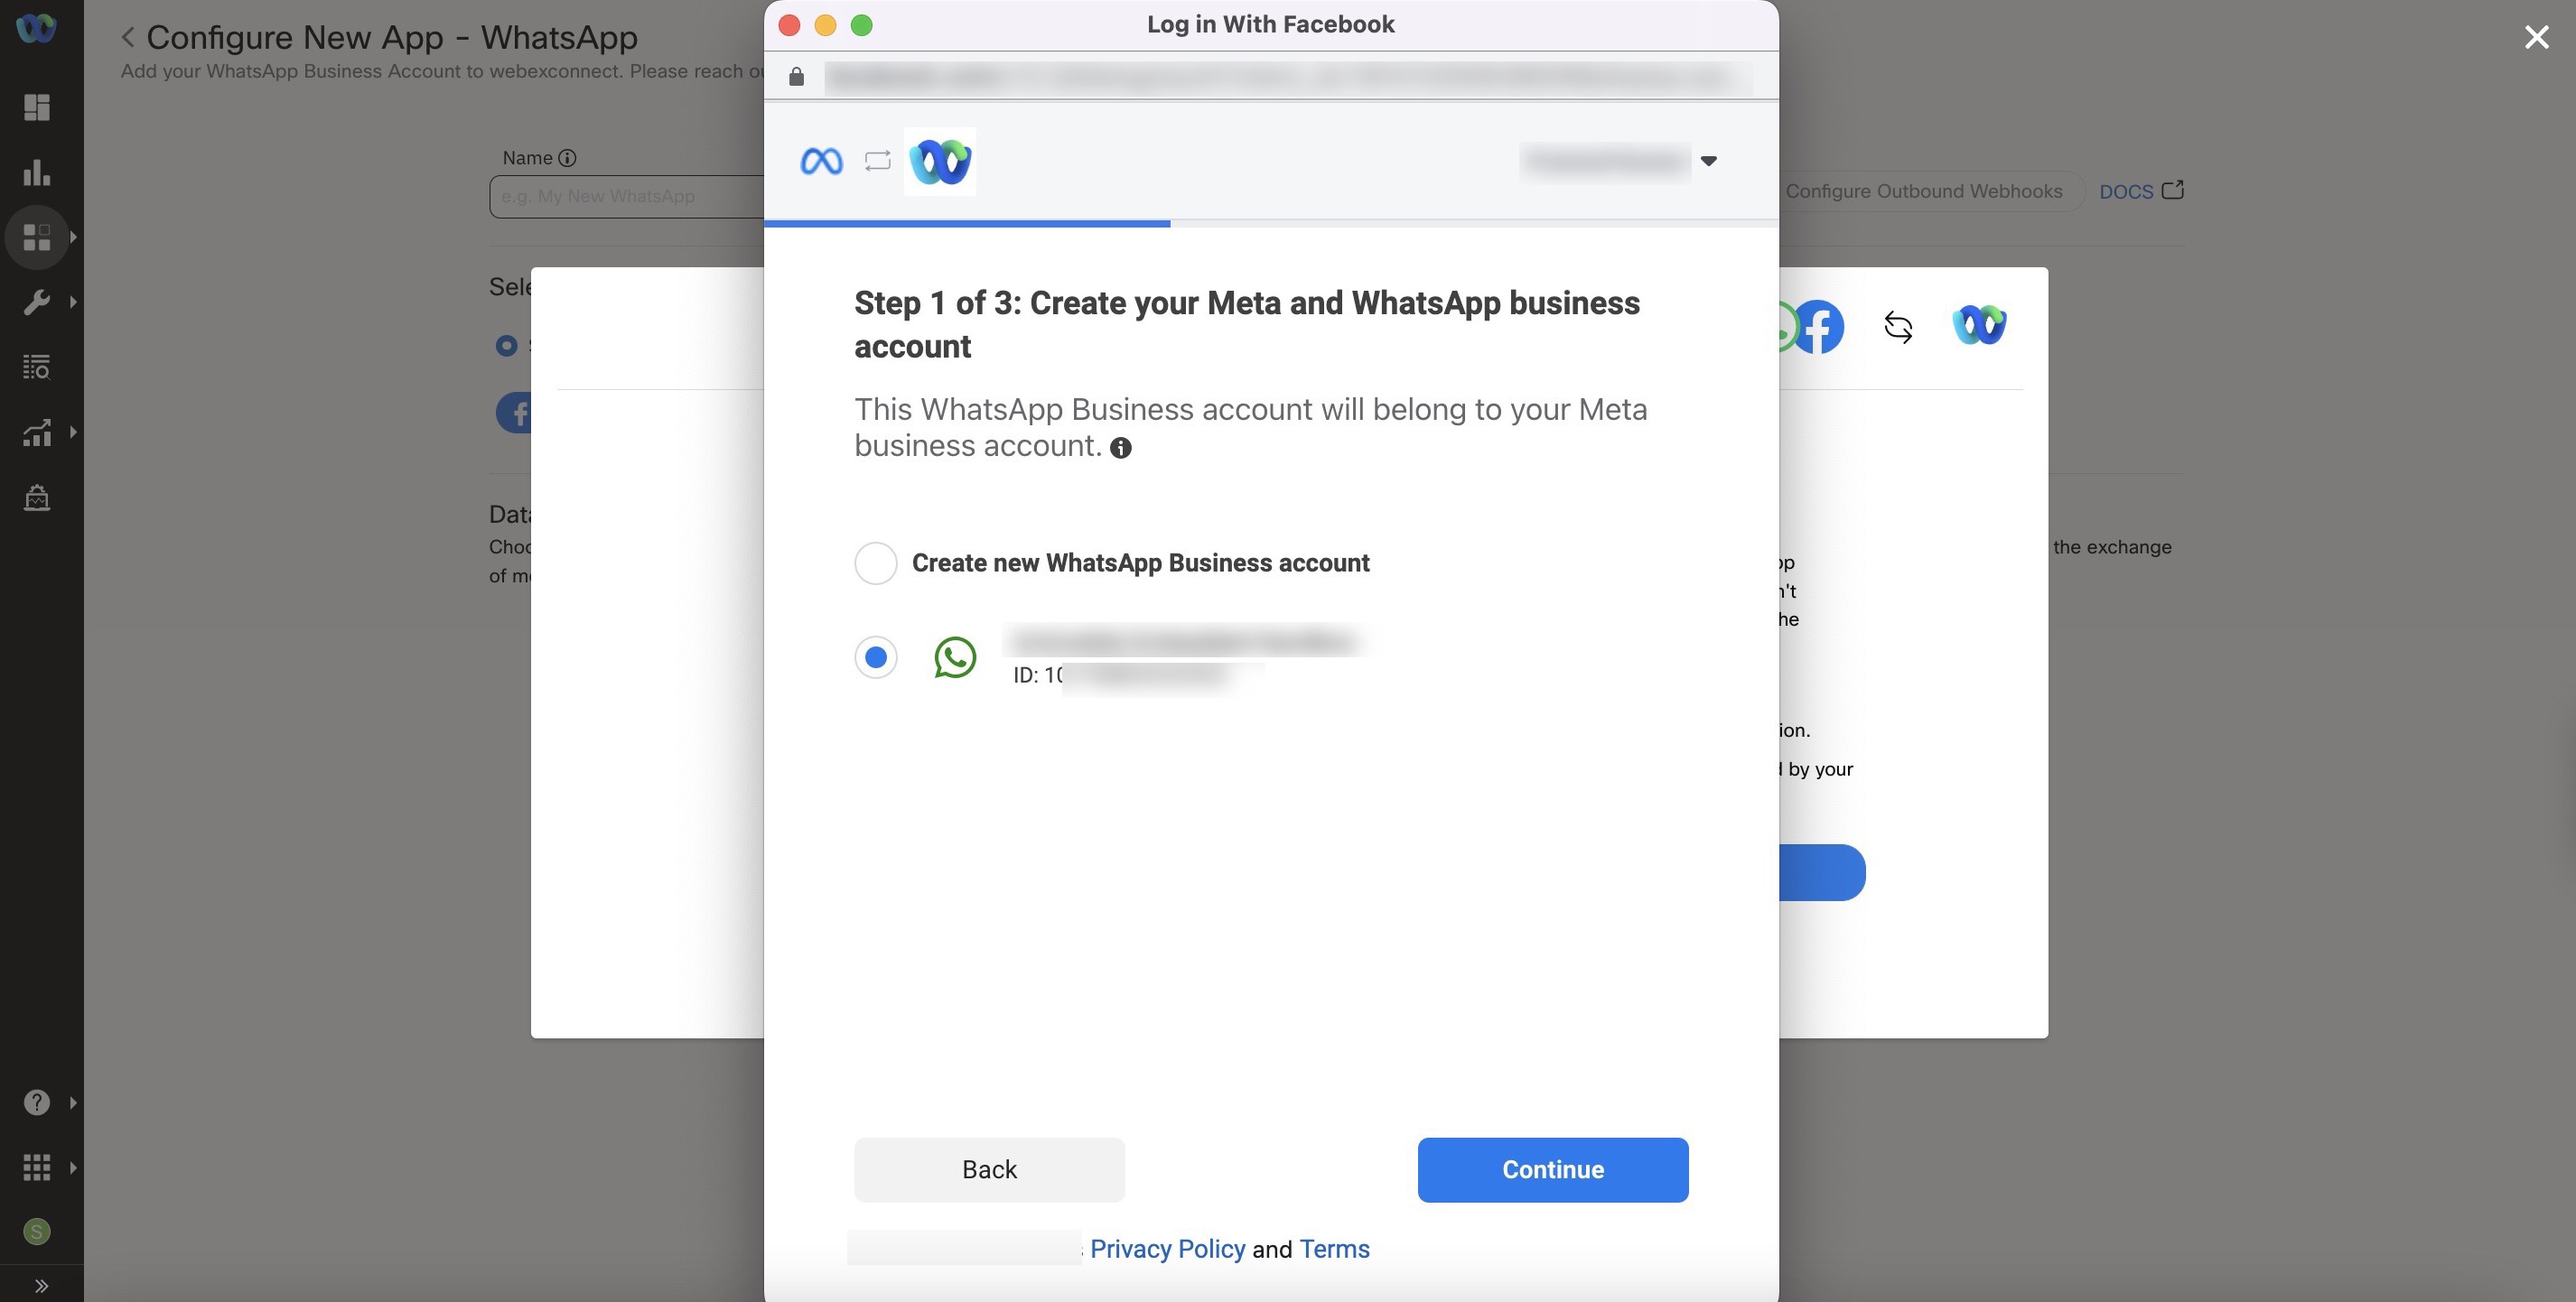
- Select the existing WhatsApp Business account (WABA) or Create new WhatsApp Business account.
Click Continue.
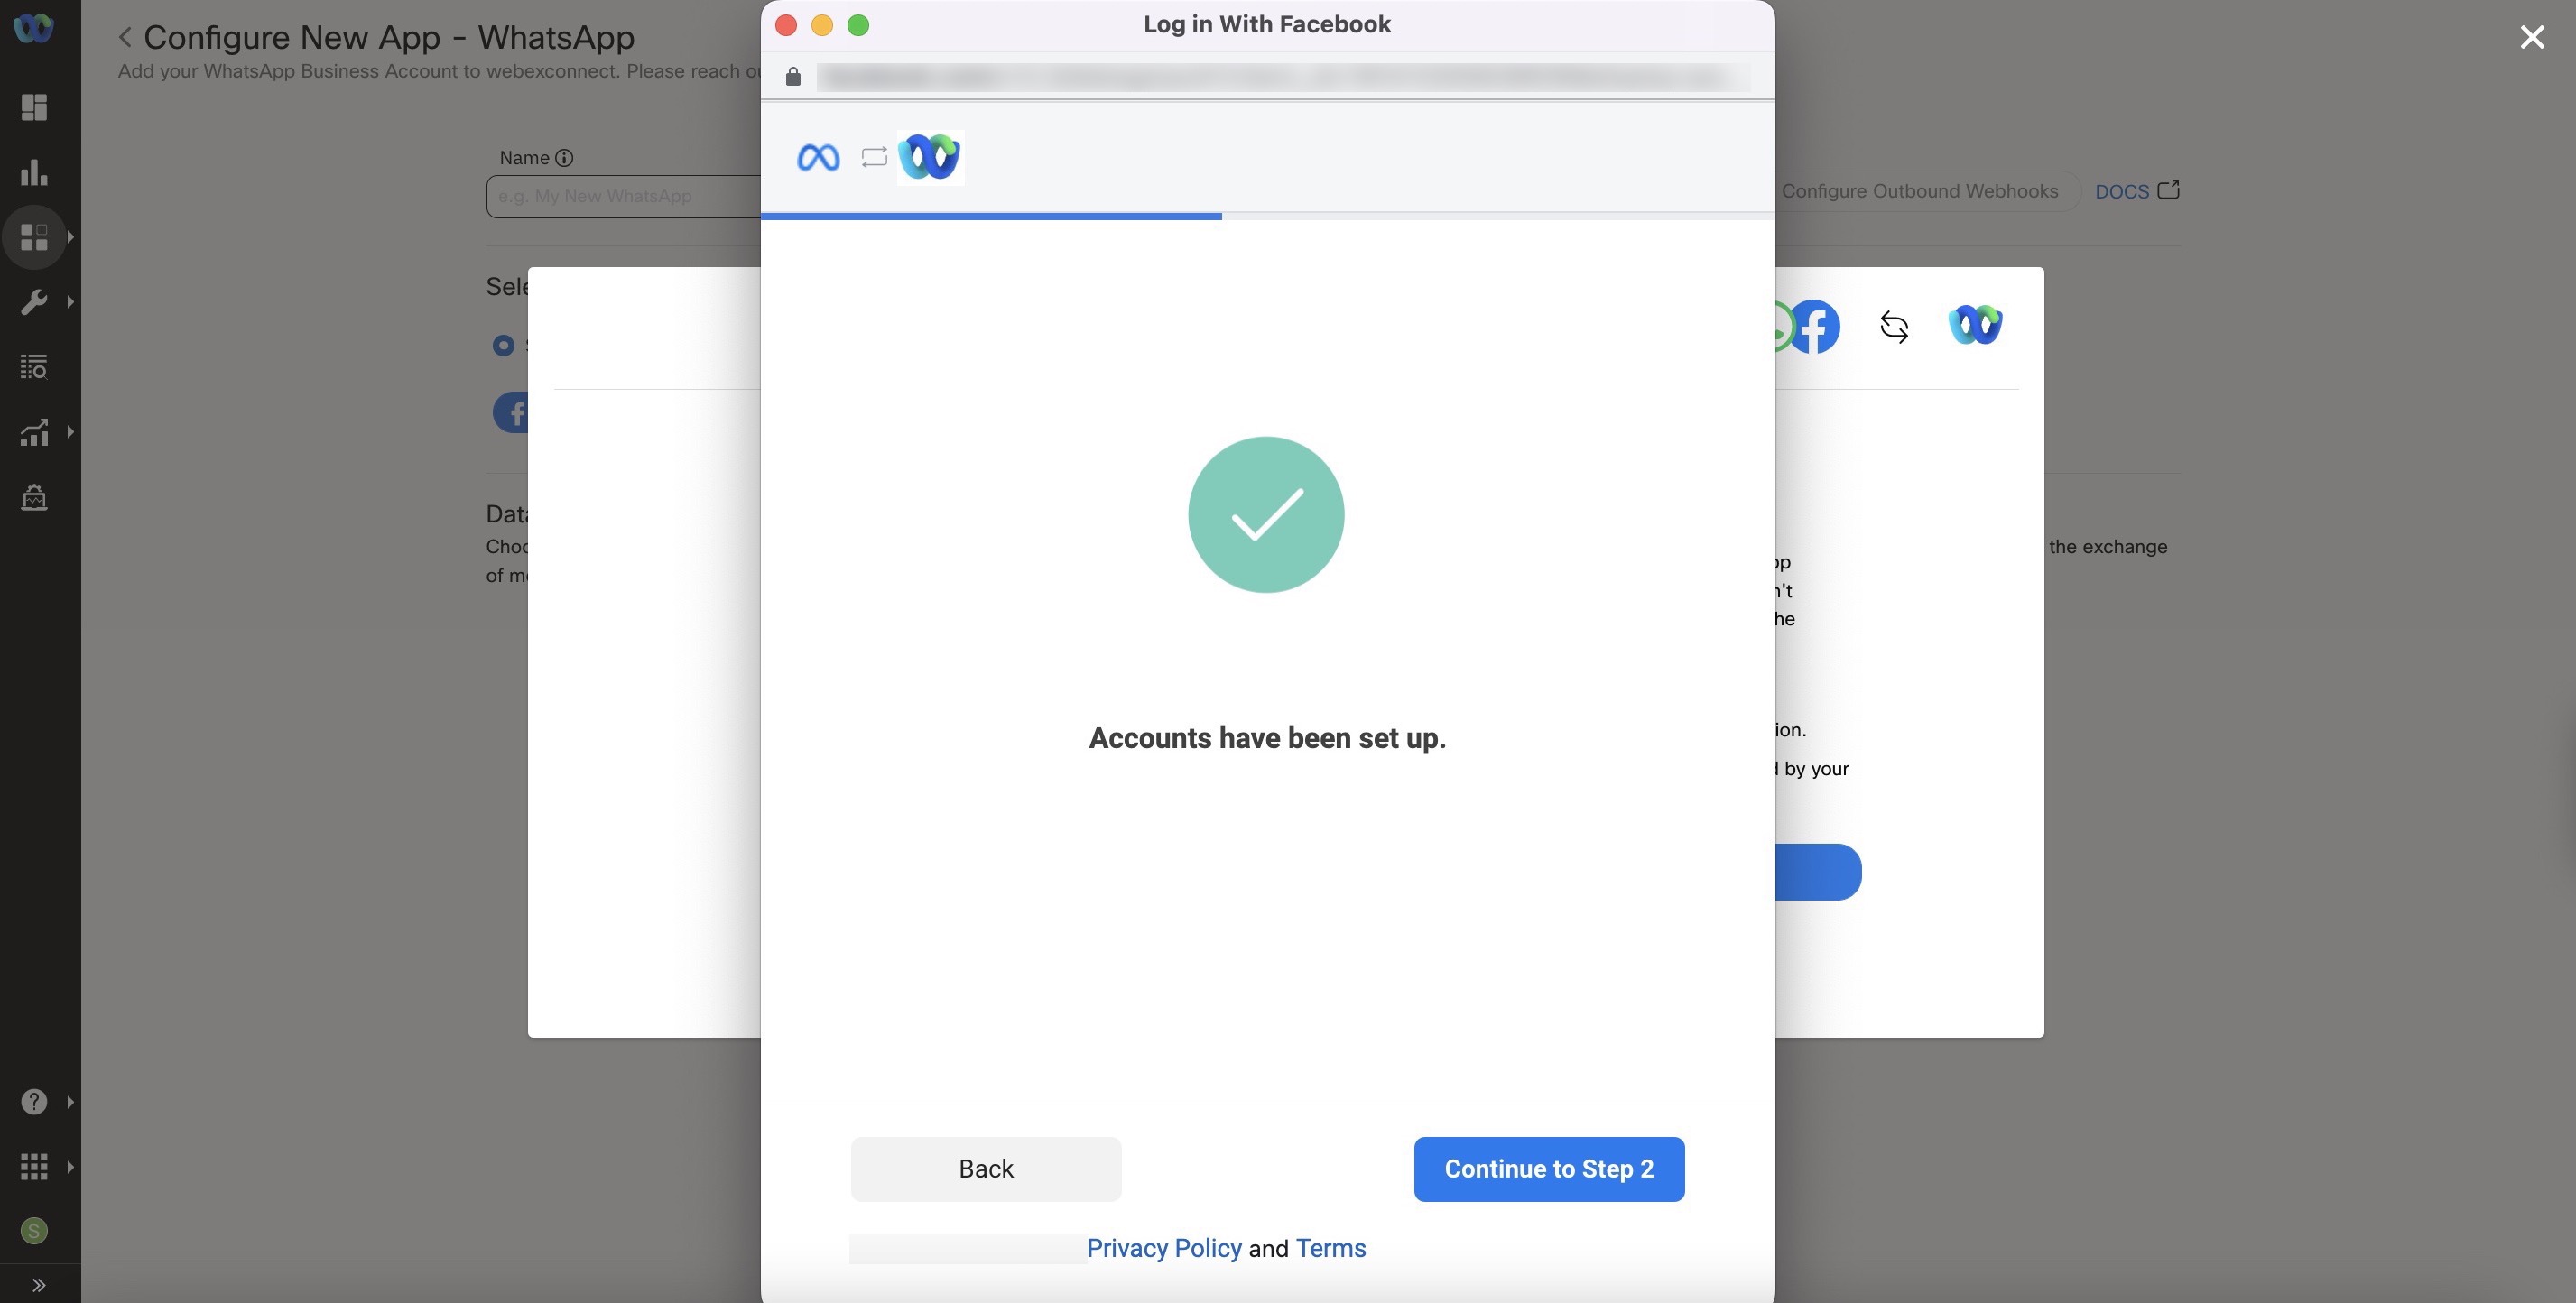
- Click Continue to Step2 to proceed to create or select the WhatsApp Business profile i.e., your WhatsApp Business number specifications.
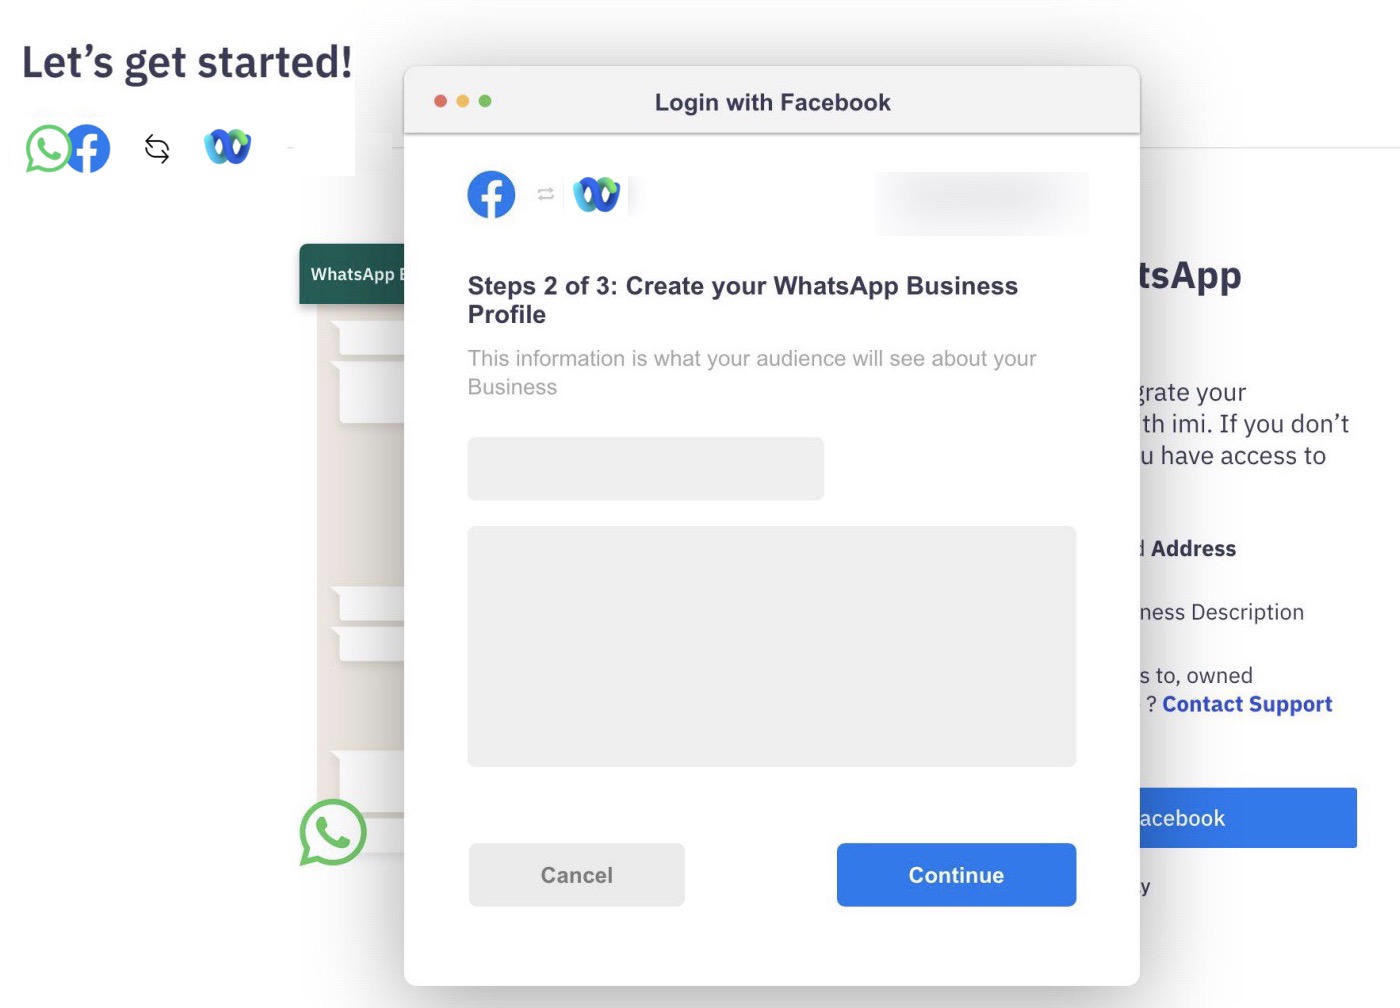
- Select the existing WhatsApp Business Profile or create a profile.
- Click *.
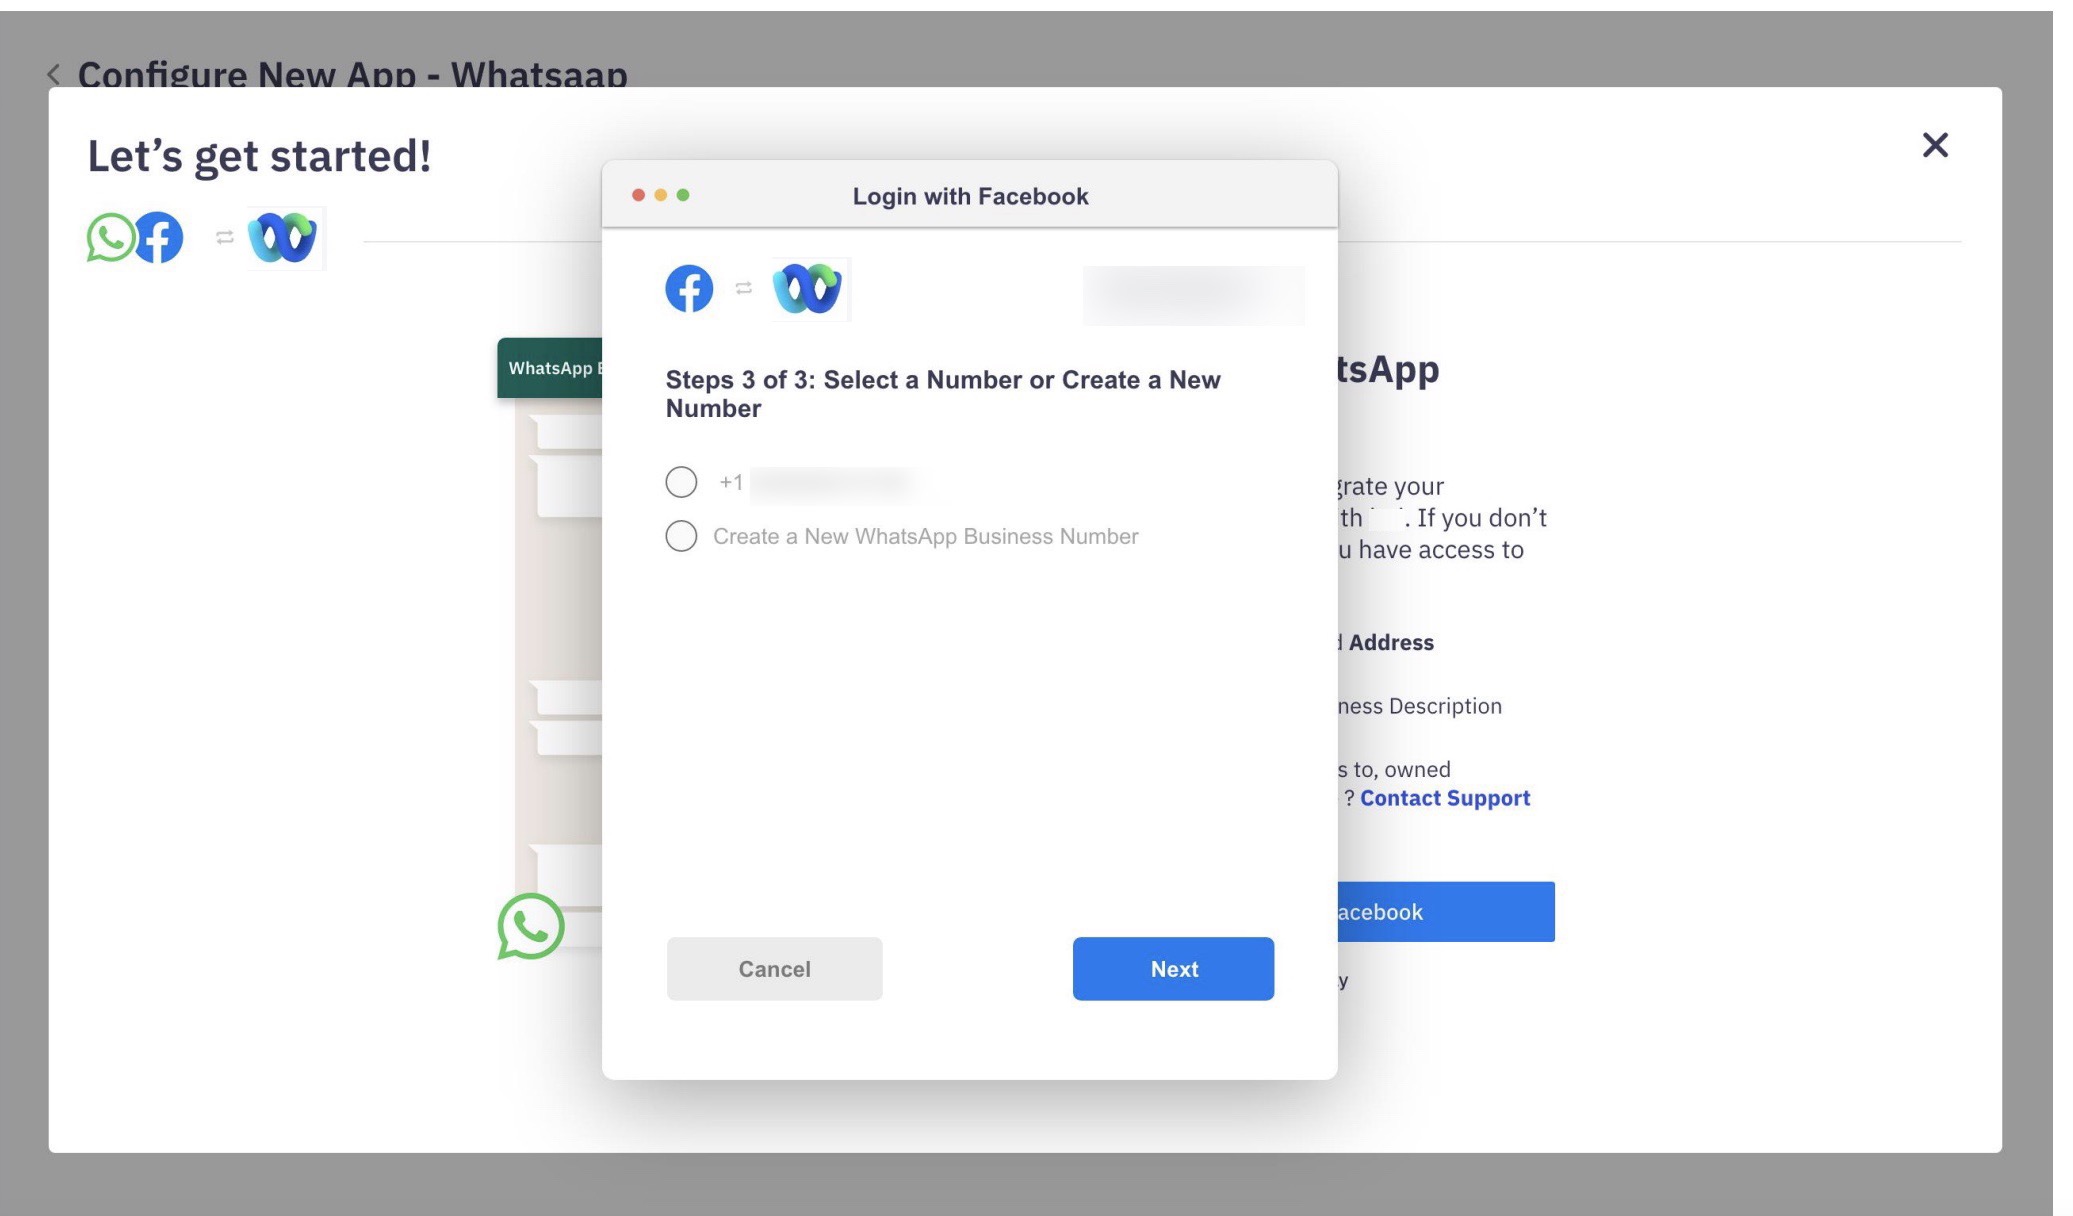
- Select the existing WhatsApp number or create a number to integrate to your WhatsApp Business Account and click Next. Please refer to the link to know more about phone number display name.
- When prompted trigger the OTP on SMS or Voice and enter the OTP to confirm the number.
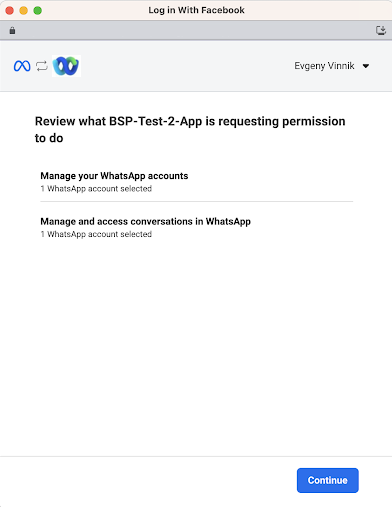
- Permission Acknowledgement: At the end of the flow, review the list of permissions requested by Webex Connect. The permissions cannot be edited. Tap on Continue to acknowledge the permissions and complete Embedded Signup flow.
- Once the Facebook Login flow is complete you should see Steps to verify your business screen.
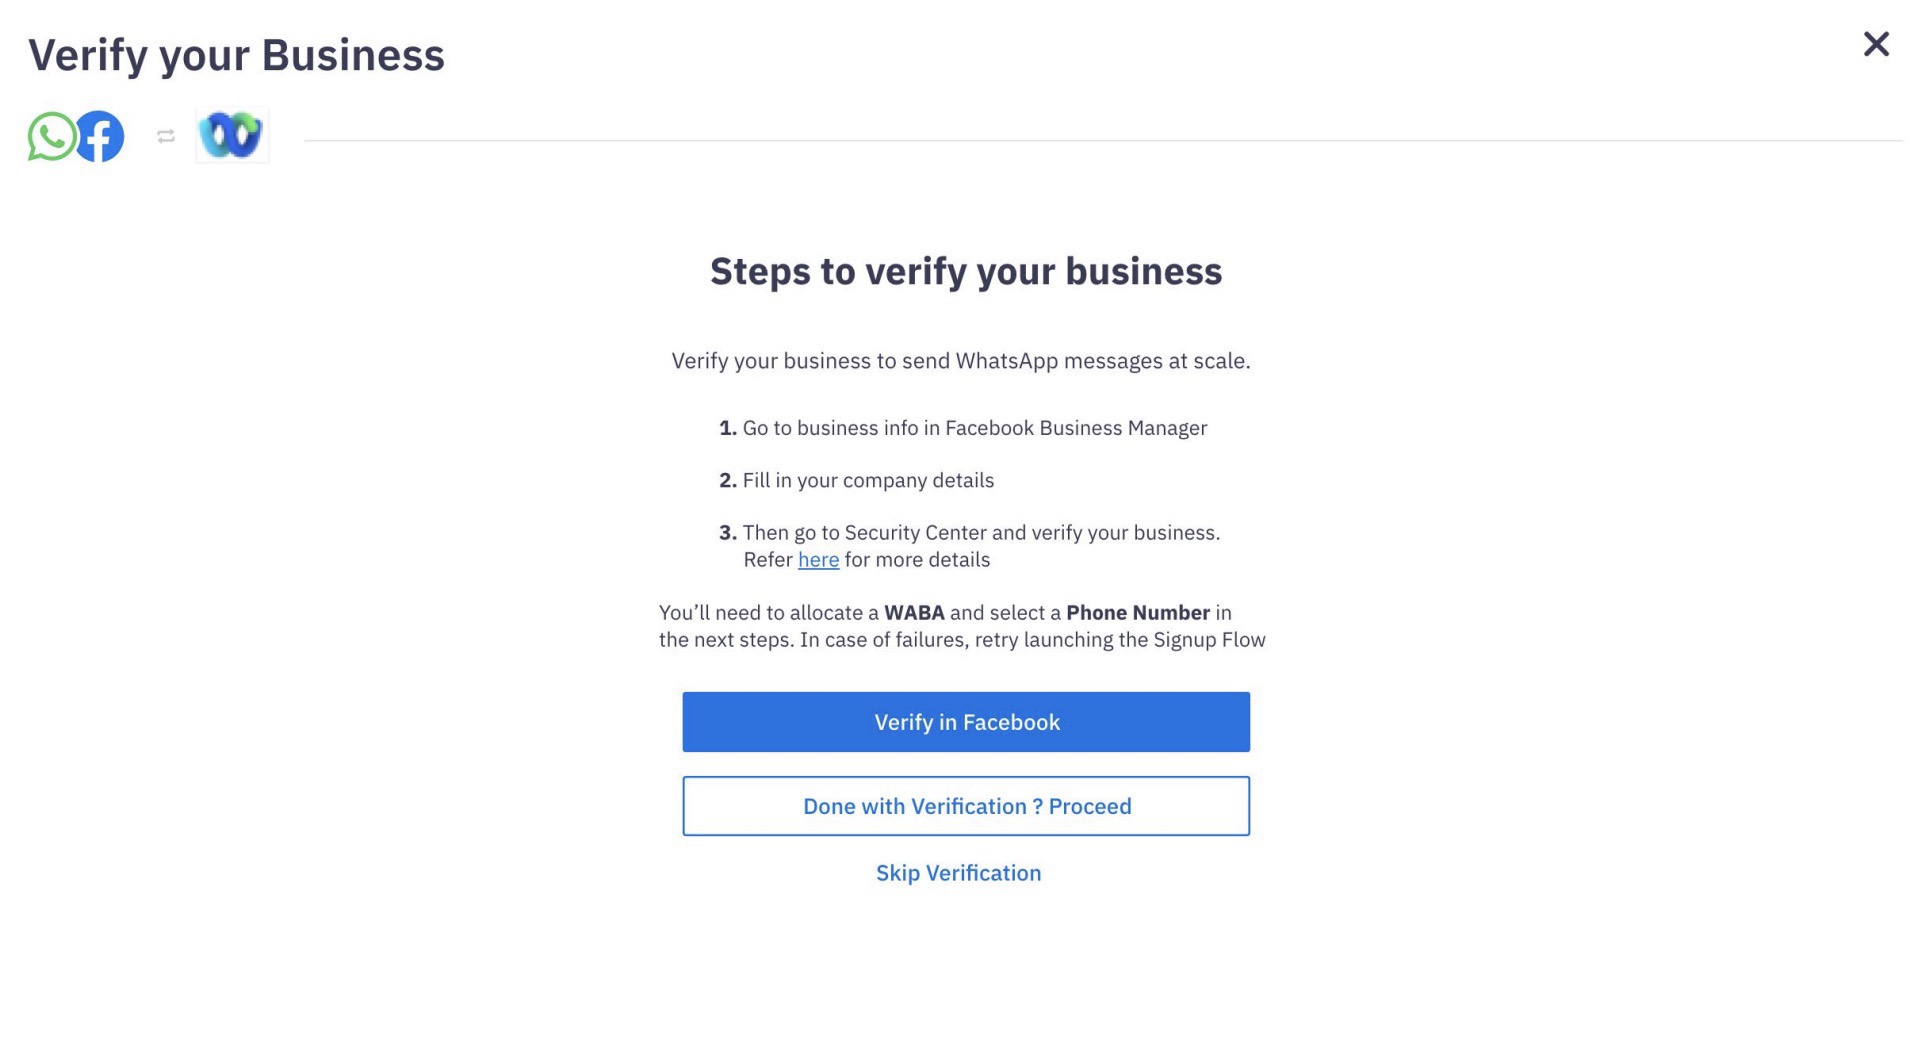
- Click one of the following:
- Verify in Facebook: a new tab opens with the verification screen. Complete the verification. To know more about WhatsApp Business verification, refer to the link.
- Done with Verification? Proceed: takes you to Step 20.
- Skip Verification: displays the following screen. Click Proceed.
Note
If you skip the verification, you can only add upto 2 phone numbers and your phone numbers will be limited to 250 business-initiated conversations in a 24-hour moving period and unlimited customer-initiated conversations. In-order to increase your messaging limit please verify your business.
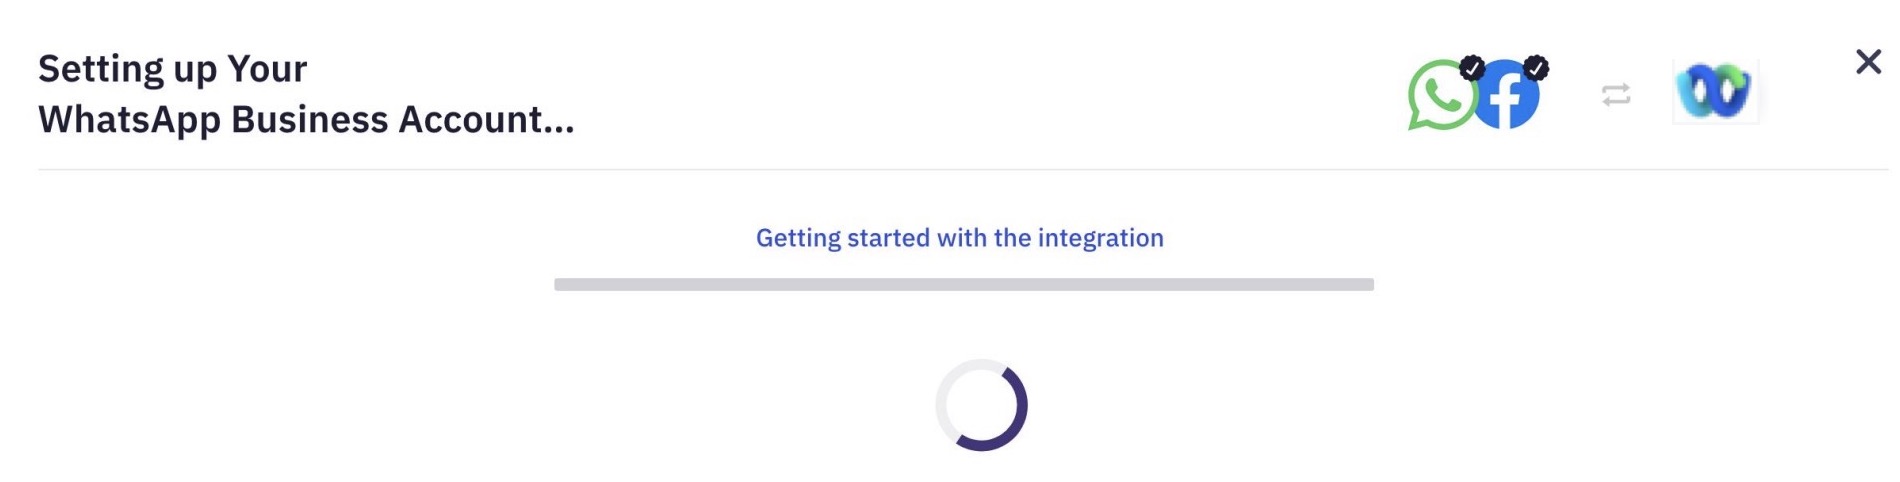
- The Setup process for your WhatsApp Business Account starts.
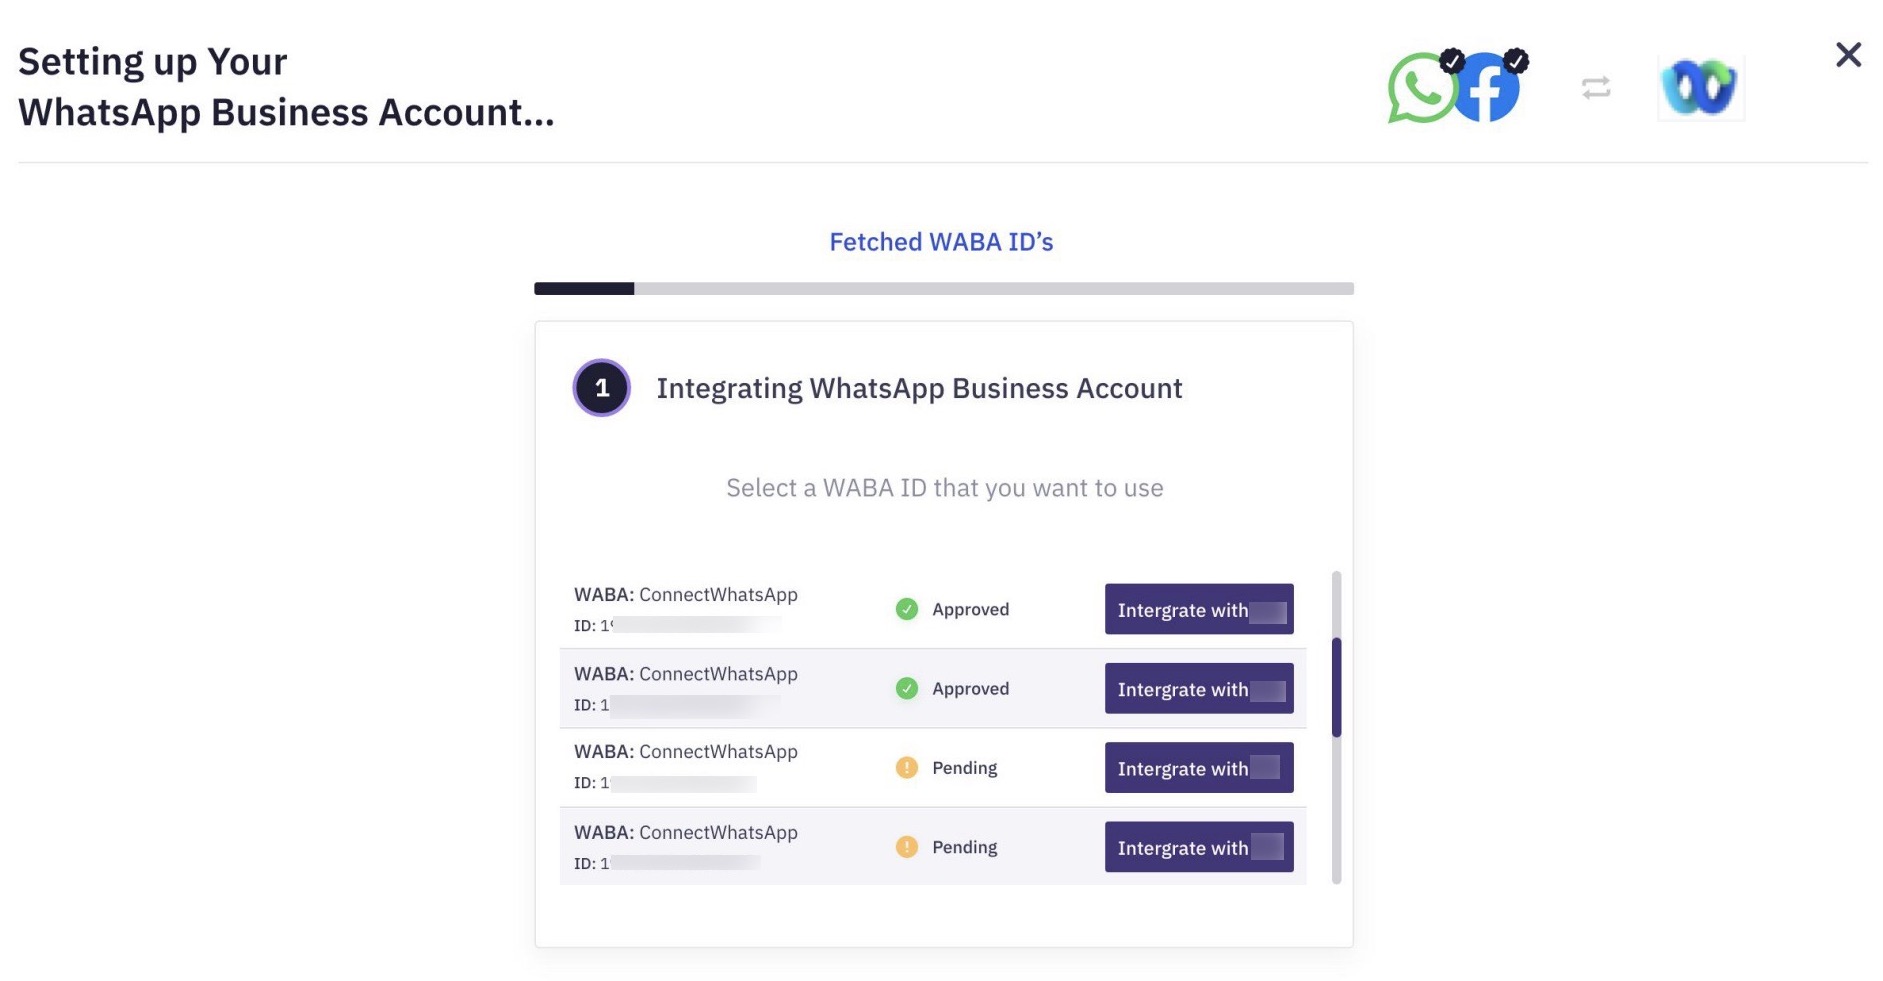
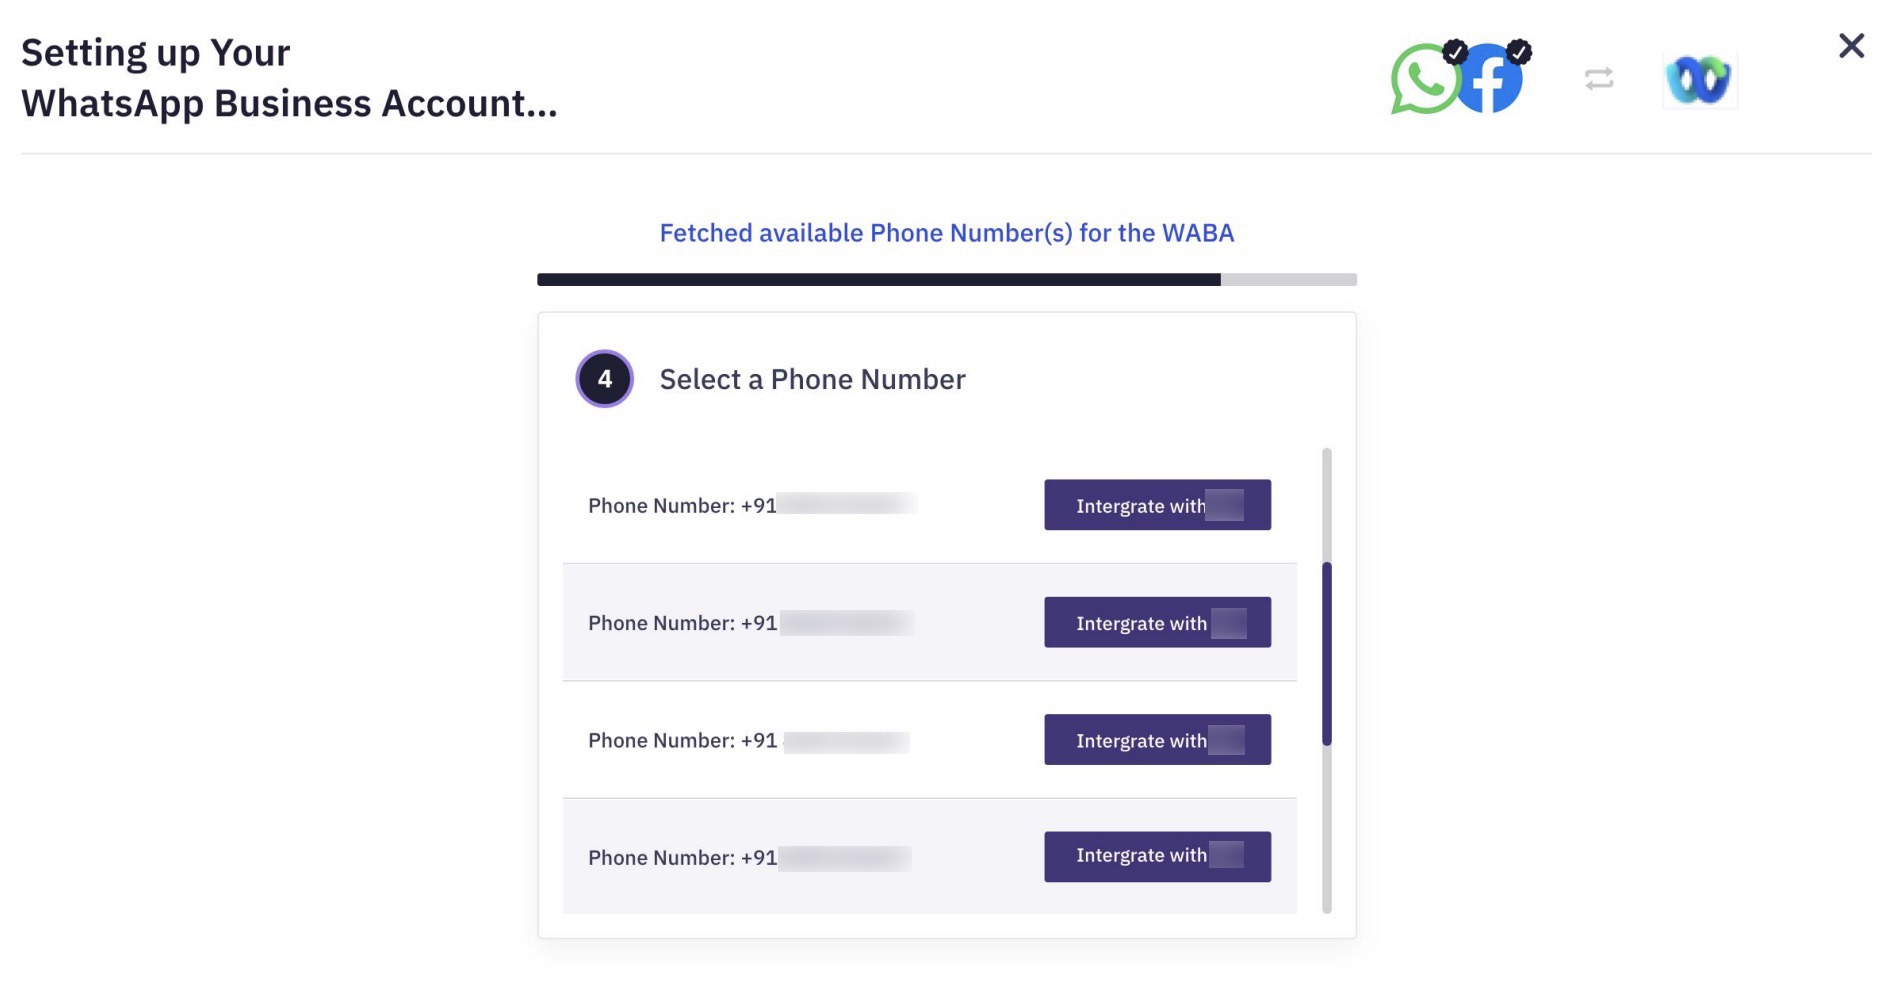
- On the Fetched WABA ID’s screen, click Integrate with Webex Connect associated with the account you would like to integrate.
- Once the permission to manage account is received, the phone numbers associated with the WABA are fetched. Select the number you want to integrate and click Integrate with imi.
- We will share Webex Connect Credit line with your WABA to complete the set up, the screen shows a prompt to register the app. Clicking on Create will register your app with Cloud APIs.
Note
Credit line cannot be changed after being attached to a WABA. If you have integrated with a different credit line in the past, you must create a new WABA to use Webex Connect's credit line and then migrate the phone numbers to the new WABA if needed.
What is Phone Number Display Name?
This is the display name which your customers see on your WhatsApp Business profile. Whenever you add a phone number to your WABA, you are prompted to add a display name for it as part of Embedded signup pop-up or Manual Sign up.
Display names should be related to your business and must not violate WhatsApp Commerce and Business policies. In addition, the display name must comply with formatting guidelines. Refer to this page for comprehensive guidelines.
Name Status limitation
The name status within the Account/Number updates section shows the status of the current display name. Please note this doesn't track the status of the new or updated display name.
Whenever there is a change in the display name, the display name approval happens automatically. Upon approval, the old name will transition to the current name.
Business verification and Display Name review
Business verification and WhatsApp Business Display name review aren’t required now as a mandatory step to start messaging on WhatsApp. After signup an automated compliance check with the WhatsApp Business Platform Policy is conducted. Following which you can immediately start sending messages to customers but only to a limited number of recipients.
When to initiate Business verification?
You are only required to initiate the business verification process when you’re ready to scale your business-initiated conversations or request to become a WhatsApp Official Business Account.
After the business verification is complete, the display name review for all phone numbers associated with your account will be initiated. Once the display name review is initiated, any new display name change will have to be reviewed and approved before it can be used.
Once the business verification is completed and the display names for all phone numbers are approved, your business can have increased messaging and phone number limits, more details here
Starting April 2024, businesses can scale with more phone numbers and daily conversations by demonstrating a record of quality messaging. This will also allow businesses to complete display name review without having to business verify.
Follow these tips for driving high-quality conversations. Businesses can track progress in WhatsApp Manager and will be notified of the increased messaging and phone number limits within WhatsApp manager as well as on their Meta login email address used during Embedded signup Onboarding.
Manual Sign-up
Using the manual configuration, the user will be able to add WhatsApp numbers to manually onboard WABAs and register assets using Cloud APIs for WhatsApp business messaging. Additionally, we have limited manual onboarding, by making this only available to tenants who have at-least one phone number live with manually onboarded WABA.
If you selected Manual in the step 4 of the procedure above, follow the below procedure:
- Enter the name of the WhatsApp account in the Name field on the Configure New App page.
- Choose Manual signup from the Select Sign Up Method option.
- Enter the WhatsApp Business Account ID (WABA ID) obtained from the support team/your account manager.
- You can either select the phone number in the Phone Number field or Add a number.

Credentials Section Select the Phone Number
- If the selected phone number is not verified, you can verify it by choosing SMS or Voice as the Verification Method . Click the Verify Number button to verify your account and complete the configuration. The OTP initiates few minutes after clicking Verify Number and is valid within 24 hours after it is initiated. Once the verification is complete, a notification will be displayed on the top of the screen.
Alert
Verification OTP on Virtual numbers - WhatsApp
If you are using a virtual number, you can face issues receiving verification SMS/Voice OTP. Please contact your regional support contact/account manager for assistance on setting up your WhatsApp app.
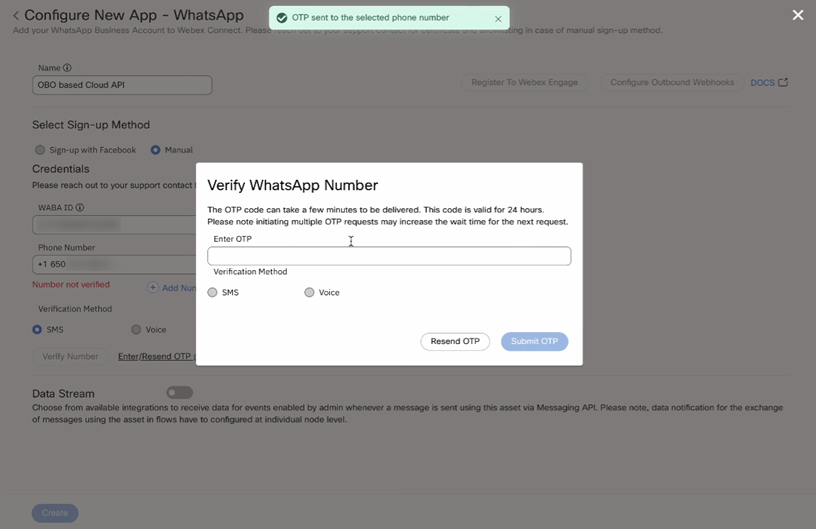
Verify WhatsApp Number
- Click Add Number to add WhatsApp number to the list. Add Phone number that can be seen by people when they chat with you. Enter your WhatsApp Business Display Name which should match your business name and adhere to WhatsApp Business’s display name guidelines and click Save to capture the WhatsApp number.
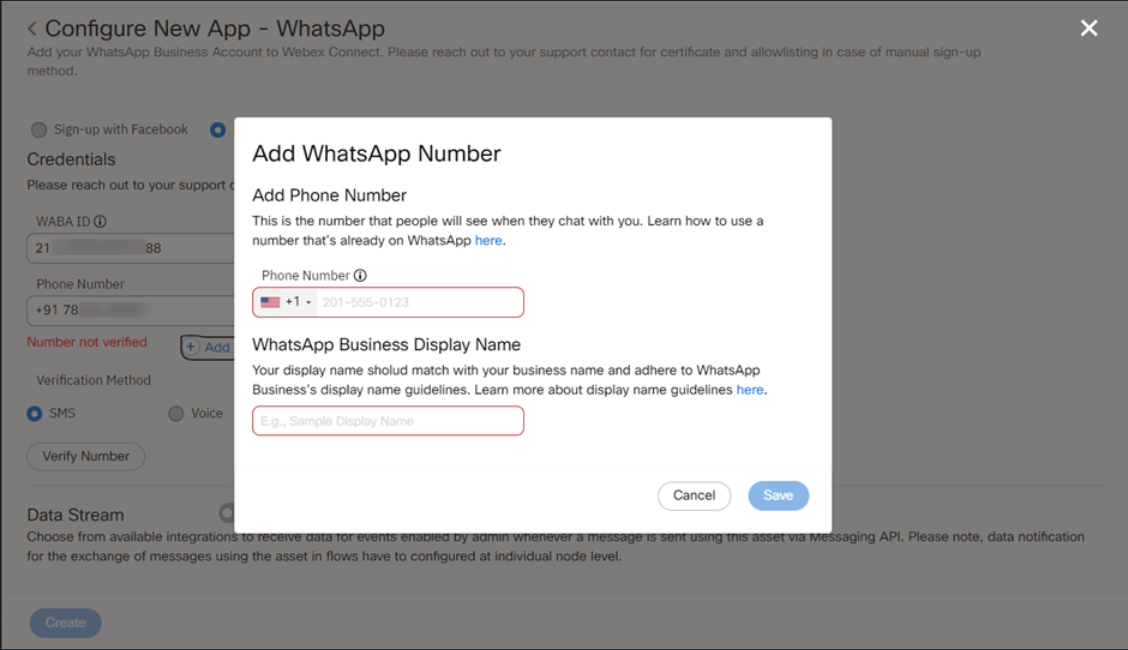
Add WhatsApp Number
- Toggle on Data Streams to choose from available integrations to receive data for events enabled by admin.
- Click Create. You can see your WhatsApp app on the Apps page.
Request to become WhatsApp Official Business Account
If your business desires to have an WhatsApp Official Business Account, it must be considered a notable business that has a substantial presence in news articles from publications with sizable audiences. WhatsApp Official Business Accounts are issued for phone numbers. With the same phone number, you can use the current or a new business name to apply for the WhatsApp Official Business Account.
Once you have initiated business verification, please reach out to your support contact it you intend to become a WhatsApp Official Business Account.
Learn more
Start messaging immediately
You can start messaging customers immediately and only need to complete Business Verification when you are ready to scale business-initiated conversations or request to become an Official Business Account (OBA).
After completing Embedded Signup or the Manual onboarding (OBO model) processes, businesses can immediately:
- Respond to unlimited customer-initiated conversations (24-hour messaging windows).
- Send business-initiated conversations to 250 unique customers in a rolling 24-hour period.
- Register up to two (2) phone numbers.
Edit/Manage/Delete the WhatsApp App Asset
- Go to Assets > Apps.
- Search for the WhatsApp that you want to edit and click Manage in the drop-down list box at the right to manage the settings of this app.

You see the Manage – WhatsApp page, where you can manage the settings of the app.
Managing WhatsApp account settings
Please use the Manage - WhatsApp page of the Webex Connect platform for updating the Business Account Settings. Although you can access your WABA from within the WhatsApp Manager portal if you have onboarded using the Embedded signup model, the following updates made from the WhatsApp Manager portal can impact your existing services - Business Account Settings, Template content, or the two-factor authentication settings.
Delete WhatsApp App
- Go to Assets > Apps.
- Search for the WhatsApp that you want to edit and click Delete in the drop-down list box at the right to manage the settings of this app.
Alert
Please note deleting the phone number from within Connect will not automatically delete the number from WABA, the number will be listed and show up as offline. In order to delete the number and re-use you should disable the two-factor authentication PIN before registering the number again.
Disable the two-factor authentication PIN from WhatsApp Manager
-
Login to WhatsApp Manager and search with the WABA ID from the POC Account drop-down.

POC Account
-
Search your phone number, and click Settings > Two-Step Verification.

Settings>Two Step Verification
-
Click Turn off two-step verification to disable the PIN. A mail will be sent to your registered email.

Turn off the two-step verification
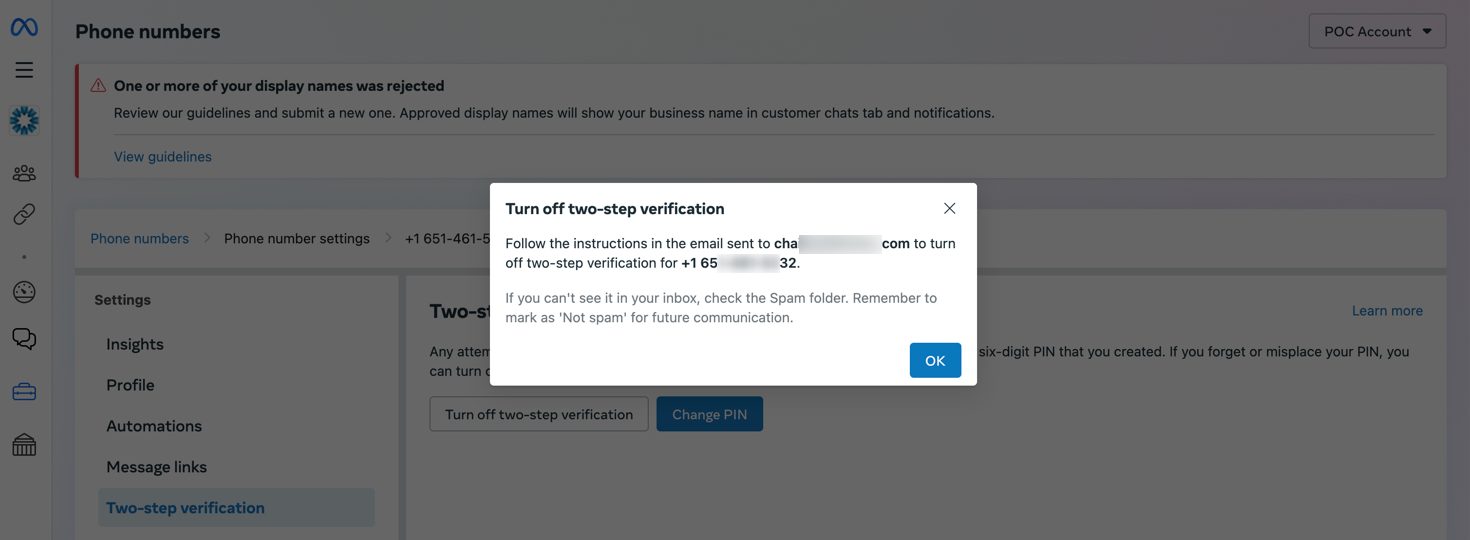
Turn off the two-step verification Email Notification
WABA Account/number updates
You can view the WABA Status, Number Status, Quality Rating and Messaging Limit metrics as part of the WhatsApp app manage screen.
Following are the parameters of the WABA Account/number updates:
- WABA Status: This tracks your WhatsApp Business Account's review status. Status property can have one of the following values: PENDING, APPROVED, or REJECTED.
- Name Status: This tracks your WhatsApp Business phone number display name status.
- Quality Rating: Quality rating is based on how recipients have received messages over the past seven days and is weighted by recency. A combination of quality signals from conversations between your business and users determines it. Examples include user feedback signals such as blocks, reports, and the reasons users provide when they block a business.
- Messaging Limit: This indicates the maximum number of template based notification messages a business can initiate to unique customers in a period of 24 hours.
Messaging Limit
Please note messaging limit metric is not captured in our platform at this moment. We are working to fix this issue as soon as possible and will have an update soon.

Learn more
- How to Change Your WhatsApp Business Display Name
- Display Name and Formatting Guideline
- Start Messaging Customers on WhatsApp Business Platform
- About Your WhatsApp Business Phone Number’s Quality Rating
- Capacity, Quality Rating, and Messaging Limits
Business Account Settings
You can register the details of the business account like the About, Address, Business Category, Contact Email, Business Description, Website URL 1 (the primary website), and Website URL 2 (the secondary website). Click the Upload button to browse and select an image that will be displayed as the logo.
As per the WhatsApp guidelines, when you upload the image, the WhatsApp Business Platform Client will scale and crop the uploaded the profile pic and render it as a square image. Therefore, the image that you use for your business logo must comply with the following:
- Maximum size of 5 MB
- Image height or width not less than 192 px
- Image resolution of 640x640.
These business account settings appear to the users when they view your business profile on WhatsApp.
Refer to the screenshot below:

Managing Business Account Settings
Please use the Manage - WhatsApp page - Business Account Settings section of the Webex Connect platform to update any Business profile information. Although you can access your WABA from within the WhatsApp Manager portal if you have onboarded using the Embedded signup model, it may impact your existing services.
Message Us Plugin
The Message Us plugin renders a Message Us button on your WhatsApp business profile page. This button, when clicked by the users, enables the users to open a conversation with the business on the configured WhatsApp Business Account. Use the following code sample on your website to allow users to contact you on your configured WhatsApp Business Account through the Message Us button.
The below HTML code shows different possible values available for color, size, border radius, etc.
<div class="wa-message-us" number="<YOUR_WHATSAPP_NUMBER>"
    label="<CUSTOM_BUTTON_LABEL>"
    pre_filled_message="<CUSTOM_PREFILLED_MESSAGE>"
    color="<teal | green | white>"
    size="<standard | compact>"
    border_radius="<VALUE_IN_PX_OR_%>"
    <script src="https://apptray-uk.imiconnect.io/WhatsApp/WhatsAppPlugin.js" type="text/javascript">
    </script>
    </div>

Message Us Plugin
For e.g. use the following code to generate a standard size WhatsApp Message Us button in green color:
<div class="wa-message-us" number="9180xxxxxxxx"
    label="Message Us"
    pre_filled_message="Hi there"
    color="green"
    size="standard"
    border_radius="5px">
</div>
    <script src="https://apptray-uk.imiconnect.io/WhatsApp/WhatsAppPlugin.js" type="text/javascript">
    </script>

Using the Channel
User Identity
To message users on WhatsApp you will need the users WA ID. This is the MSISDN that the customer uses on WhatsApp.
Getting Opt-Ins
You are required to obtain opt-in before opening marketing, utility, and authentication conversations with customers outside the 24-hour window. You can obtain opt-in in a multitude of ways, both on and off WhatsApp.
The following are examples of supported opt-in methods:
- SMS
- Website
- In a WhatsApp thread
- By phone (using an interactive voice response (IVR) flow)
- In person or on paper (customers can sign a physical document to opt in)
We strongly recommend that businesses continue to optimize for the user experience when designing opt-in flows.
API
Here is a Postman collection to test our APIs. Make sure you change the key in the header to your service key.
Latest Collection: 
Archived Collection: Refer Postman Collection
Message Types
WhatsApp supports the following message types:
- Text
- Media (Image, Video, Document and Sticker)
- Location
- Contact
- Templates
- List Messages
- Reply Buttons
Rules
You can configure based on Trigger events to activate the WhatsApp node.
| Trigger event | Action |
|---|---|
| Incoming Message | Send WhatsApp Message Forward to BOT |
Flow
In a flow, you can configure the Receive node to receive messages from WhatsApp users and the WhatsApp node enables you to deliver messages to the WhatsApp user.
Configuring Outbound Webhook for WhatsApp
To configure a Outbound Webhook for WhatsApp:
- Go to Assets → Apps.
- Select WhatsApp from the App Type drop-down.
- Click the number for which you want to enable the Outbound Webhook.

- Click Configure Outbound Webhooks.
Configure New Integration - Outbound Webhook is displayed.

- Enter the Name for the webhook.
- Entity is automatically populated.
- Select the notifications you want to receive – Incoming Message, Postback, List Message, and/or Reply Buttons Message.
- Enter the webhook URL for the Endpoint Configuration.
- Select Enable Hub Signature if you want to enable the hub signature and enter all the relevant details.
- Click Save.
WhatsApp User Identity Change
WhatsApp enables you to authenticate the identity of the customer to make sure you are communicating with the intended person. For this, WhatsApp uses a unique cryptographic identity hash key for the customer’s phone number.
If there is a change in the customer’s phone number or device (due to theft or change to a new device), WhatsApp considers it as an identity change and updates their Identity Hash.
When you send a WhatsApp message to that customer including the old hash in the message, the delivery of the message fails because the hashes do not match. An error code is sent to notify you that the delivery has failed. This indicates that the customer’s phone number can no longer be authenticated. To re-authenticate, contact the customer using any of the non-WhatsApp channels and verify the customer’s identity.
After re-authenticating the customer, you can get the new hash key:
- By sending a message to the new identity (if any) without including the hash. You will receive the updated hash as part of the delivery receipt.
- As part of incoming message payload within Outbound webhooks, Export Logs, Debug logs, Start Node, and Receive Node, when the customer messages you.
You can save it for future use and include the new hash in the messages going forward.
Note
The above changes are limited to Cloud API based WhatsApp business numbers. This capability is not available for existing on-premises numbers. To utilize this feature you must migrate your numbers to Cloud API.
FAQs
You can refer to the WhatsApp channel FAQs for contextual information.
Updated 4 days ago