Data Parser Node
Understand what a Data Parser node is and how to configure it
The Data Parser node enables you to convert JSON or XML data into a list of key-value pairs. You can use it instances such as needing some specific data from a JSON or XML file.
When you double-click the node, the Data parser screen appears with two tabs: Configuration and Transition Actions. The Configuration tab enables you to configure the input file, parse the data, and extract the desired values from the parsed data. Using the Transitions tab, you can configure node on-enter/on-leave operations.
As part of converting JSON or XML data into a list of key-value pairs, you need to first import data from the JSON or XML file, Once imported, you need to parse that data. You can parse a sample data and test it to see how it works.
From the parsed data, you can select the desired variable and then import it. The imported variable is available as an output variable in the Output Variables panel.
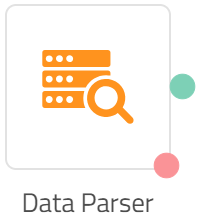
Here is the node image:

Interface Elements

Click the image to view it larger
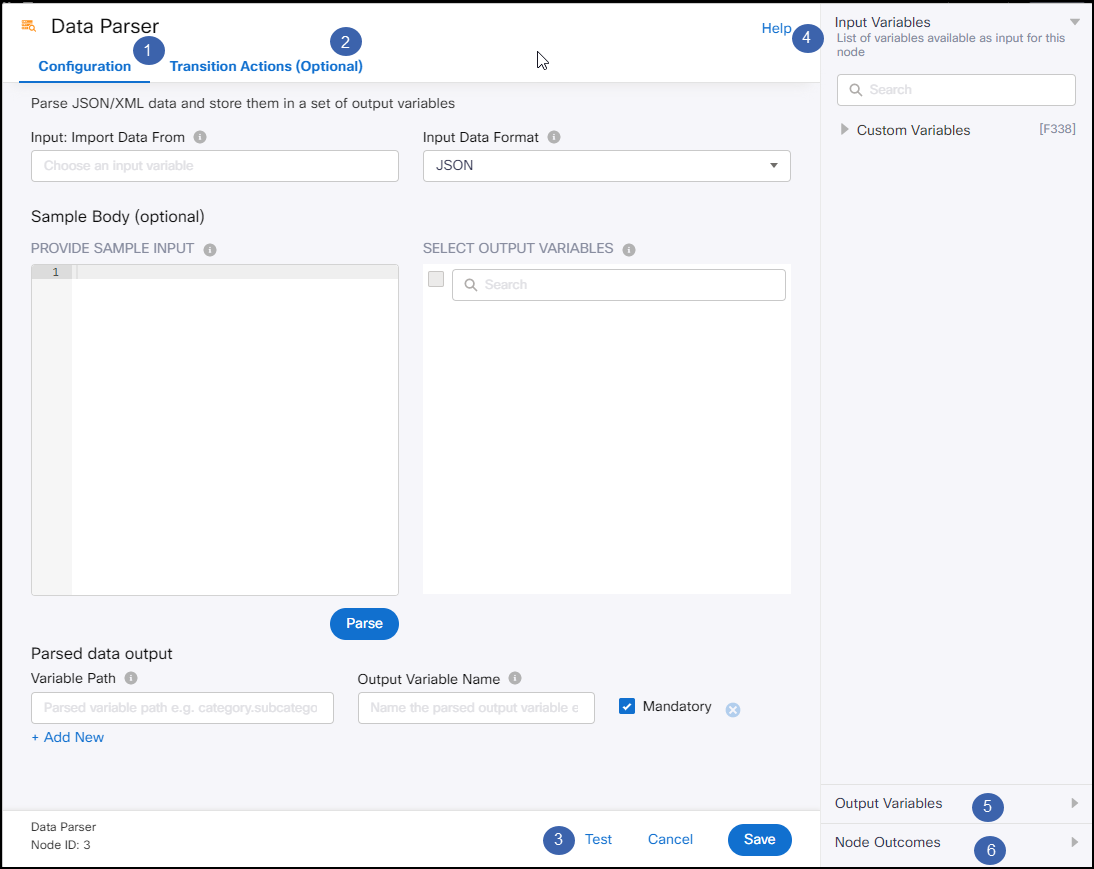
Here is the description for interface elements:
| S. No | Element | Description |
|---|---|---|
| 1 | Configuration tab | Use this tab to convert JSON/XML data into a list of key-value pairs. Here is the description for the fields: INPUT: IMPORT DATA FROM In this field, specify the variable in which JSON or XML data is stored. INPUT DATA FORMAT This drop-down box contains two options: JSON OR XML. Select the required one choosing from these options. SAMPLE BODY In this box, specify the sample data and then parse it. SELECT OUTPUT VARIABLES This box displays the parsed data. Select the required variables from this parsed data. VARIABLE PATH This field displays the variable extracted from the parsed data. OUTPUT VARIABLE In this field, specify a name for the output variable. Once specified, it populates in Output Variables panel on the right. |
| 2 | Transition Actions tab | Use this tab to configure node on-enter/on-leave operations. |
| 3 | Test button | Both the Configuration tab and the Transition Actions tab contain a Test button. Here is what you can do using the Test button: Click the Test button on the Configuration tab to test the sample input. Click the Test button on the Transition Actions tab to test the configured on-enter / on-leave operations. |
| 4 | Input Variable | Click this collapsible panel to view the list of all the available flow variables. You can search for a variable using the Search field. You can also add a variable to the flow variables list by clicking the Add new flow variable link at the bottom of the list. |
| 5 | Output Variables | Click this collapsible panel to view the output variables. The data generated by the node is displayed as variables here. |
| 6 | Node Outcomes | Click this collapsible panel to view the list of possible node outcomes. You can also customize the node labels by clicking the Edit icon. |
Converting JSON or XML Data
You can convert the JSON or the XML data into key-value pairs in four steps: Configuring Input Data, Parsing Data, Testing Data, and Configuring Transition Actions. However, Configuring Transition Actions is optional.
Here is the description for these steps:
Configuring the Input Data
- Double click the Data Parser Node.
The Data parser screen appears. - On the Data parser screen, click the Configuration tab if it is already not opened by default.
- On the Configuration tab:
- In the IMPORT DATA FROM field, enter the variable name in which JSON or XML data is stored. For example, $(n4.http.responsebody).
- From the INPUT DATA FORMAT drop-down box, select JSON or XML. This is the format of the input data file.
Parsing the Data
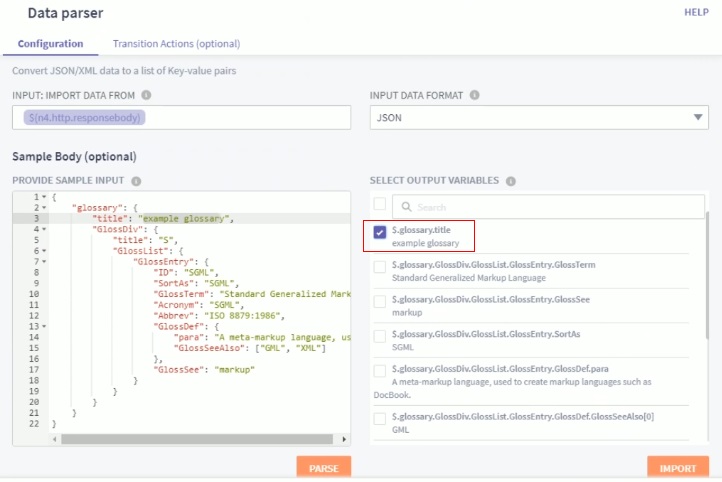
- In the Sample Body box, enter a sample data. If the input file data format is JSON, then you need to enter JSON sample data. Otherwise, enter XML data.
- Click the PARSE button located below the PROVIDE DATA INPUT box.
The parsed data is populated in the SELECT OUTPUT VARIABLES BOX. - In the SELECT OUTPUT VARIABLES BOX, select the variables, which you wish to extract. For example, $.glossary.title.

Selecting Output Variable
- Click the IMPORT button located below the SELECT OUTPUT VARIABLES BOX.
The selected variable is populated in the Variable Path field in the Parsed data output area. - In the Parsed data output area, specify a name for the Output variable in the OUTPUT VARIABLE Name field.

Naming Output Variable
The output variable is populated in the Output variables collapsible panel.
Note: If you wish to extract another variable from the SELECT OUTPUT VARIABLES BOX, select that variable, and then follow the above steps from 4 to 6.
7. Click the Save button.
Testing the Data
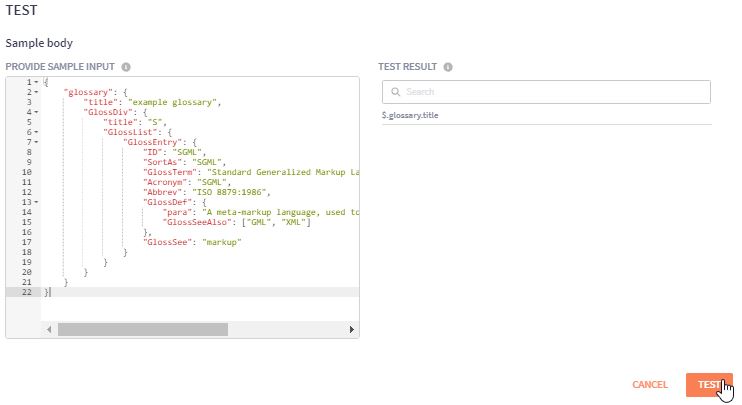
- Click the Test button.
The Test window appears. - On the Test window, make the required changes in the Sample body box, and then click the Test button.

Test Window
Configuring the Transition Actions
As part of configuring transition actions, you can configure on-enter/on-leave operations. However, configuring these are optional.
To configure the transition actions, you need to first configure and then test them.
Here are the steps:
- On the Data Parser screen, click the Transition Actions tab.
- On the Transition Actions tab, click Add Action.
The Transition Actions area appears.
3. On the Transition Actions area:
- From the Time drop-down box, select On-enter or On-leave. For example, On-enter.
- From the Acton drop-down box, select an action choosing from the pre-built options.
Tip
To delete an event, click the delete button corresponding to that event. See the image below.

- Click the Test button at the bottom to test it.
- Finally, click the Save button at the bottom.
The transition actions are configured.
Updated 3 months ago
