Live Chat
Learn about the procedure for app asset configuration for the Live Chat channel.
Webex Engage users who want to use Live Chat as a channel of customer support with Cisco Contact Center Enterprise can configure a Live Chat asset with Webex Connect by following the below steps:
Configuring Live Chat channel asset on Webex Connect
Please note that In-App messaging on Android and iOS is not available for Cisco Contact Center Enterprise (CCE) integrated - Webex Connect tenants at the moment. The below configuration steps are applicable for Live Chat over websites/web browsers alone.
You can create a Live Chat asset in Webex Connect (for enabling customer support over Live Chat in combination with Cisco Contact Center Enterprise) by following the below steps:
- Log in to the Webex Connect platform.
- Go to Assets → Apps section.
- Click Configure New App and select Mobile/Web.
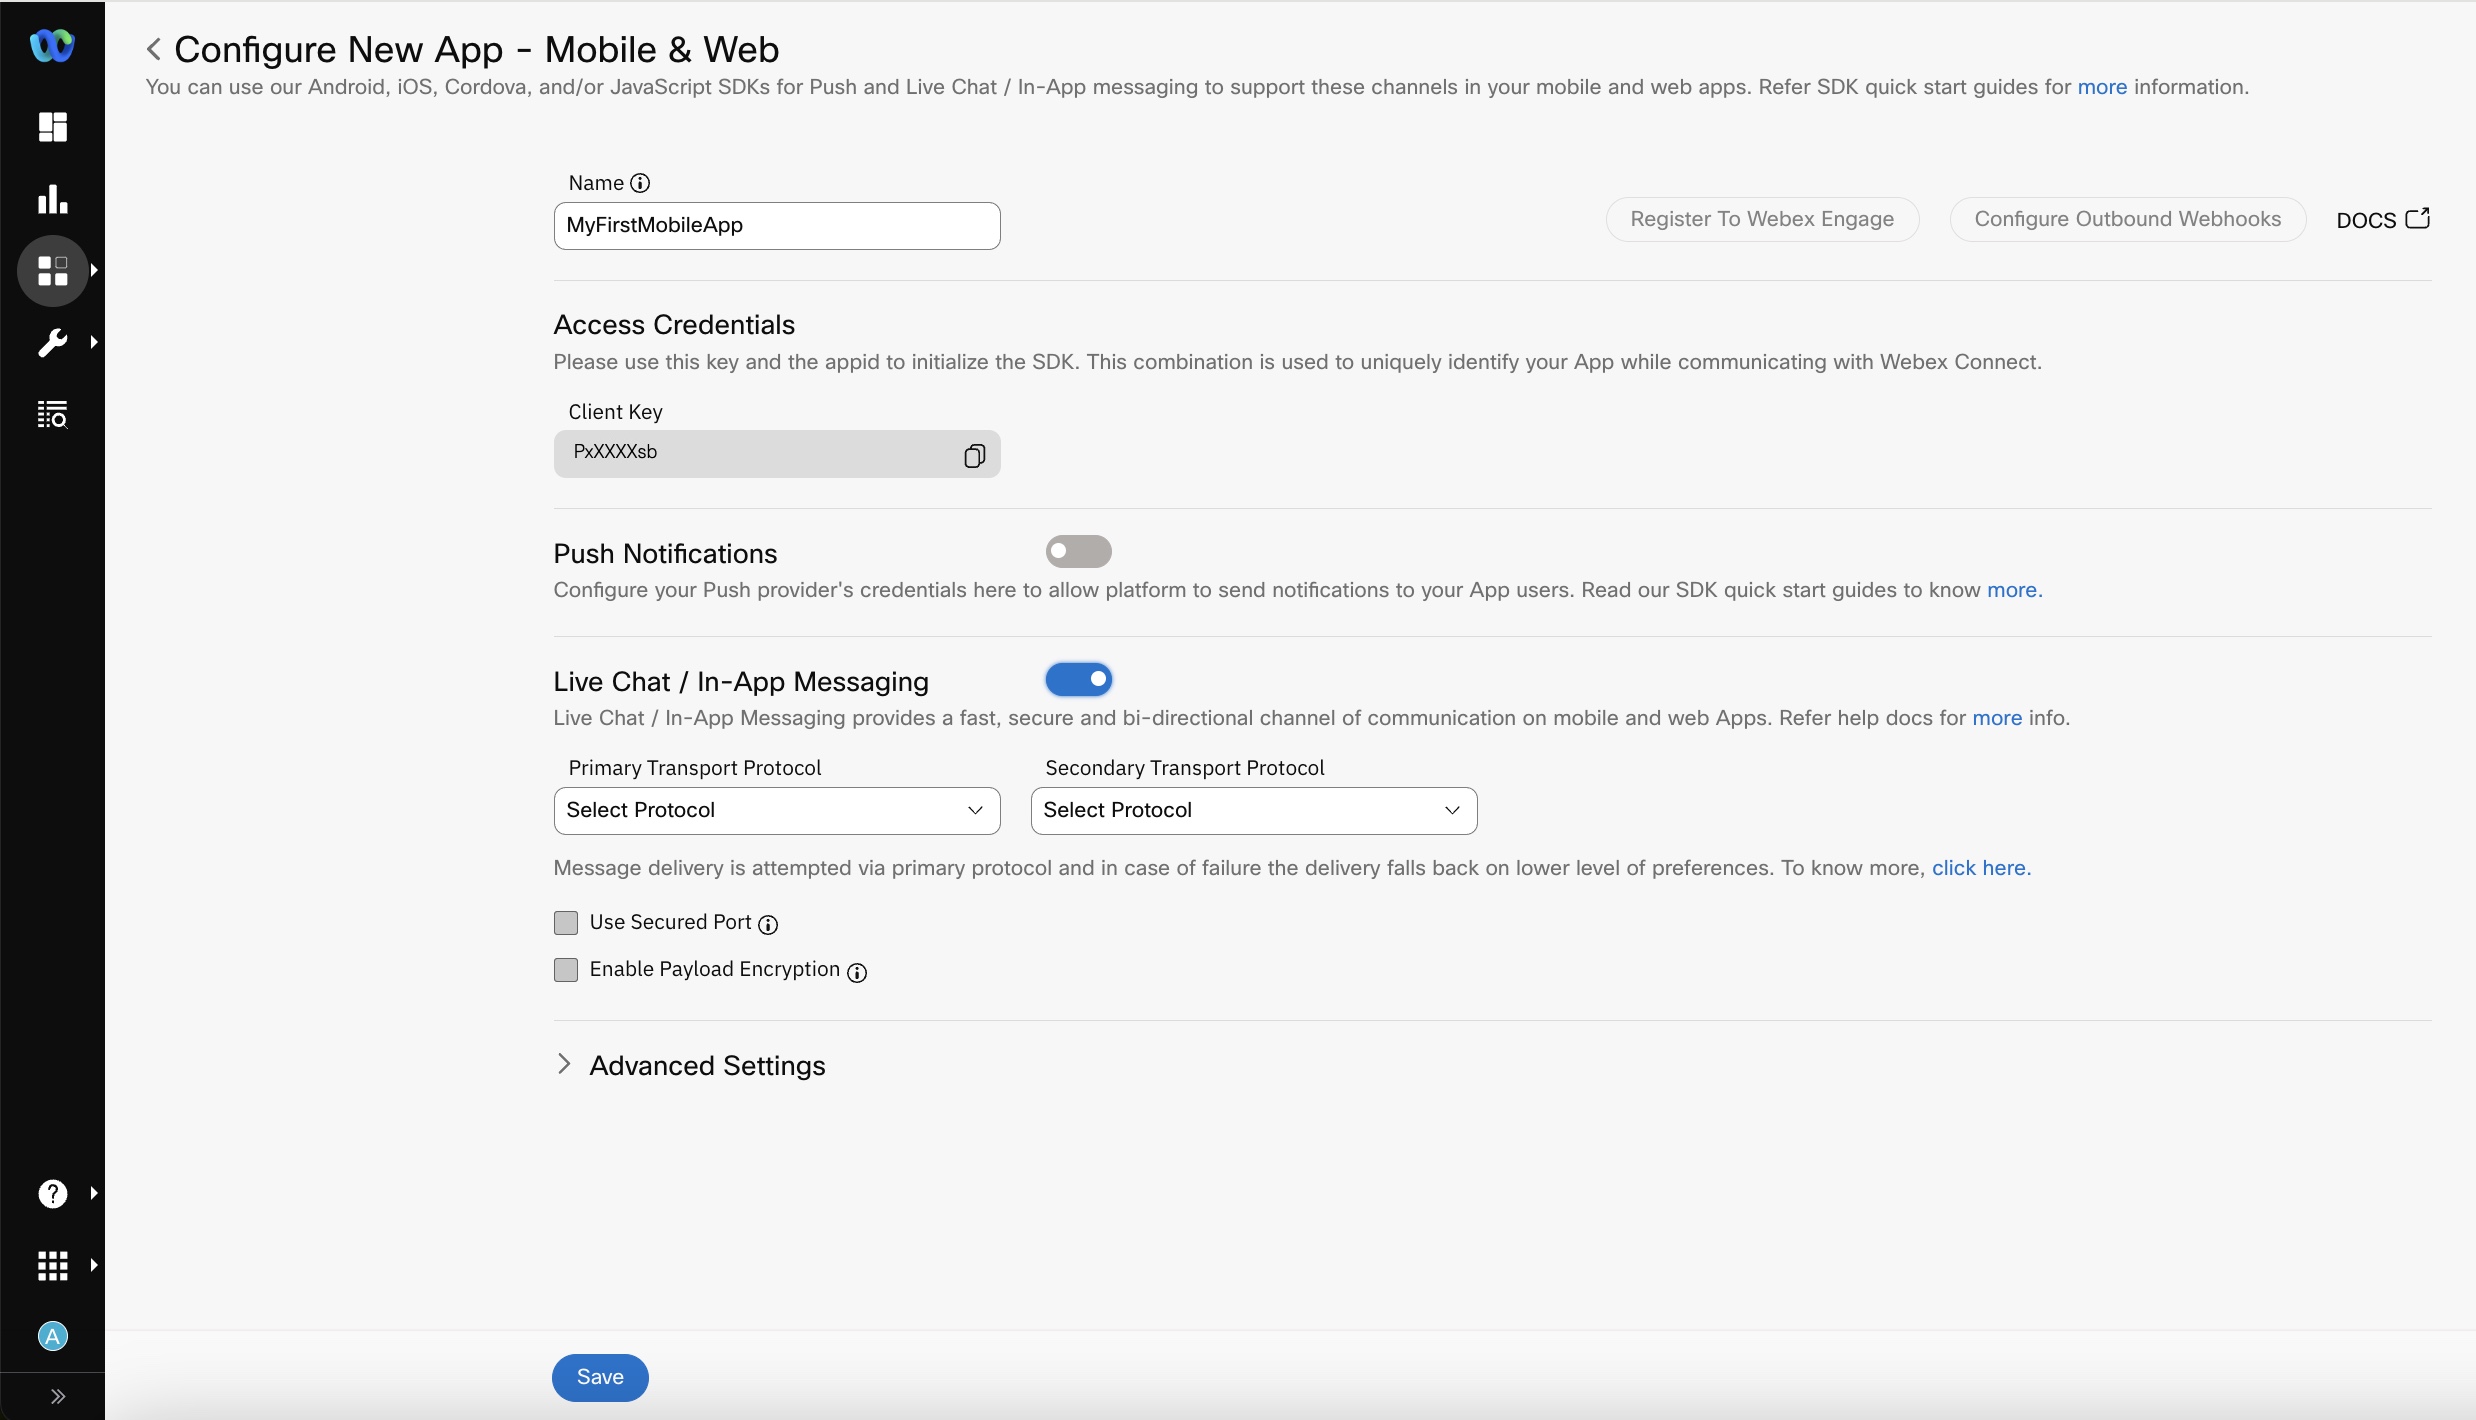
- Enter a user-friendly name for your Live Chat asset.
- Enable Live Chat Messaging configuration section.

Screenshot of Configuring New Mobile & Web App Page
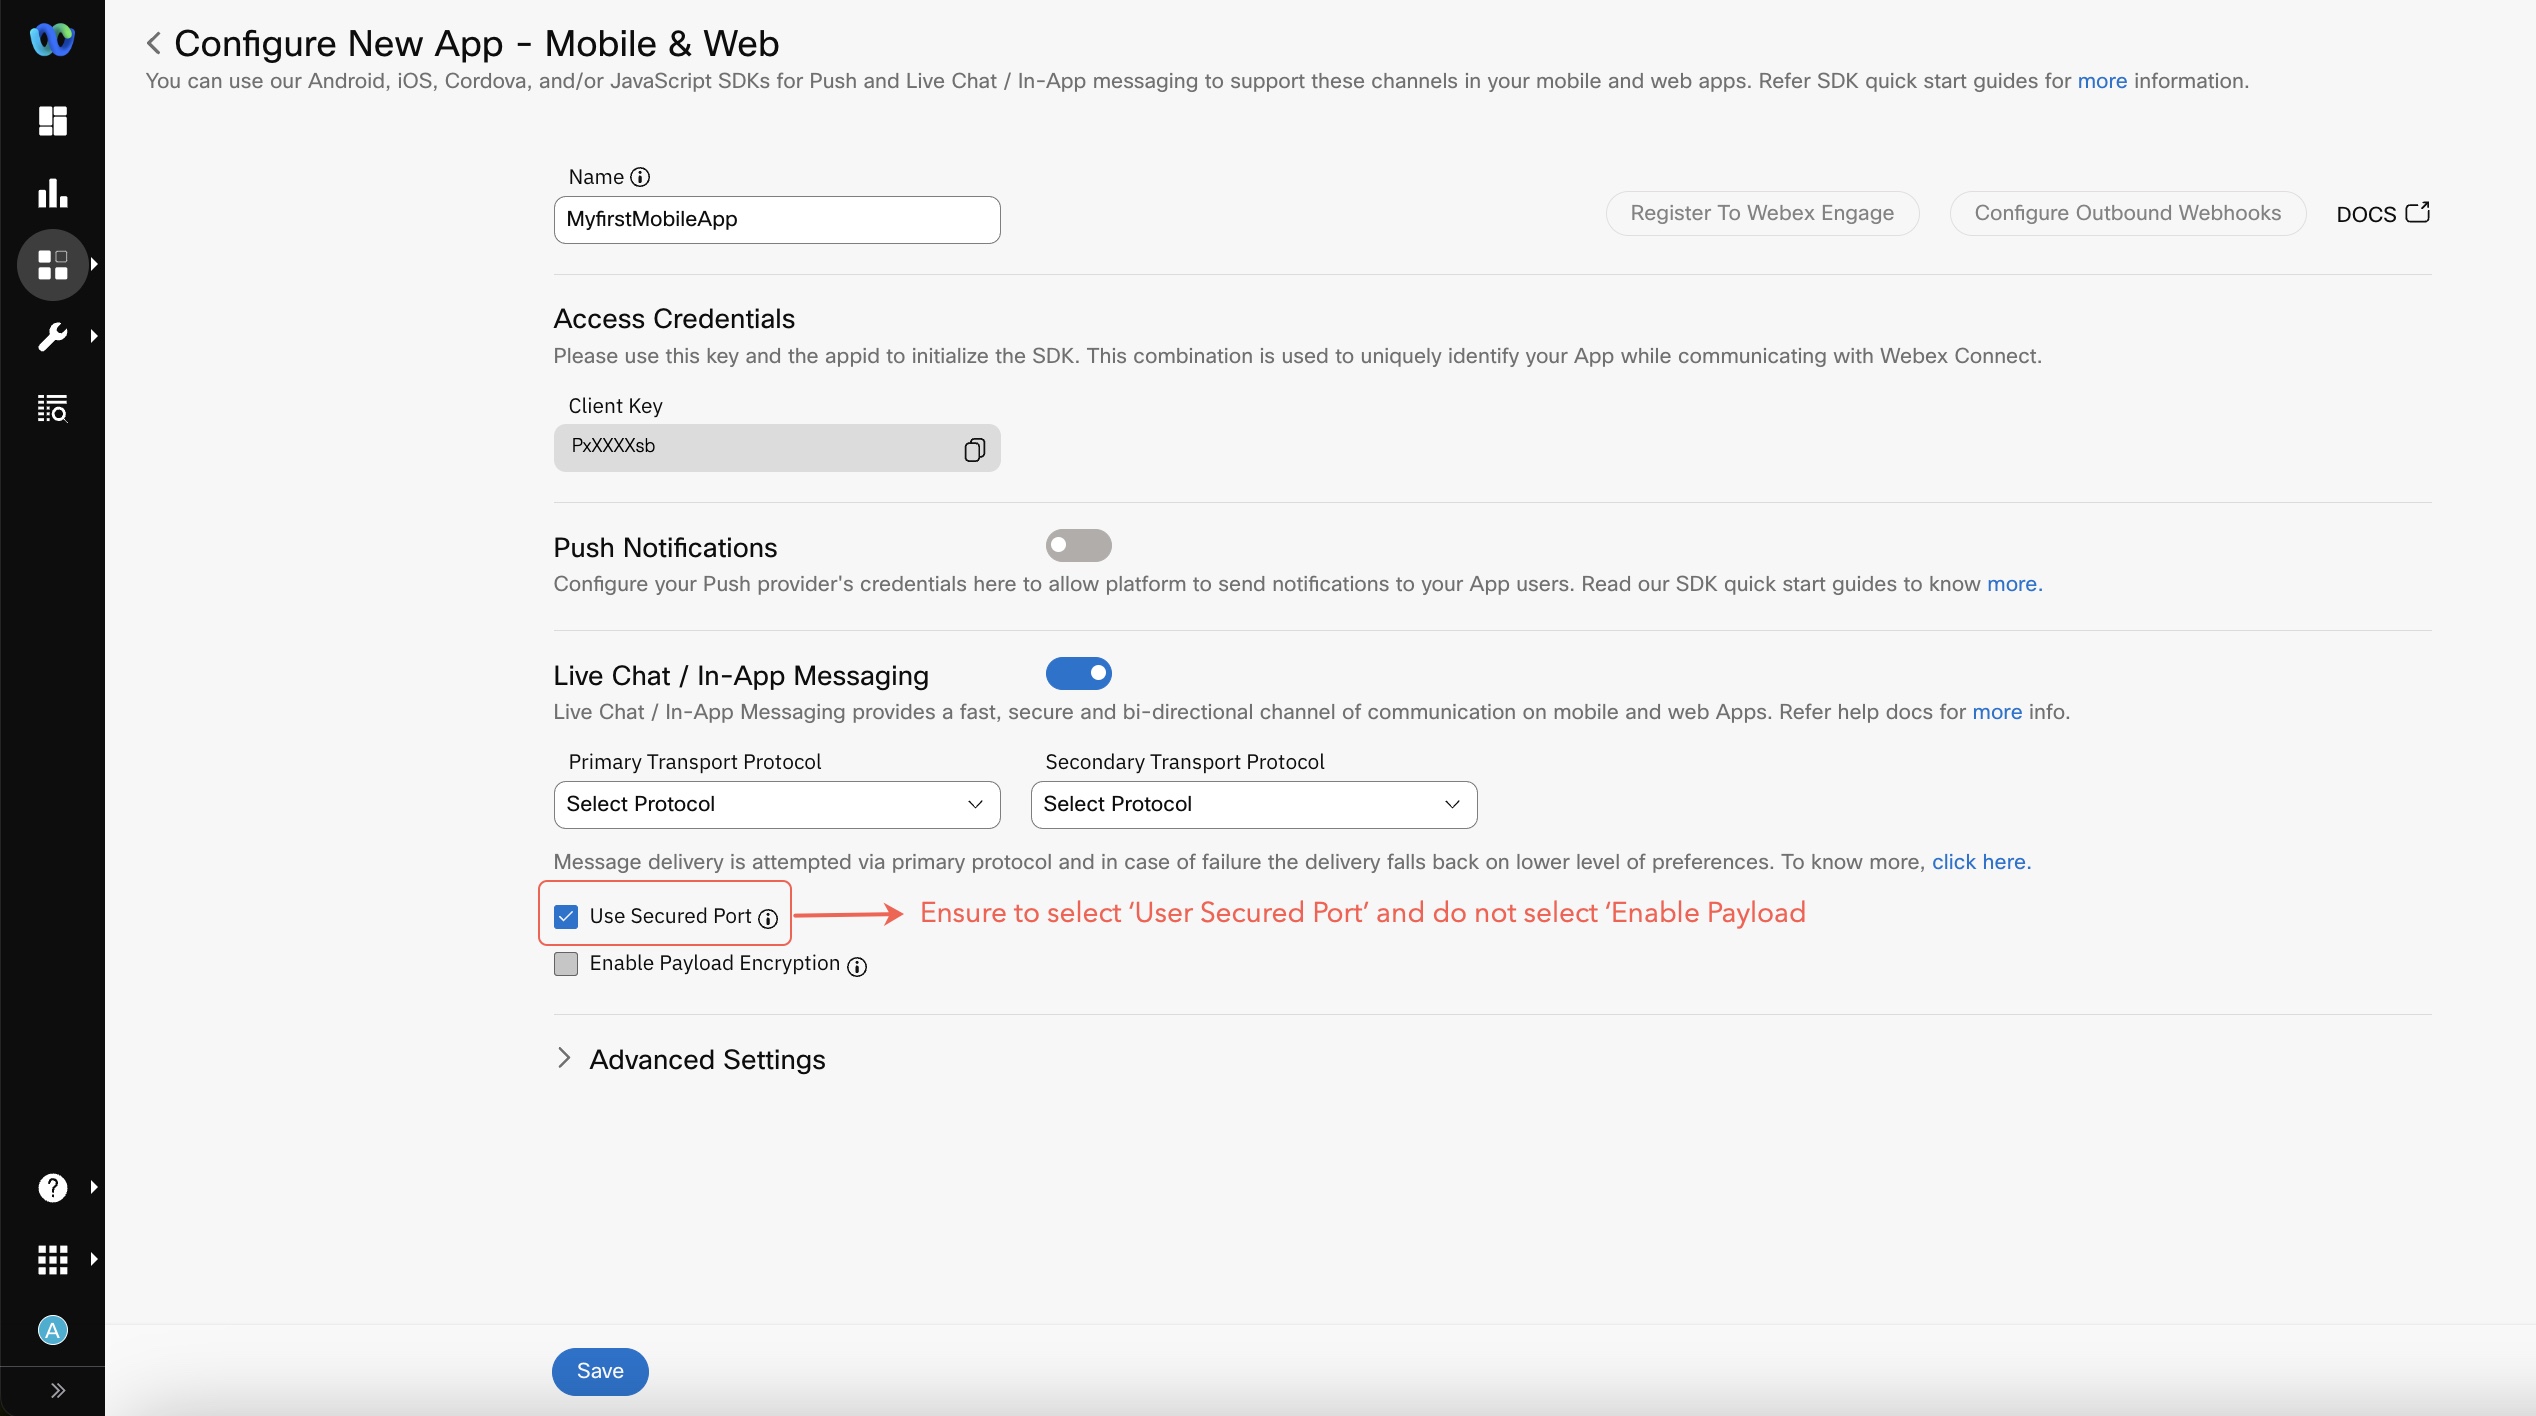
- Select the Primary Transfer Protocol - MQTT or Web Socket. Message delivery is attempted via a primary protocol and in case of failure, the delivery falls back on the secondary protocol.
- Select the Secondary Transfer Protocol - MQTT or Web Socket. E.g., if you selected MQTT as the primary protocol, select Web Socket as the secondary protocol.
- Select 'Use Secured Port' checkbox. This is a must have for Webex Connect and Cisco Contact Center Enterprise integration.
- Do not select 'Enable payload encryption' checkbox. This setting is not applicable for Webex Connect and Contact Center Enterprise integration.

Screenshot displaying to enable Use Secured Port
- Click 'Save'. The 'Register To Webex Engage' action button becomes available once you've completed this step.
Registering your Live Chat App Asset with Webex Engage
Once you’ve successfully configured your Live Chat asset with Webex Connect, you can register it with Webex Engage by following the below steps:
- Go to Assets ->Apps.
- Select Mobile/Web option in the ‘App Type’ drop-down list box.
- Click the required Live Chat asset.
- Click 'Register to Webex Engage'.
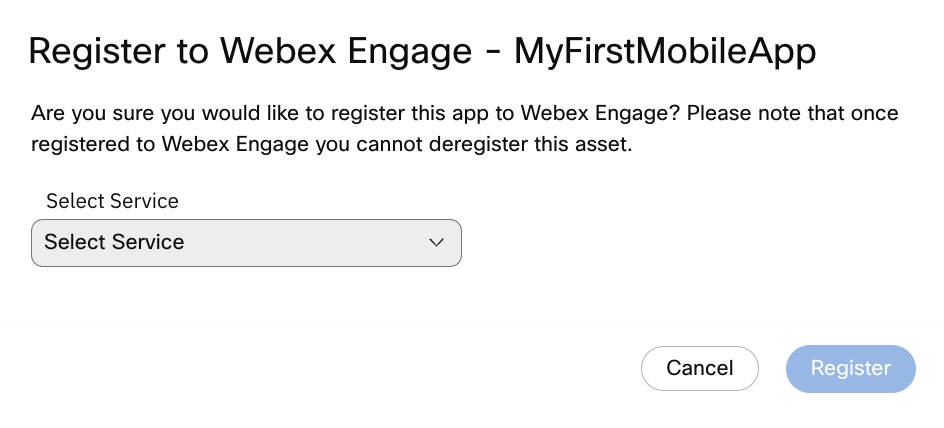
The Register to Webex Engage page displays.

Screenshot of Register to Webex Engage
- Select the required service and click Register (Note: this should be the Webex Connect service that would be used for configuring Live Chat flows for Cisco Contact Center Enterprise integration and click Register).
You cannot change the service mapping once done. Hence, the asset registration on Webex Engage should be done after the service to be used has been decided.
- Do not delete a Live Chat asset once it's been registered with Webex Engage. Once deleted it cannot be restored. Doing so would lead to asset deletion within Webex Connect alone while the entry continues to be in Webex Engage.
A message displays “Asset registered successfully”. This completes the asset registration for Cisco Contact Center Enterprise integration.

Screenshot displaying the Webex Engage icon and PCI check enabled flag next to a mapped Mobile/Web Asset.
As shown above, you will see a Webex Engage icon and a PCI check enabled flag next to the Live Chat asset once it's been successfully mapped with Cisco Contact Center Enterprise.
The Live Chat widget design configuration needs to be done within Webex Engage. The code for embedding a live chat widget on your website also is available within Webex Engage.
Updated 10 months ago
