Creating a Flow on Webex Connect
Webex Connect allows you to rapidly configure two-way communication flows using a drag-and-drop flow builder. Below are the steps to configure a flow.
Step 1 - Add a New Flow
- Click Create Blank Flow button under the Flows section on the service dashboard.

Creating a Blank Flow using Services Dashboard
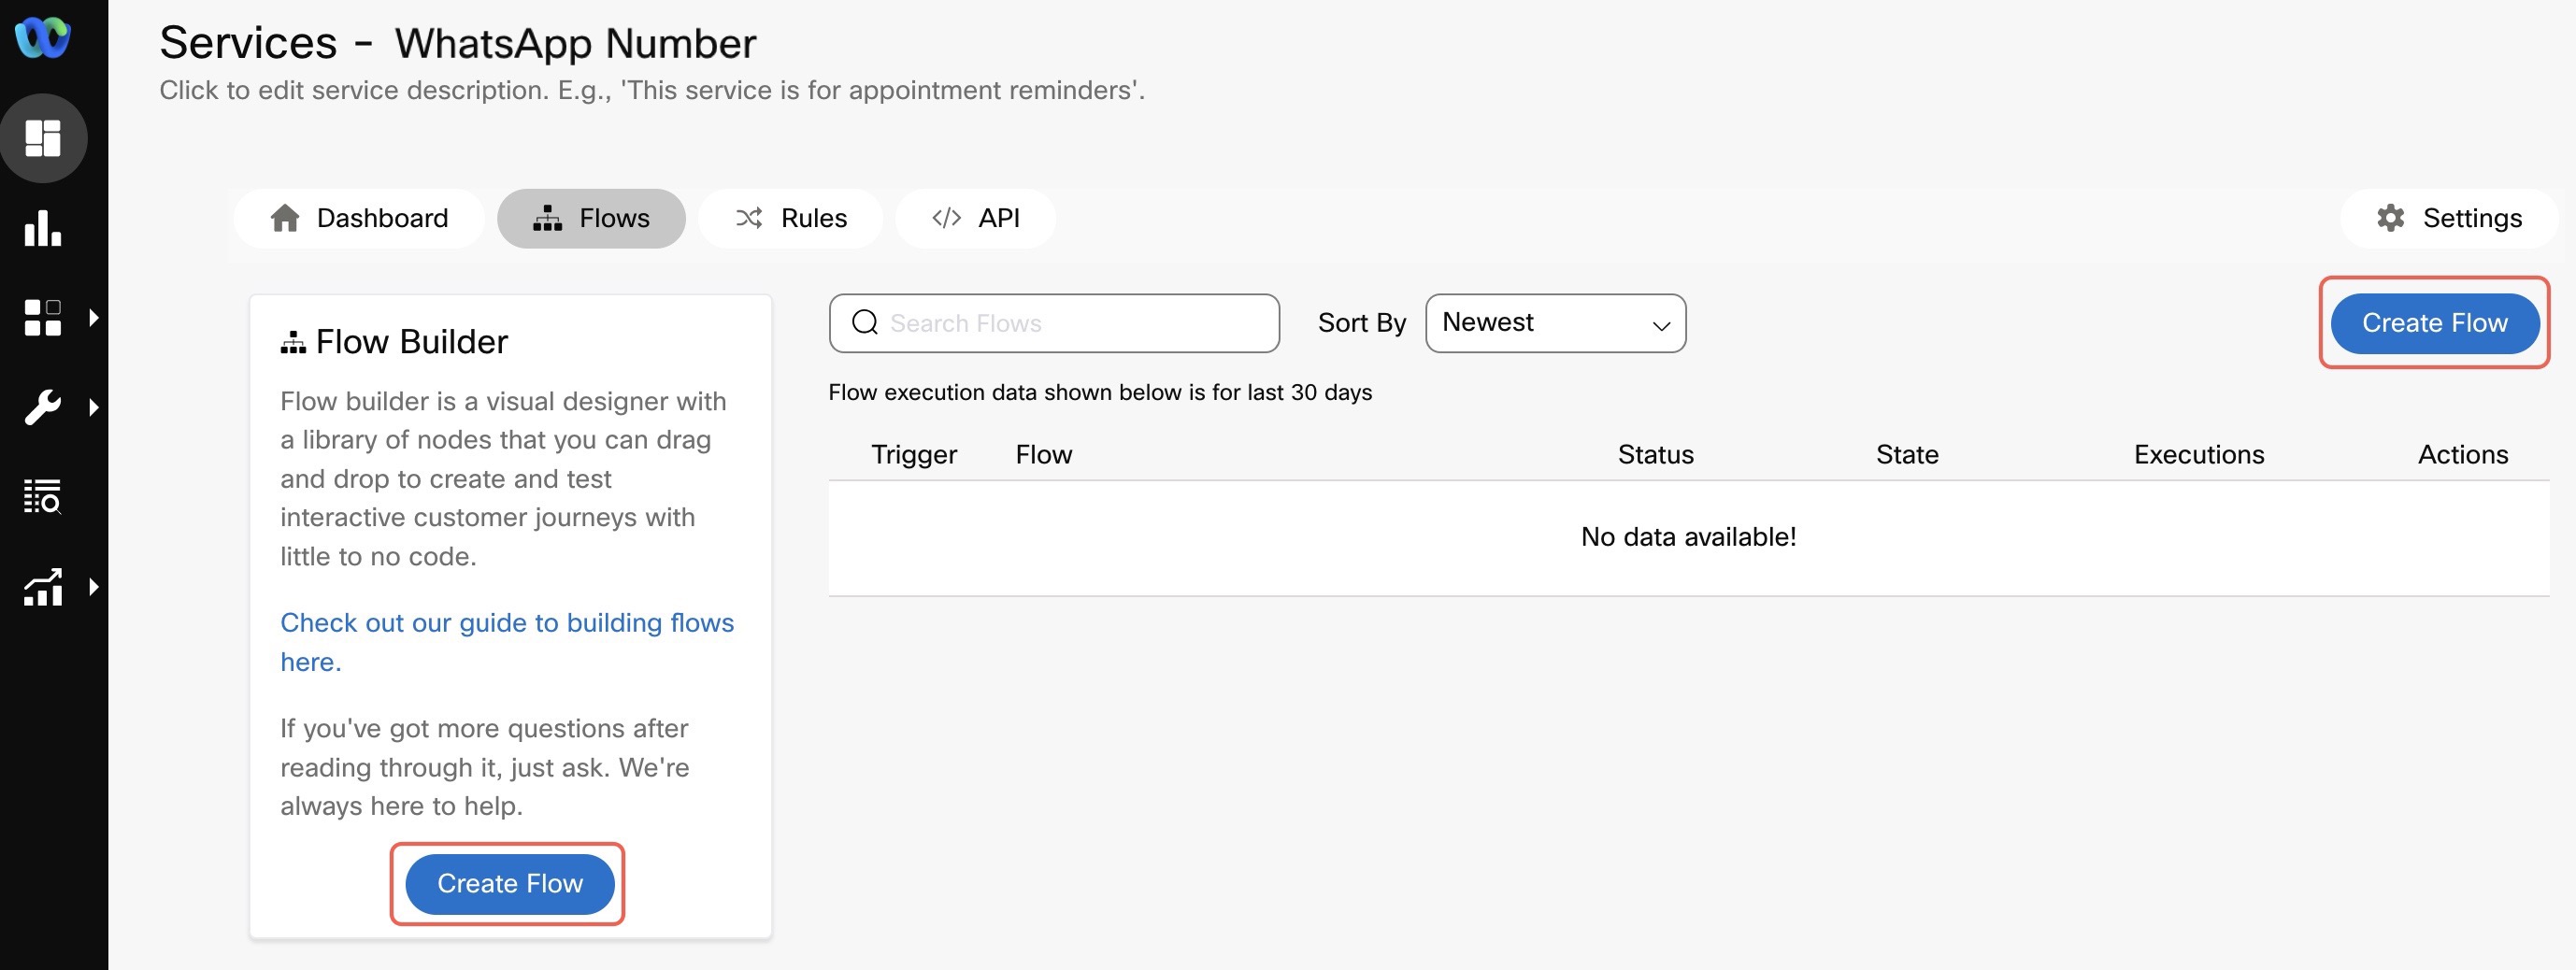
Alternatively, click Flows tab (shown below), and then click either of the two Create Flow buttons.

Creating a Blank Flow using Flows
-
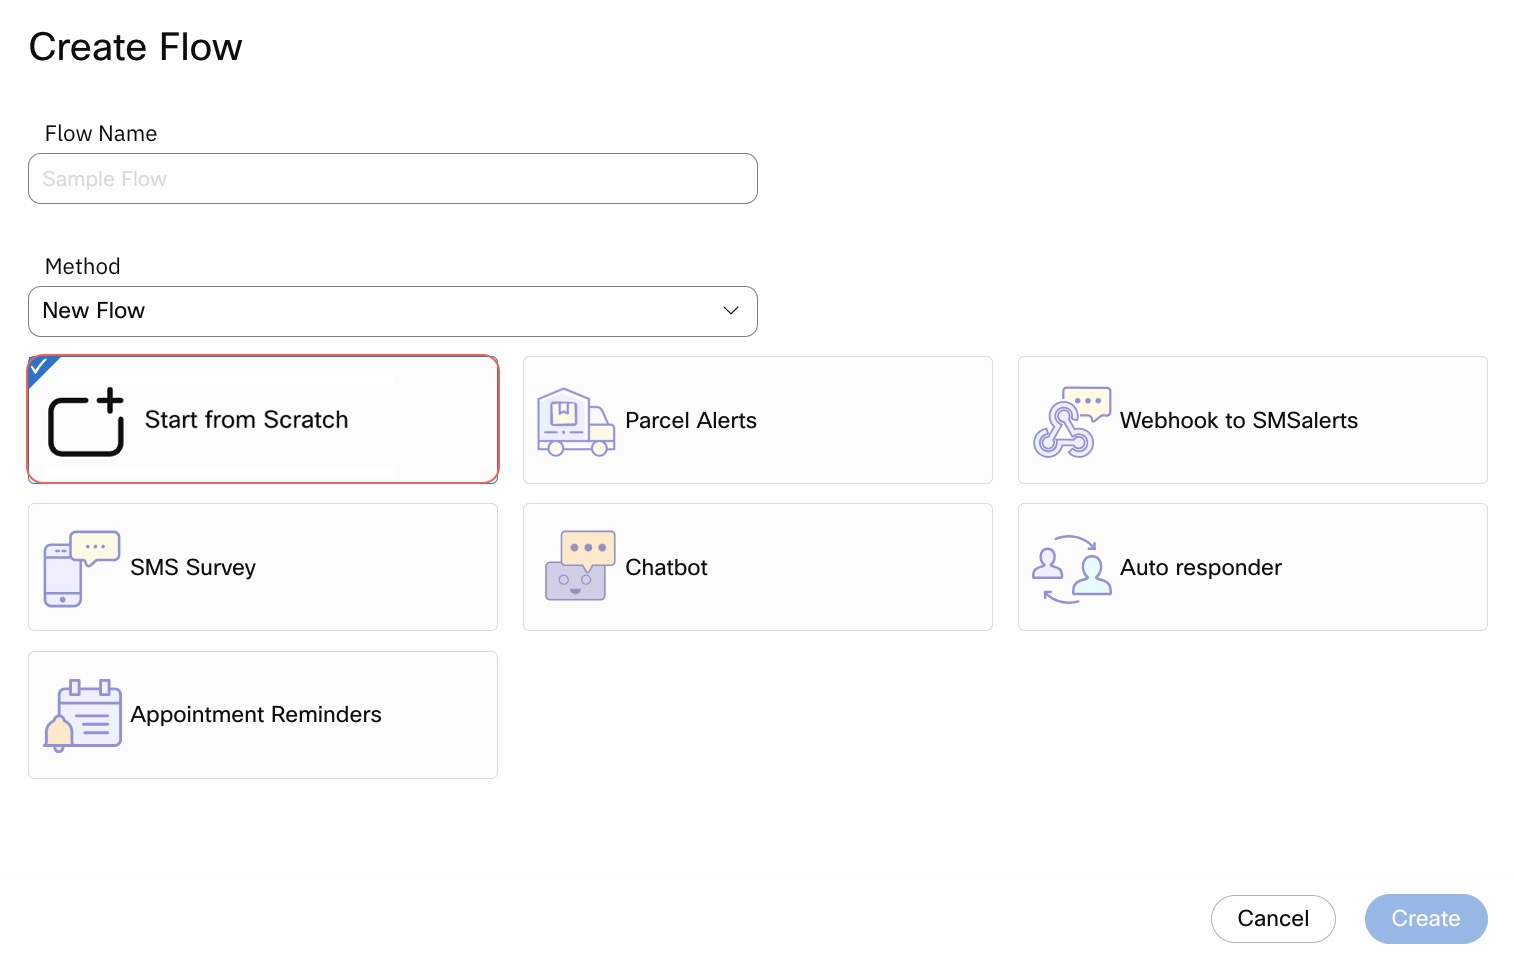
Enter the Flow Name and choose the Type as WorkFlow. You can select 'Voice Flow' in case you want to build a voice flow.
-
In the Method dropdown, select the New Flow option.
-
Select Start from Scratch option to create a flow from the beginning and click on Create to proceed further.
In case you would like to build an SMS survey, appointment reminder flow, or an autoresponder flow you can select one of the pre-built templates and get a head start.

Creating a Flow popup
- Once done, you will arrive at the Select Trigger Category page where you can configure how this flow will be triggered. You can pick from the displayed trigger categories e.g. channel triggers, system triggers, or custom triggers.

Select Trigger Category window
From here on, you can follow one of the below end-to-end tutorials.
Updated over 1 year ago
