Play Node
Understand what a Play node is and how to configure it
The Play node is used to play audio or voice prompts to the customers at the beginning of a call or during the call. The Play node can be used only within the Voice Node Group.

Play Node
Node Configuration
Drag-and-drop the node on to the visual flow builder and double-click it to open the configuration window.
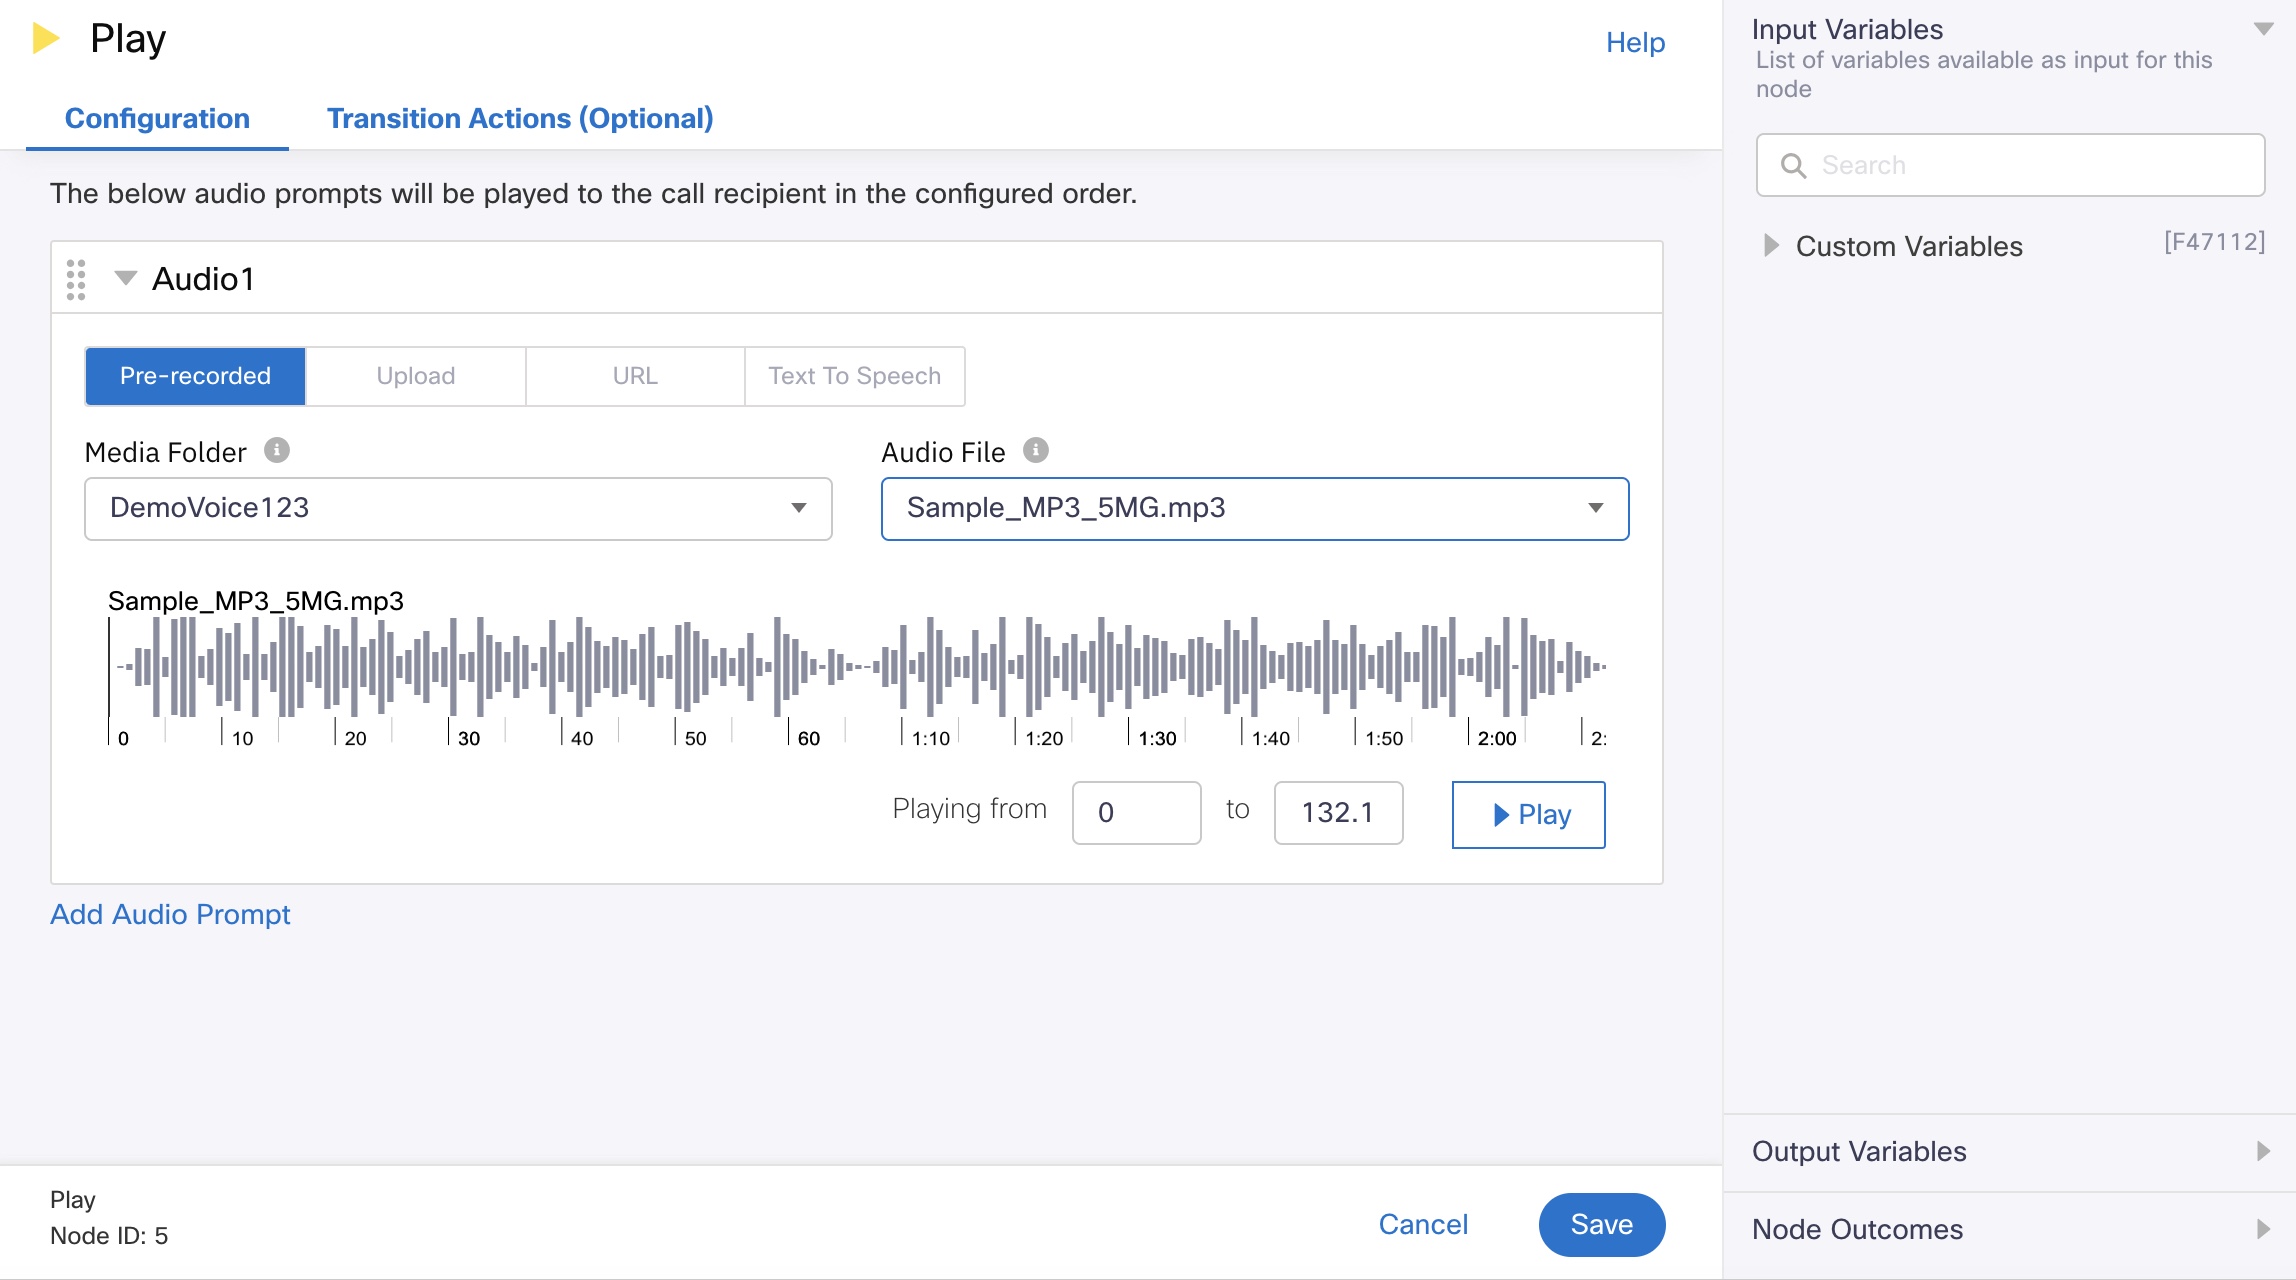
- Click the suitable way you like to use for the audio prompt. Supported ways for configuring audio for the audio prompt are:
(i) Pre-recorded - select the Media Folder and then the Audio File. If the selected audio prompt is available in multiple languages, then you also need to select the required Language. The values in these drop-down lists are pre-populated based on the data available in the Media Manager. You can also select an offset value and click Play to listen to the selected audio prompt.

Screenshot of Play Node Configuration Page.
(ii) Upload - drag and drop an audio file or click Browse to select an audio file from your local system. The supported file types are: .wav and .mp3. The maximum allowed size of the audio file is 20 MB.

Uploading a file
(iii) URL - Enter the URL that contains the audio file. Optionally, you can click Fetch to listen to the prompt during configuration when you using a static URL configuration. The voice file URL can be passed dynamically using a variable as well. Note that Webex Connect supports only HTTP URLs at the moment.
Please refer Supported File Types for Channels to know which files types are supported.

Fetching a URL
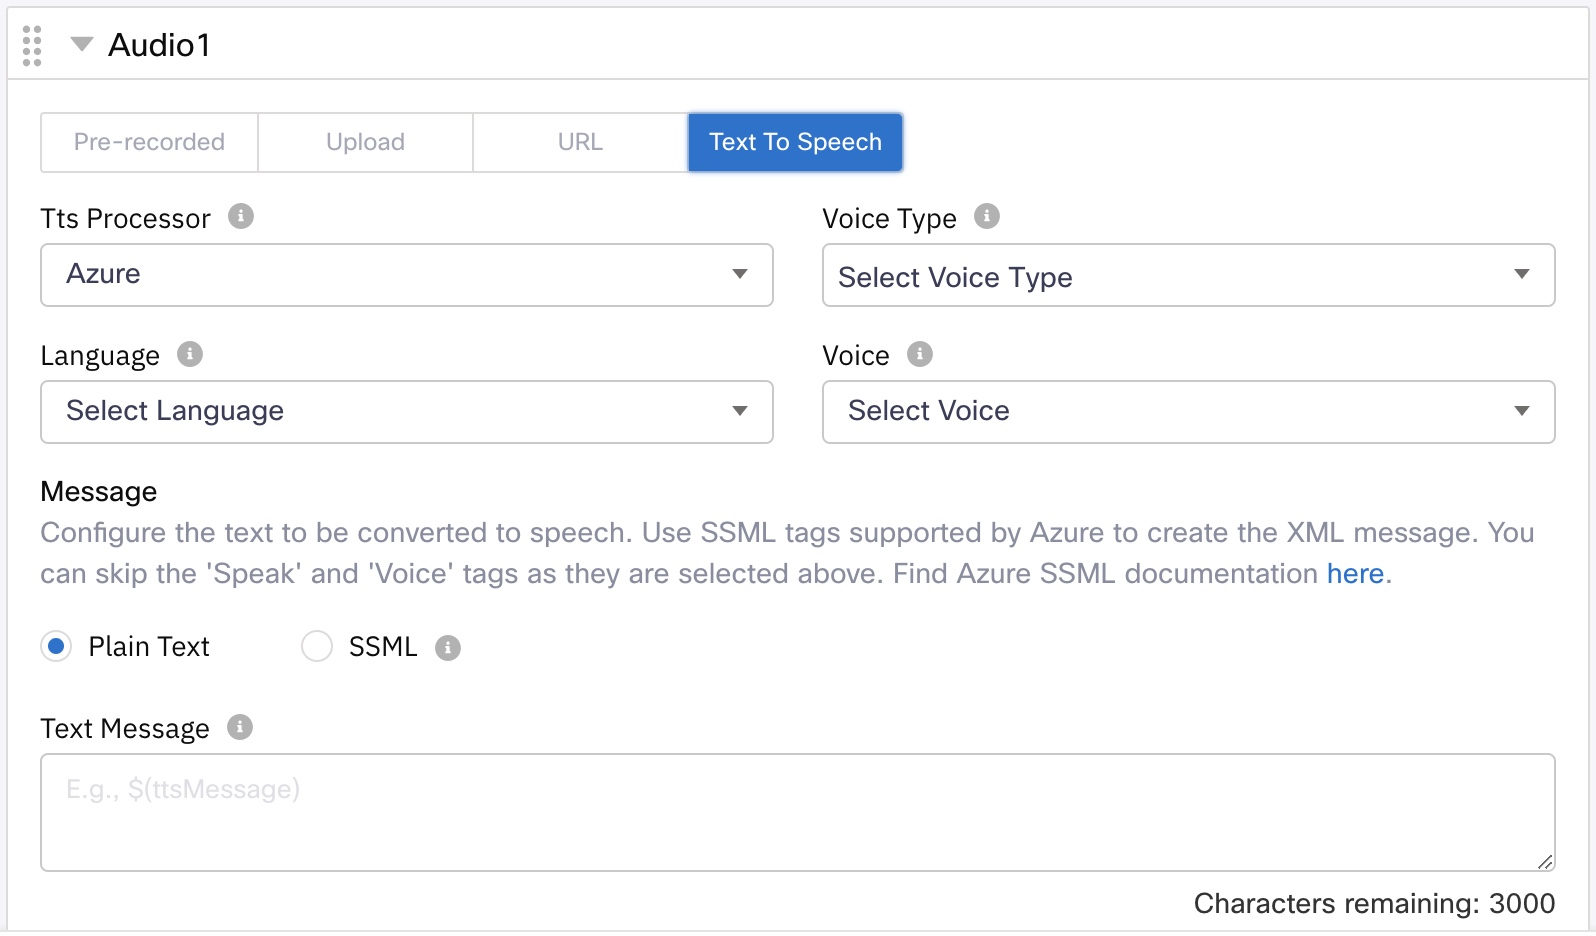
(iv) Text To Speech
- TTS Processor - specify the text to speech processing engine; currently Azure is the supported processor.
- Voice Type - select the desired voice type: neural. Azure offers neural voices. Neural voices have human-like natural prosody and clear articulation of words.
Note
The Standard Voice Type is no longer supported by Webex Connect, as Azure has deprecated it. Hence, you must make sure that all the flows with Text-to-Speech have Neural selected as Voice Type and a corresponding neural voice is selected for the opted language. Otherwise, the flow will not be processed in Webex Connect.
- Language - the list of available languages. Select Dynamic if you want to pass the language at run-time. Ensure that the language code you pass at run-time is of the ISO 639 format. See the supported languages section for a complete list.
- Voice - the required voice. You can also select the voice dynamically at run-time.
- Message - enter the Plain Text or the SSML input that needs to be converted to speech.

Text To Speech
- Plain Text - Enter the text message that you want to convert to speech.
- SSML - If you want to control the text-to-speech output using Speech Synthesis Markup Language, you can select SSML option. SSML is an XML-based markup language that lets you specify how input text is converted into synthesized speech using the text-to-speech service.
Webex Connect offers SSML option in the Play node allowing you to control the text-to-speech
output by automatically adjusting the pitch and tone, pronouncing a word in a specific manner, putting emotions such as saying a phrase excitedly or in a sad tone, contour, etc. Normal punctuation, such as pausing after a period, or using the correct intonation when a sentence ends with a question mark is automatically handled.
Speech Synthesis Markup Language (SSML)
Webex Connect offers the option to submit text-to-speech synthesis requests using SSML tags within ‘Play’, ‘IVR Menu’, ‘Record’, ‘Collect Input’, and ‘Call Patch’ nodes as well.
These voice effects are not available in the Plain Text option.
You can select the options such as Voice Type, Language, and Voice using the fields on the Play node. However, the inputted tags whether partial or complete take precedence over the options selected from the drop-down list box.
Character Limit
The total character limit to enter plain text is 3000 and for XML it's 6000.
The XML can be passed in the text area of Azure TTS to use the SSML elements to improve speech synthesis.
SSML Support
Azure provides SSML support for all available neural voices, hence enabling to create messages using SSML in any of the supporting languages and voices.
See the Azure documentation for a list of supported SSML tags.
- Click Fetch to fetch the audio in the selected language. Click Play to listen to the audio prompt.
- Click Add New Audio and repeat step 1 if you want to add more audios.
- Click Save.
Input Variables
You can see a list of all the flow variables available for use within this node under the Input Variables pane. You can also search for a variable using the Search field.
You can see the list of variables that you explicitly create and configure for this node under the Custom Variables pane. You can also add a custom variable to the flow using the Add New Custom Variable button. For more information, see Custom Variables.
Output Variables
This node has no output variables.
Node Outcomes
You can see the list of possible node outcomes for this node under this pane. You can customize the node labels using the Edit (pencil) icon. The node exits through one of the node edges corresponding to the outcome of the node.
| Node Edge | Node Event/Outcome |
|---|---|
| Success (green) | - onSuccess - the flow exits through this node when the configured audio prompts are played successfully |
| Error (red) | - onError - the flow exits through this node outcome when there is an error in playing the configured audio prompts |
Transition Actions
Use this tab to configure the transition actions for On-enter/On-leave events. However, configuring transition actions is optional. For detailed instructions about configuring the transition actions, see Node Transition Actions.
Updated 11 months ago
