Screen Pop
Understand how to configure Screen Pop in Cisco Webex Contact Center
This node calls Webex CC Screen pop API. While configuring flows in Webex Connect, you’d need to use this node for sending a screen pop message to the agent contact on Webex CC.
Authorization
Refer to section Node Authorizations for more information.
Methods and Outcomes
Here’s a brief description of various methods, and corresponding output variables and node outcomes associated with each of the methods.
Note
- Within the Agent desktop, the screen pop feature only allows one URL to be displayed, and the tab will be labeled Screen Pop.
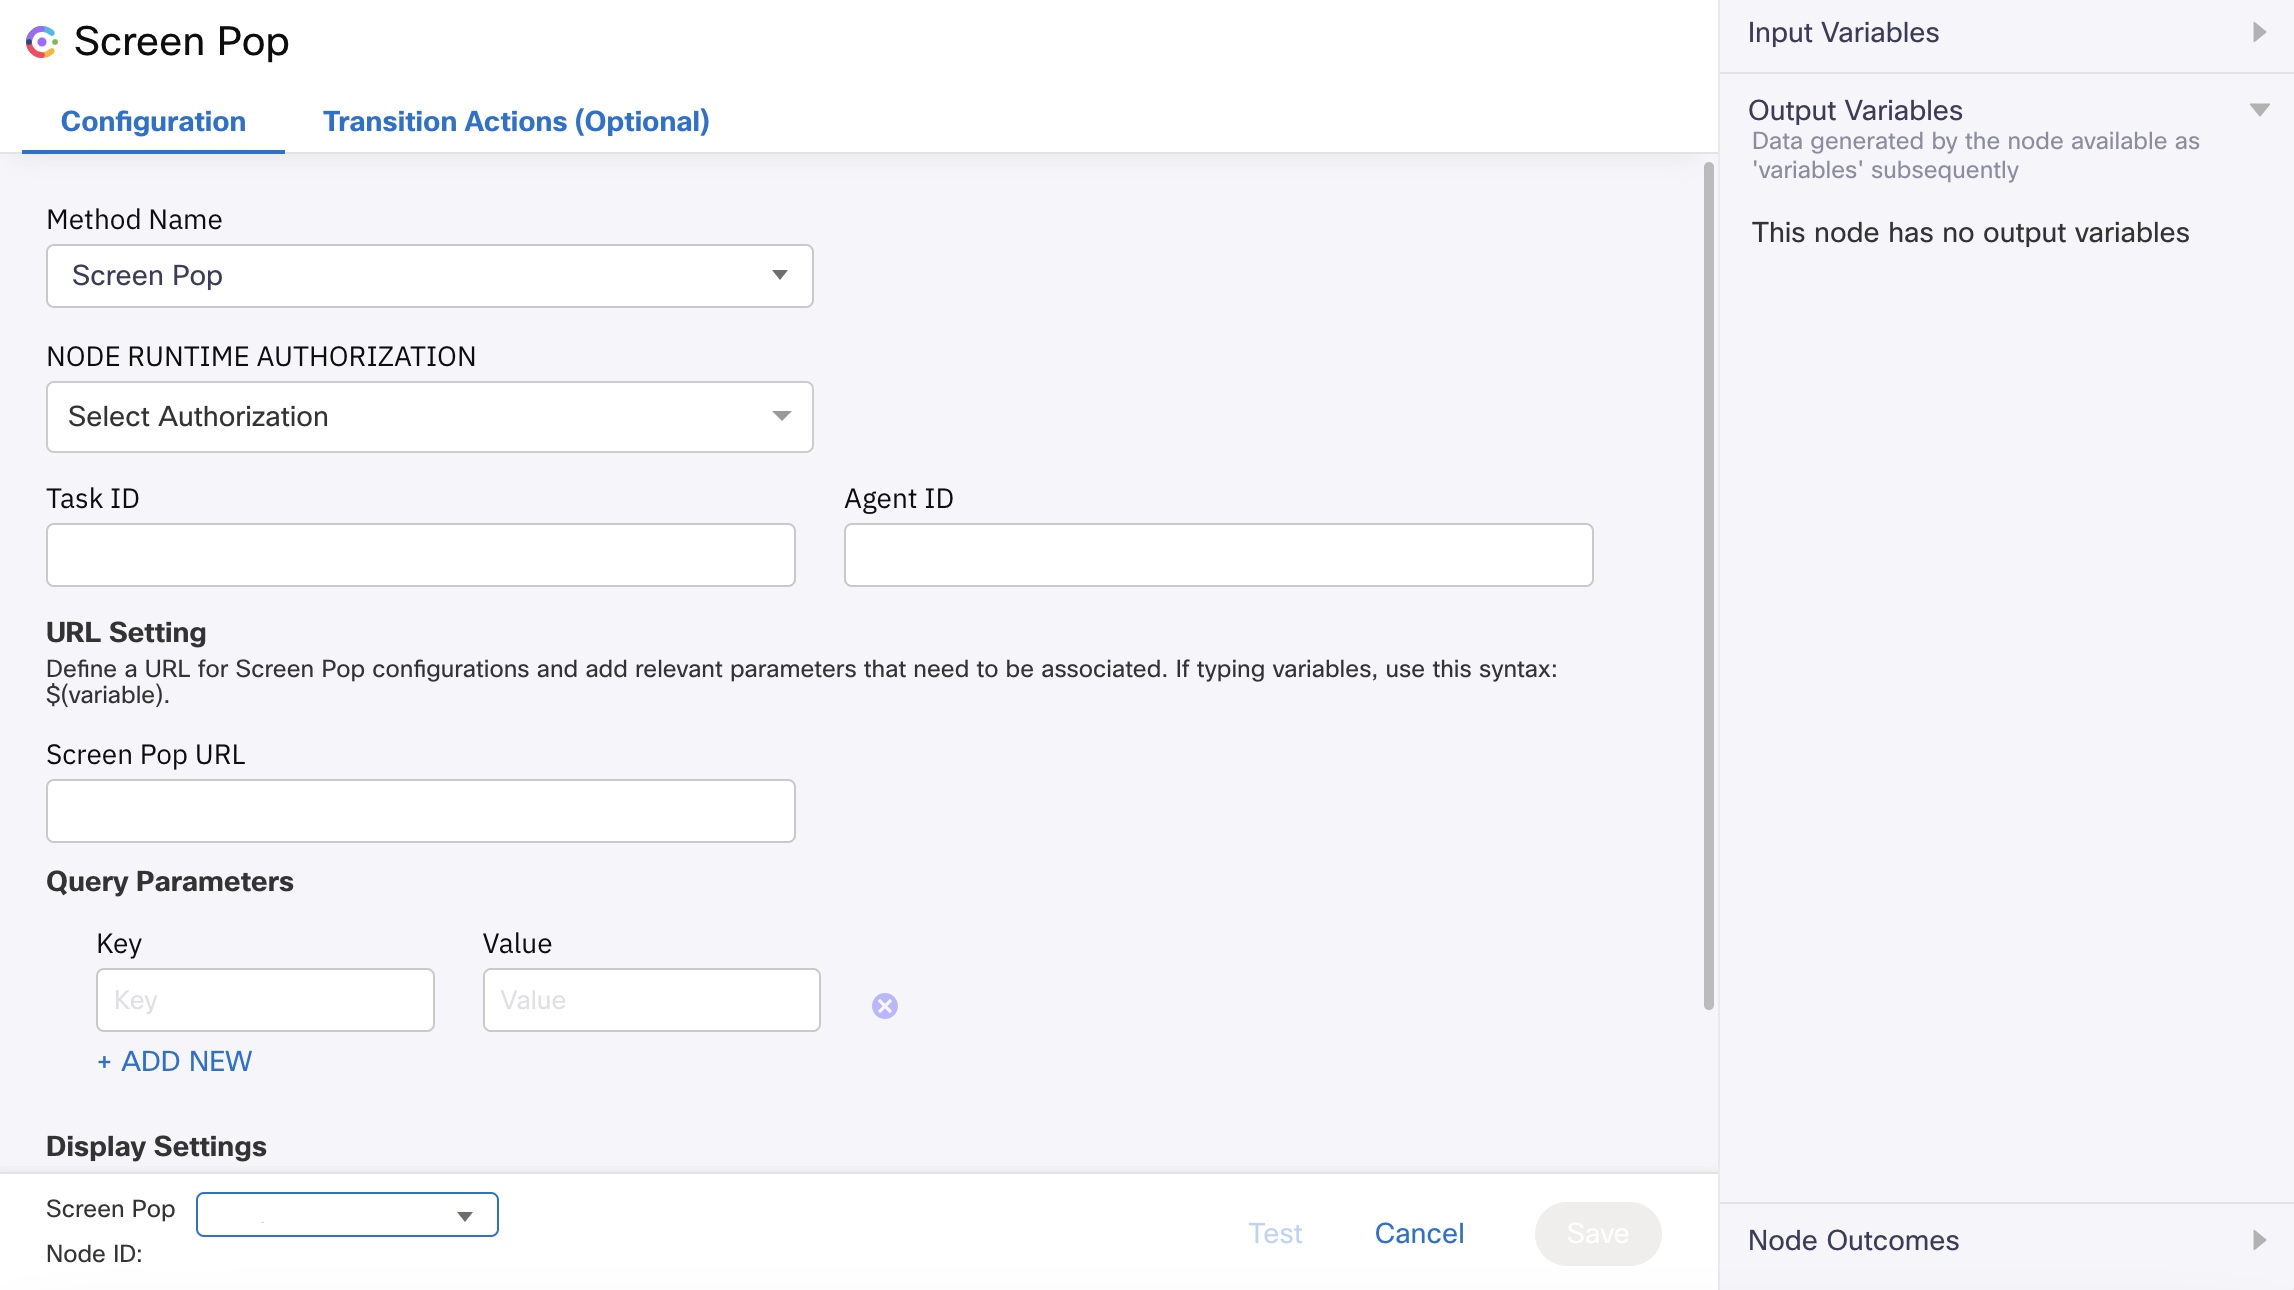
Method Name - Screen Pop

Screenshot of Screen Pop configuration page.
| Method Name | Output Variables | Node Outcomes |
|---|---|---|
| Screenpop | None | onInvalidData onError onInvalidChoice onauthorizationfail Error onScreenpopSuccess onScreenpopFailure Queued * onTimeout |
| Channel | Field Value |
|---|---|
| All channels | TASK ID - $(flid) AGENT ID - $(conversationId) SCREENPOP URL SCREENPOP LOADING URL |
| Input Variables | Output Variables | Versions |
|---|---|---|
| TASK ID - $(flid) _ Flow transaction id from the state node is converted into UUID in the evaluate node, and passed to create task node, for creating task with flid as task id AGENT ID - $(n2.webex.agentId) _ AgentId from the output variables of the routed event is the Agent Id SCREENPOP URL _ Enter the URL to which the agent must be navigated QUERY PARAMS - _ Enter The additional key-value pairs that must be sent to the agent Display Settings - Screen Pop Loading Behavior * Select the required screen pop loading behavior from the list: Inside Desktop, New Browser Tab, and Existing Browser Tab | None | v1.1 and v1.0 |
Note
When the variable is selected from the previous node output variables, the node Id will be the prefix for the variable. For example, if sms.serviceNumber is an output variable of start node (node Id 2), then the variable becomes $(n2.sms.serviceNumber).
Note
A user can use different screen pops using a branch node in the flow, and configure the branch node with different conditions and connect them with each screen pop.
The variable labels will not be translated in the agent desktop.
Updated 19 days ago
