Transfer conversation
Understand how to configure a Transfer conversation node.
While configuring flows in Webex Connect, you need to use this node to transfer the conversation to a team or skill queue. This node utilizes the Transfer conversation API from Webex Engage.
Route to a Team queue
You can use this node to transfer the conversation to a team's queue.
Configuration
To configure a Transfer conversation node, follow these steps:
- Drag and drop the Transfer conversation node from the Node palette from the left side of the screen.
- Double-click the Fetch team working hours node to view the configuration settings.

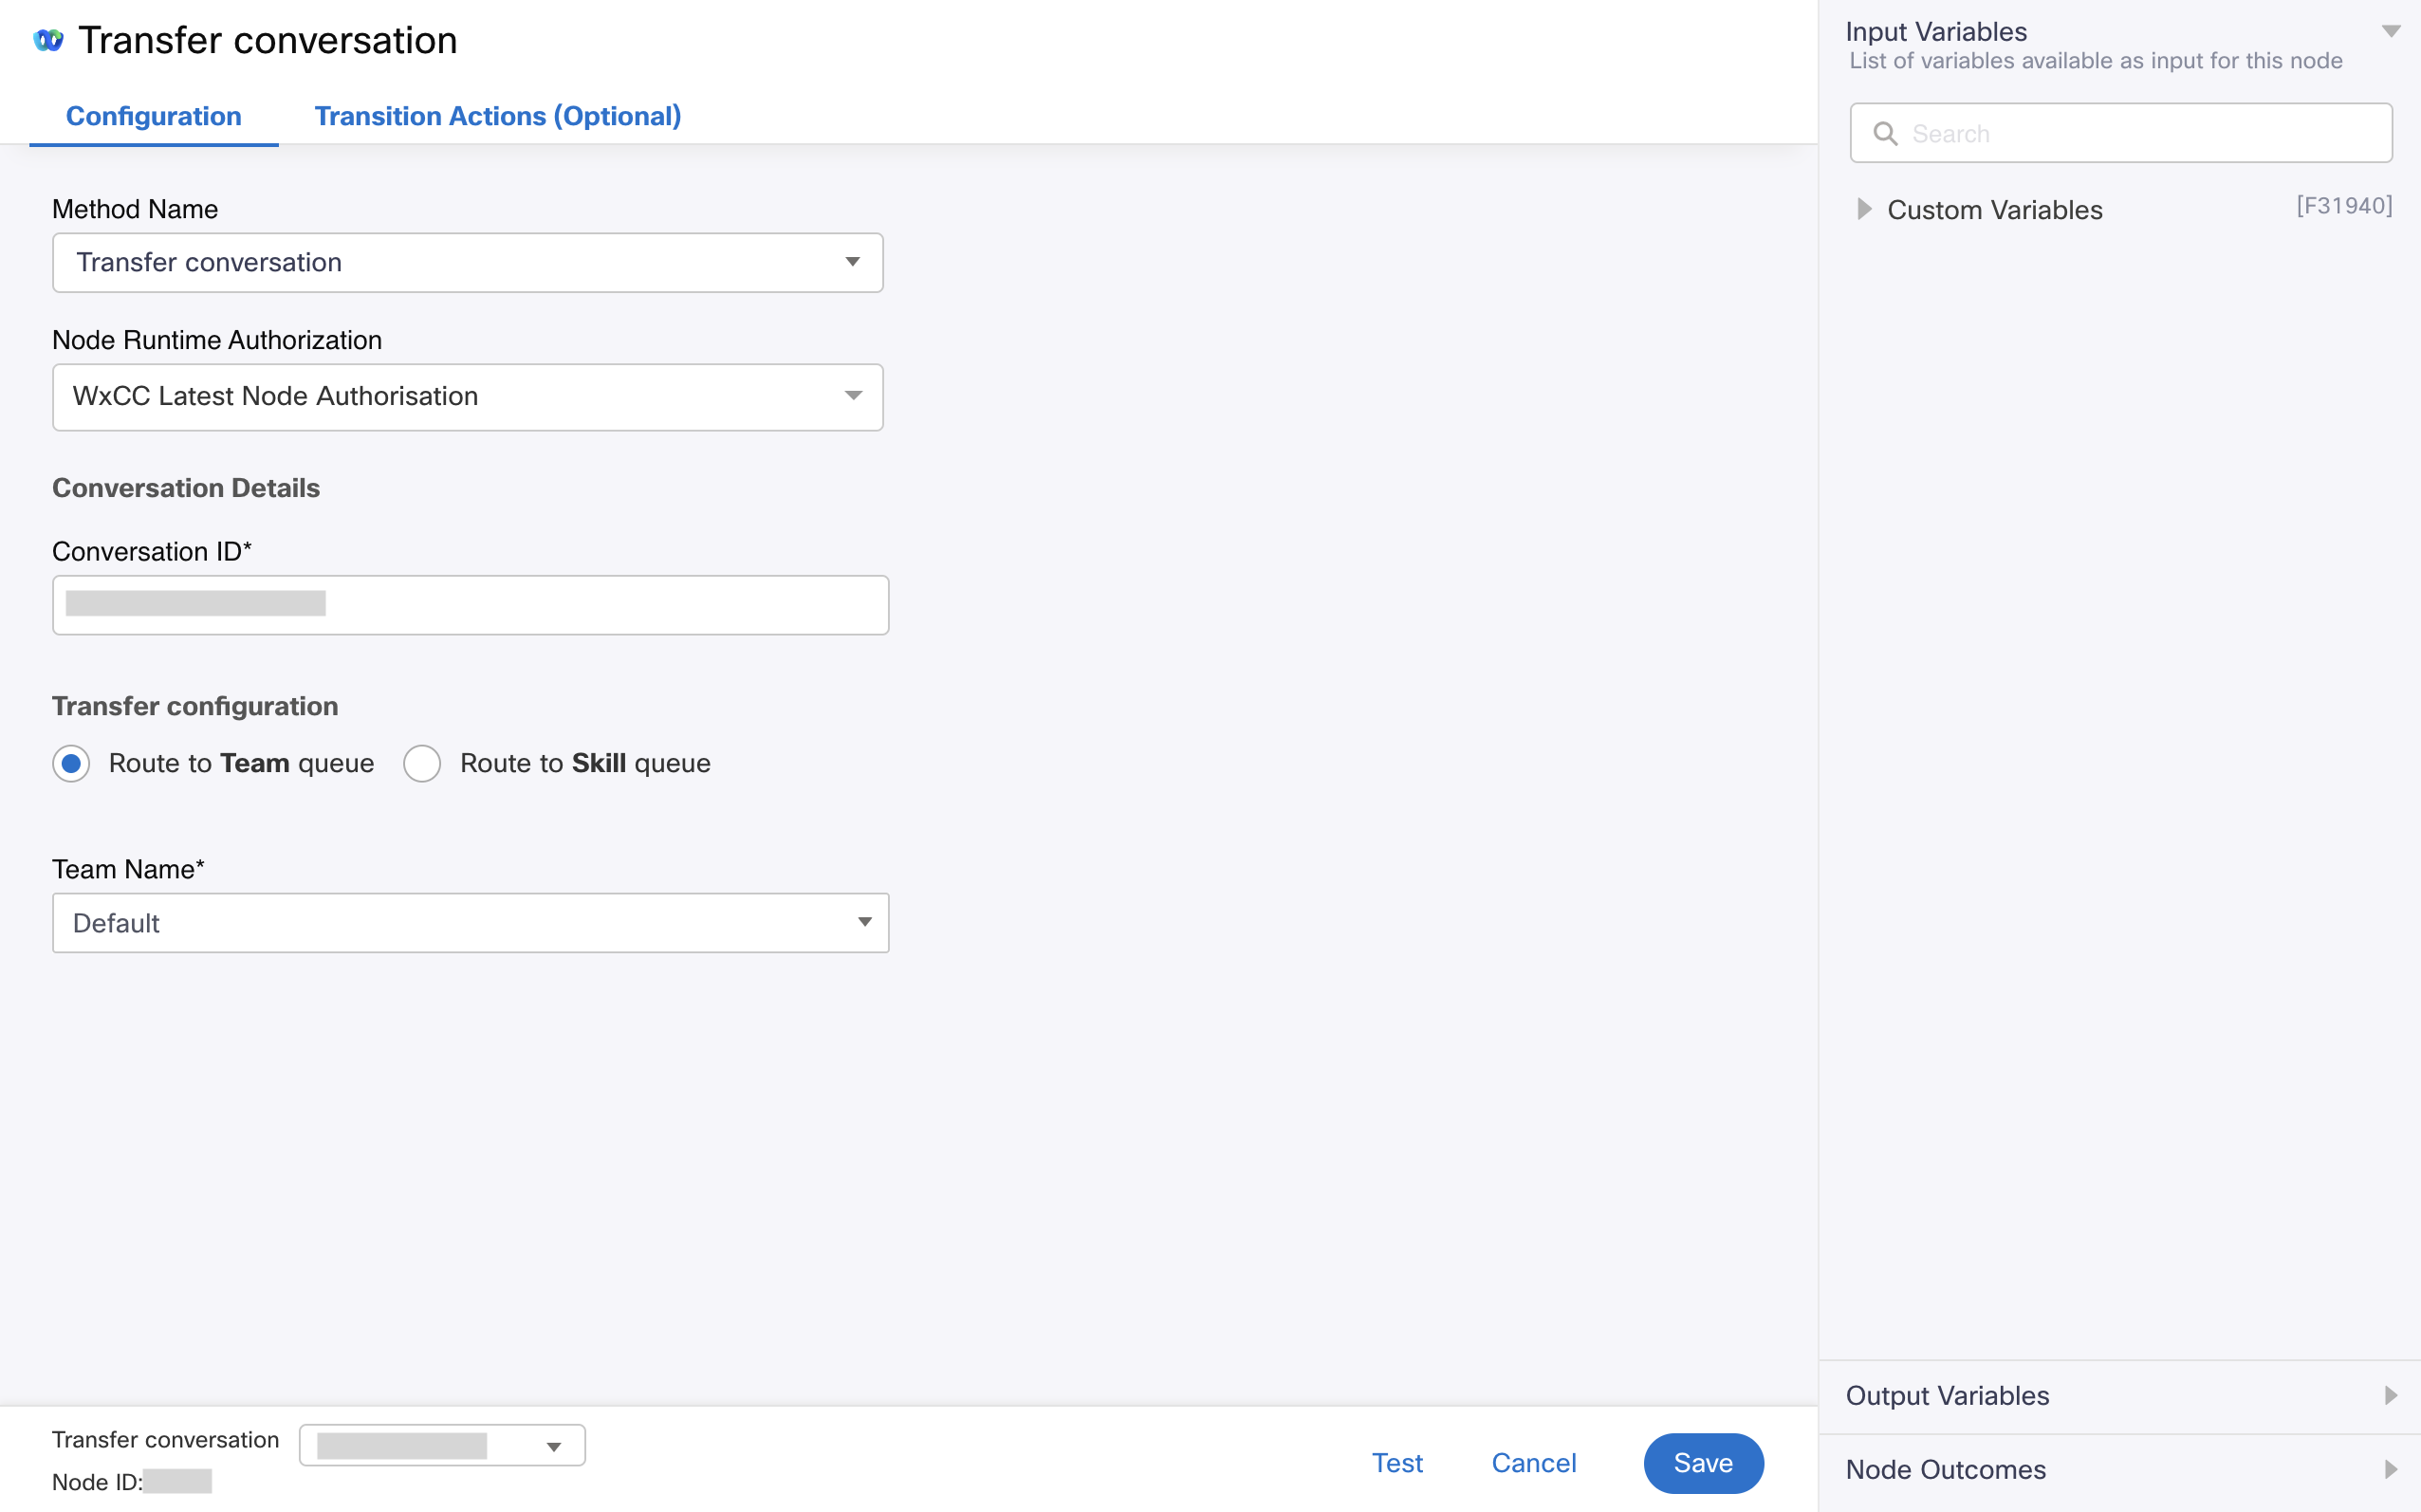
Screenshot displaying the Configuration Settings for Transfer conversation node
- Choose Transfer conversation from the Method Name drop-down list.
- Choose Authorization from the Node Runtime Authorization drop-down list.
We recommend you set Authorization to a Default Authentication configured in WxEngage's Integrations screen under WxConnect's Integrations. Once you re-authenticate from the Integrations screen, all your nodes across flows will pick up the updated token. - In the Conversation ID field, enter an appropriate variable that contains WxEngage's conversation ID (e.g.$(n6.conversationId)).
- Under the Transfer configuration section, select Route to Team queue radio button.
- Choose a team from the Team Name drop-down list to transfer the conversation.
- Click Save.
Output variables
| Variable | Description |
|---|---|
transId | API request identifier generated by WxEngage |
Node outcomes
| Category | Outcome | Description |
|---|---|---|
| Success | onConversationTransferred | Node execution successful |
| Errors | onConversationTransferFailed | Could not transfer the conversation due to an error from WxEngage's API |
onTimeout | Could not receive an API response from WxEngage within the agreed time-out | |
onInvalidData | Invalid data configured in WxConnect node | |
onError | Error in WxConnect's middleware services | |
onInvalidChoice | Invalid choice | |
onauthorizationfail | Failed to Authorize successfully. We recommend you to recheck your Node Authorization configurations in the Authorize Integration section | |
Failure | Any other run time failures |
Route to a Skill queue
You can use this node to transfer the conversation to a team skill queue.
Configuration
To configure a Transfer conversation node, follow these steps:
- Drag and drop the Transfer conversation node from the Node palette from the left side of the screen.
- Double-click the Fetch team working hours node to view the configuration settings.

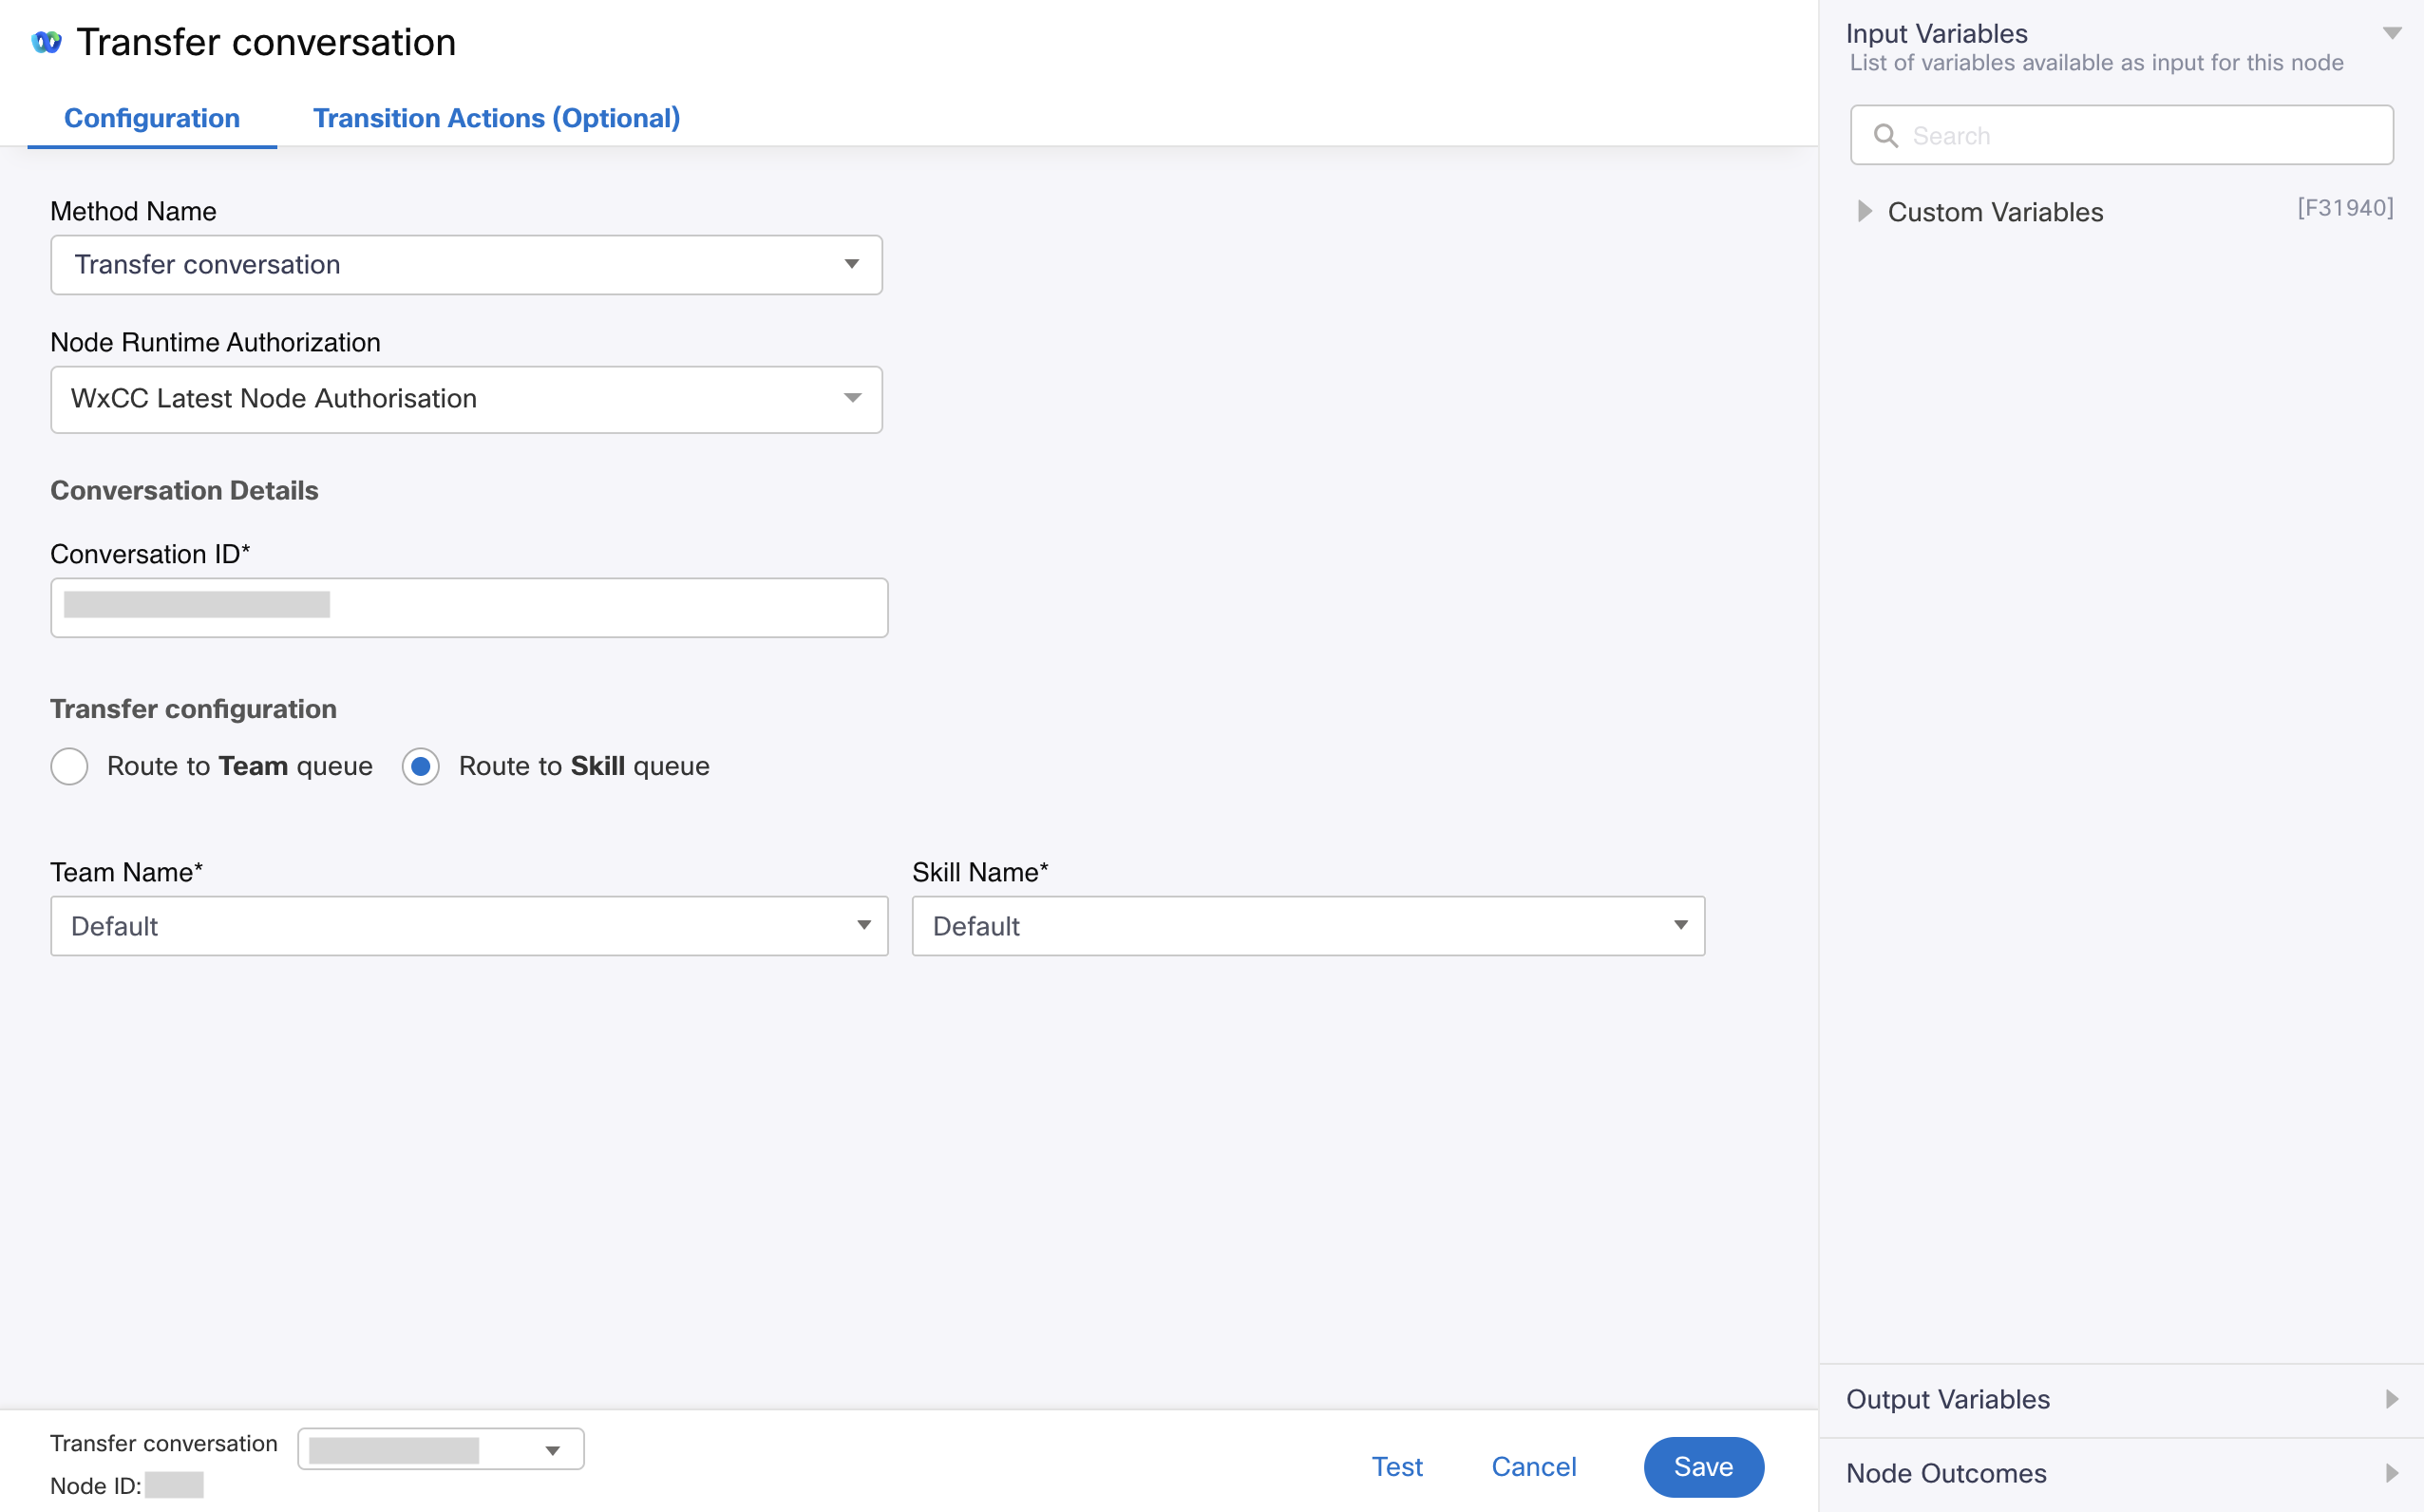
Screenshot displaying the Configuration Settings for Transfer conversation node
- Choose Transfer conversation from the Method Name drop-down list.
- Choose Authorization from the Node Runtime Authorization drop-down list.
We recommend you set Authorization to a Default Authentication configured in WxEngage's Integrations screen under WxConnect's Integrations. Once you re-authenticate from the Integrations screen, all your nodes across flows will pick up the updated token. - In the Conversation ID field, enter an appropriate variable that contains WxEngage's conversation ID (e.g.$(n6.conversationId)).
- Under the Transfer configuration section, select Route to Skill queue radio button.
- Choose a team from the Team Name drop-down list to transfer the conversation.
- Click Save.
Output variables
| Variable | Description |
|---|---|
transId | API request identifier generated by WxEngage |
Node outcomes
| Category | Outcome | Description |
|---|---|---|
| Success | Success | Node execution successful |
| Errors | onTimeout | Could not receive an API response from WxEngage within the agreed time-out |
onInvalidData | Invalid data configured in WxConnect node | |
onError | Error in WxConnect's middleware services | |
onInvalidChoice | Invalid choice | |
onauthorizationfail | Failed to Authorize successfully. We recommend you to recheck your Node Authorization configurations in the Authorize Integration section | |
Failure | Any other run time failures |
Updated 6 months ago
