Skype for Business Integration - Deprecated
Webex Connect offers a pre-built connector to make it easy for you to integrate with Skype for Business. This enables you to use Skype for Business as a channel for employee support through third-party contact center software (such as Cisco Contact Centre Enterprise or Enghouse Interactive) integrated with Webex Connect.
Webex Connect provides two authentication mechanisms for Skype for Business integrations:
a. Using Office 365 user credentials.
b. Using server details and Fully Qualified Domain Name (FQDN).
Prerequisites
In case, you want to use your Office 365 credentials for authentication, ensure the following:
- Create an Azure Active Directory application.
For detailed instructions refer to creating an Azure application.
Webex Connect uses Unified Communications Web API 2.0 to create a connector. This is a key component to communicate with users of Skype for Business Online.
Create and Configure Skype for Business Integration
To create and configure Skype for Business integration with Webex Connect:
- Sign in to Webex Connect.
- Go to Assets > Integrations > Add Integration.
- Select the Skype for Business integration option.
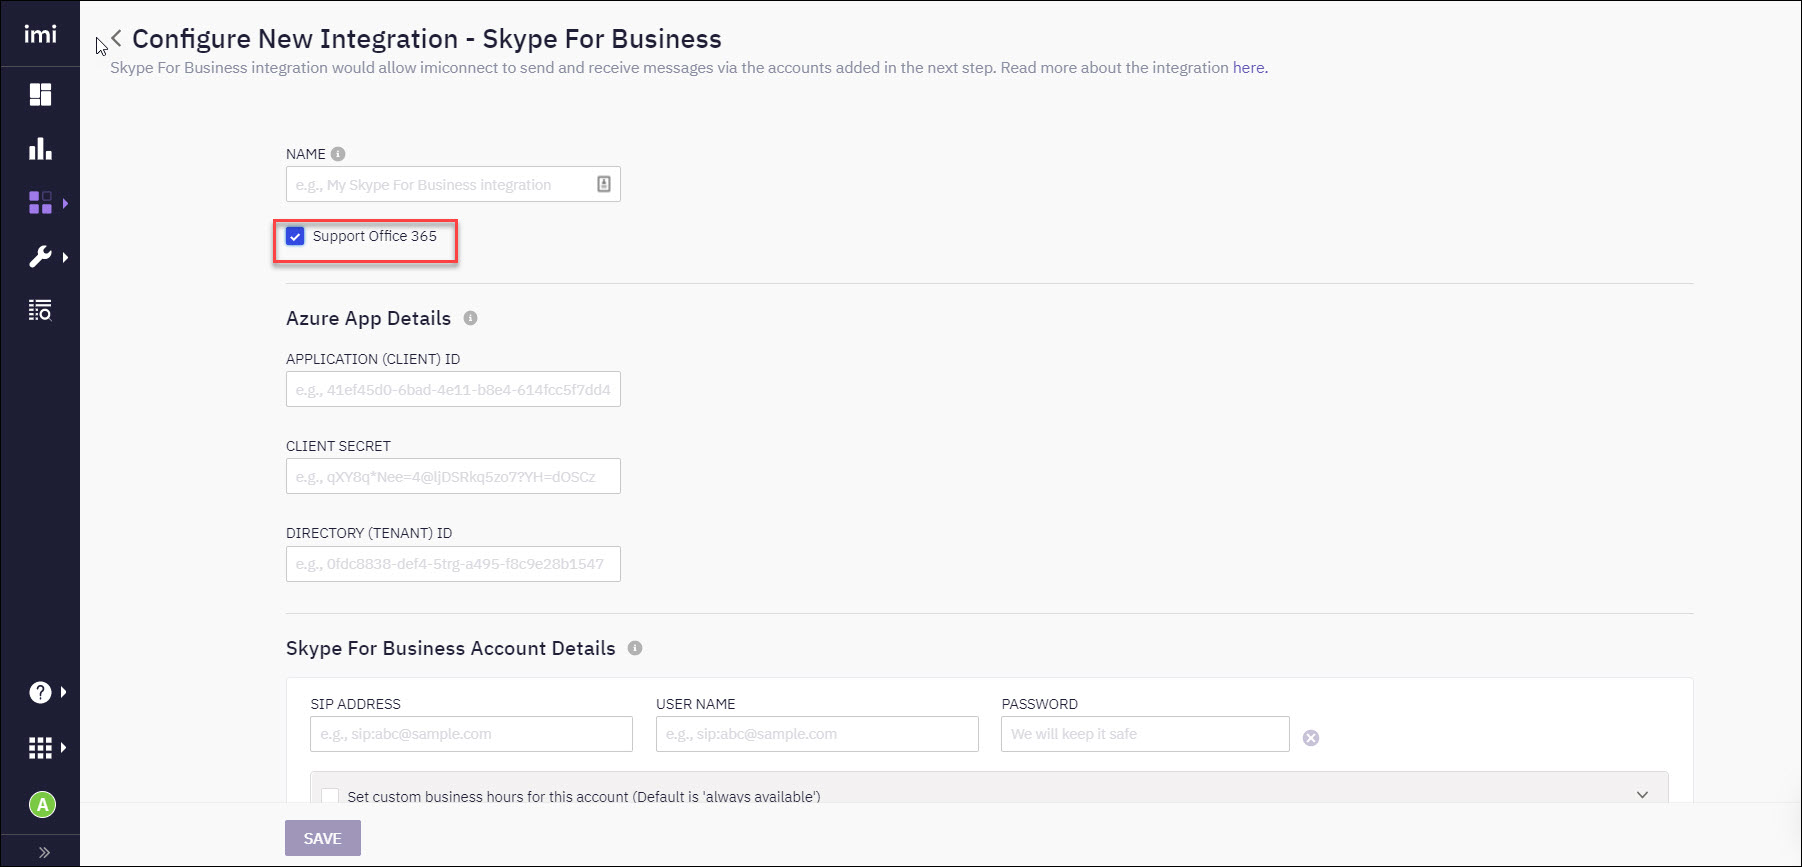
This takes you to the Configure New Integration – Skype for Business page. - Enter a Name for the integration.

Skype For Business Configuration Screen
- Select the Support Office 365 checkbox if you want to use Office 365 credentials for user authentication.
Follow 6a if you want to use Office 365 credentials for authentication. Alternatively, follow 6b if you want to use server details and FQDN for authentication. - Perform either one of these steps based on your authentication mechanism.
6a. Enter the following Azure App Details. Webex Connect uses these details to connect to the Azure application and get an access token. You need to provide these details only if you enable the Support Office 365 option:
a. Client ID: a unique Client ID auto-generated by Azure after creating the application.
b. Client Secret: a secret string that the application uses to prove its identity when requesting a token. It is also referred to as an application password.
c. App ID: the application ID auto-generated by Azure after creating the application.
6b. Make sure you have not selected the Support Office 365 checkbox. Enter Server Details. The server details allow you to establish a connection with Skype for Business.
a. Fully Qualified Domain Name (FQDN): your domain. For example,www.yourcompanysfb.com.
b. Port Number: port number for the domain. - Enter the details of Skype for Business Account that you want to use for sending and receiving messages (e.g., it can be the designated Skype for Business account for internal IT support):
a. Domain: a domain name you want to use for your business. For example,yourcompanychat. You can see this field only if you have not enabled the Support Office 365 checkbox.
b. SIP Address : a unique address for your business. For example,[email protected].
c. Username: the username of the business account.
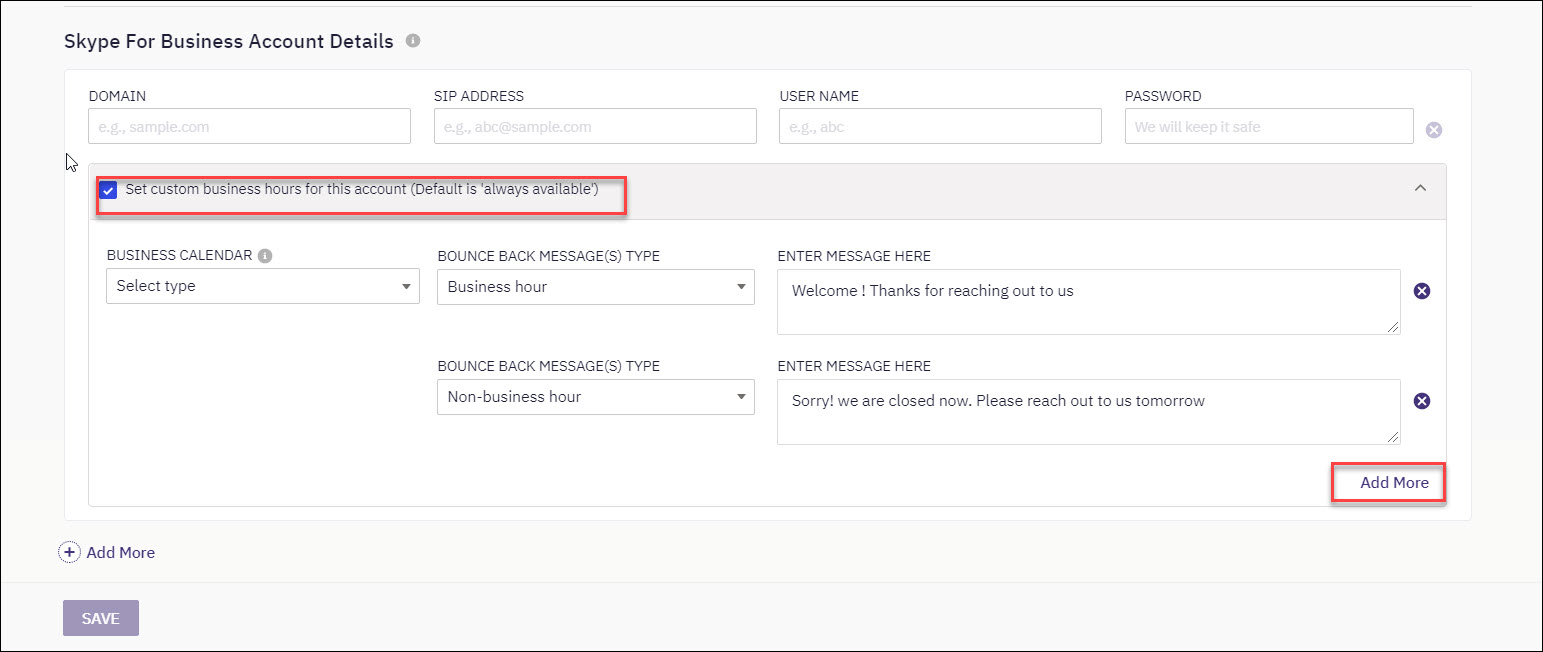
d. Password: the password to sign in to the account. - Select Set custom business hours for this account (Default is ‘always available’), if you want to configure specific business hours. If you do not select this option, your account always appears as
available.
As a Skype for Business account can be used for communications across geographies, users across multiple time zones may communicate with the configured account anytime. A Business Calendar handles such scenarios so that users can send and receive messages as per the applicable business hours.

SFB Account Details
- Enter or select the following details. You need to do this only if you have enabled custom business hours in the previous step.
a. Business Calendar – select a calendar from the drop-down list box. You can create this calendar using the Business Calendar app in the App Tray.
b. Bounce Back Message(s) Type – select the appropriate message type from the drop-down list box.
c. Message – enter the message that you want to send the user for the selected message type.
d. Add More – repeat these steps to add more message types. - Click Add More to add another Skype for Business Account in the integration. You can add multiple accounts within the same integration.
You can update or modify the account details at any point after the completion of integration. - Click Save to complete the integration.
Note: This integration is available only in the cloud version of Webex Connect.
Updated 13 days ago
