Creating a Custom Variable on Webex Connect
Custom variables are user-defined variables that can be used to store required data during the flow execution.
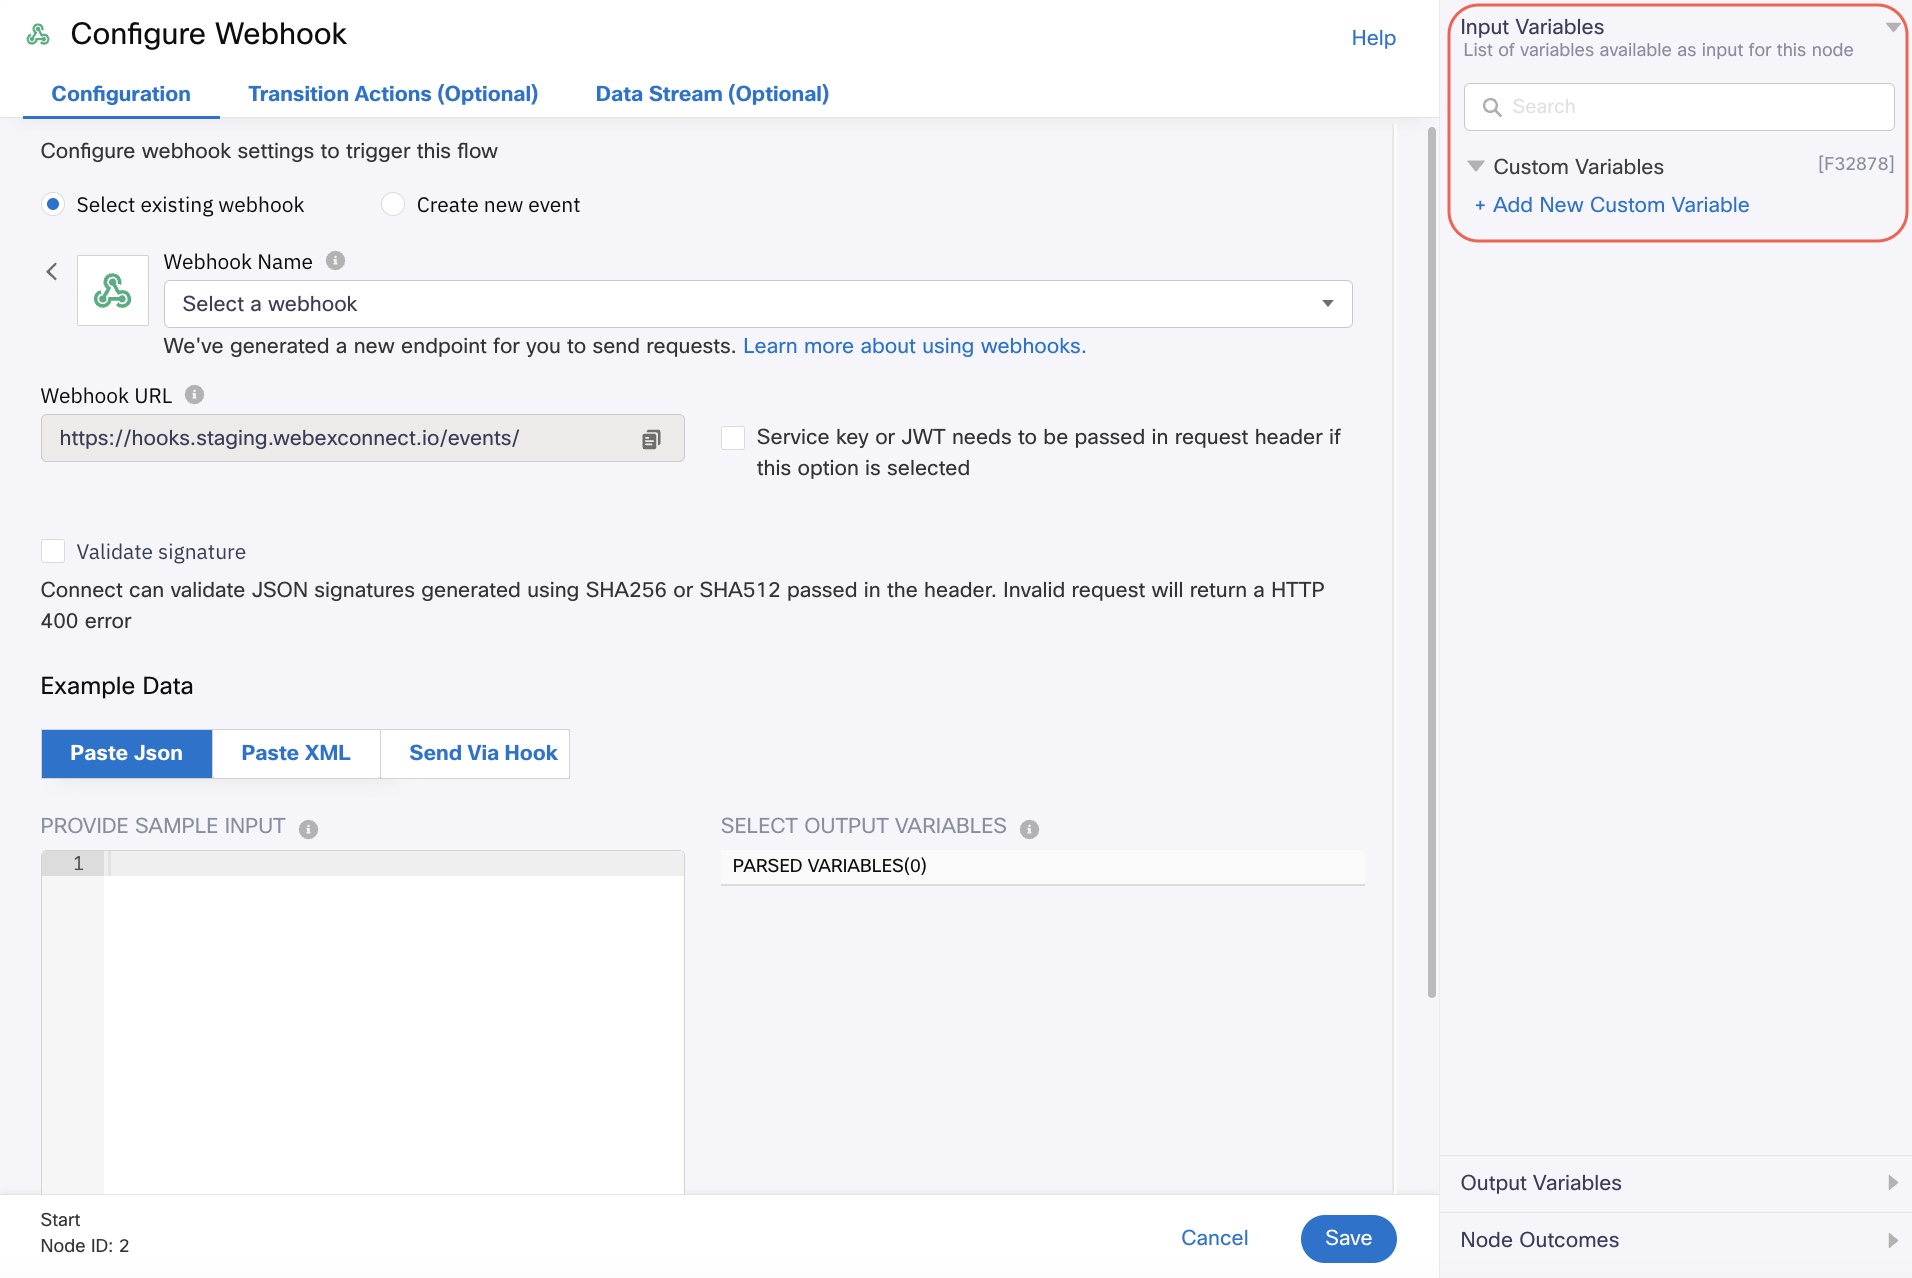
When you open the configuration settings window of any node on the flow canvas, the list of variable types is shown on the right panel (see Input variables, Output variables, and Node outcomes). Custom variables dropdown is shown under the Input variables section.
Note
Please note that all flow variables are case-sensitive.

Steps to create a custom variable.
Creating a custom variable
- In the Input variables pane, click +Add new custom variable underCustom Variables.
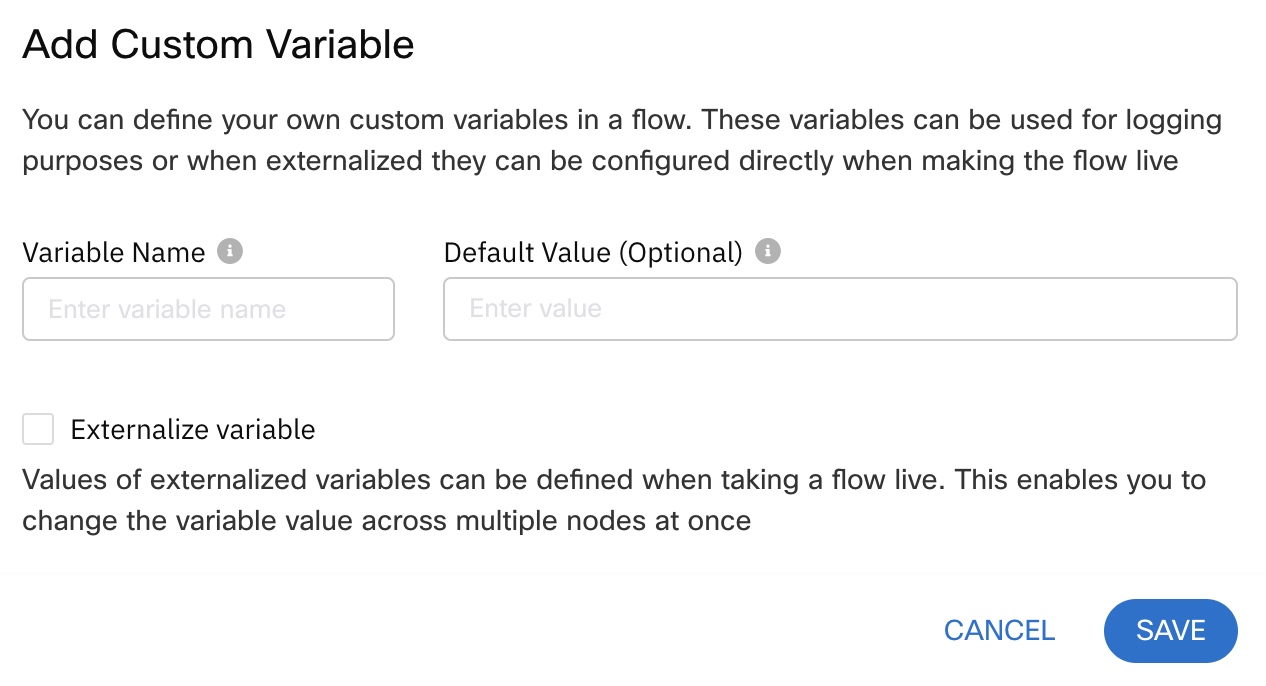
A pop-up to add a custom variable is displayed as below:

Steps to create a custom variable.
- Enter the Variable Name and Default Value (Optional).
- Optionally externalize the variable.
Note
- Variable name can have Alpha Numeric values(for e.g; channel13). We do not support the use of special characters in the variable name.
- When a variable is to be referenced in the Evaluate node, it should mandatorily be referenced in one or more preceding nodes in the flow, either in the Configuration tab or the Transition Actions tab for the variable to populate its value during flow execution.
Externalizing a variable
Externalizing a variable allows you to you defer the process of assigning a value to the variable until the launch of the flow. This allows you to assign or configure the values for all externalized variables at once during the flow launch.
Updated about 1 year ago
