Single Sign-On (SSO) Using SAML
The prerequisites and configuration of SSO settings on the platform.
The Webex Connect platform supports web-based Single Sign-On (SSO) using the Security Assertion Markup Language (SAML). This feature allows Webex Connect enterprise clients to enable their employees to log in seamlessly using their existing organizational credentials.
Single Sign-On (SSO) is an integrated feature of Webex Connect and must be set up to allow users to authenticate via their organizational credentials. Please contact your account manager to assist with enabling the SSO feature for your organization.
SSO for tenant Owner
Owner can login via SSO or password depending on the SSO configurations.
Only an owner can configure the SSO settings and enable SSO for various users.
Prerequisites
You must have the Identity provider details like IDP (Identity Provider) login URL, Entity ID, and IDP certificate for successful user invitation. Also, make sure that the users' email addresses are present in IDP. The '.cer' certificate files will be accepted for both, Identity Provider Certificate, and the Assertion Decryption Certificate.
Obtain the following assertion data from the Webex Connect service provider:
| Attributes | Values | Description |
|---|---|---|
| mobileno | user.telephonenumber | The telephone number of the user |
| loginid | user.userprincipalname | The email ID of the user |
| firstname | user.displayname | The first name of the user |
| Unique User Identifier | user.mail | The email ID of the user |
Attributes in assertion data
The attributes are case-sensitive and should be entered in the displayed cases above.
SSO Settings
To configure the SSO settings, follow the steps given below:
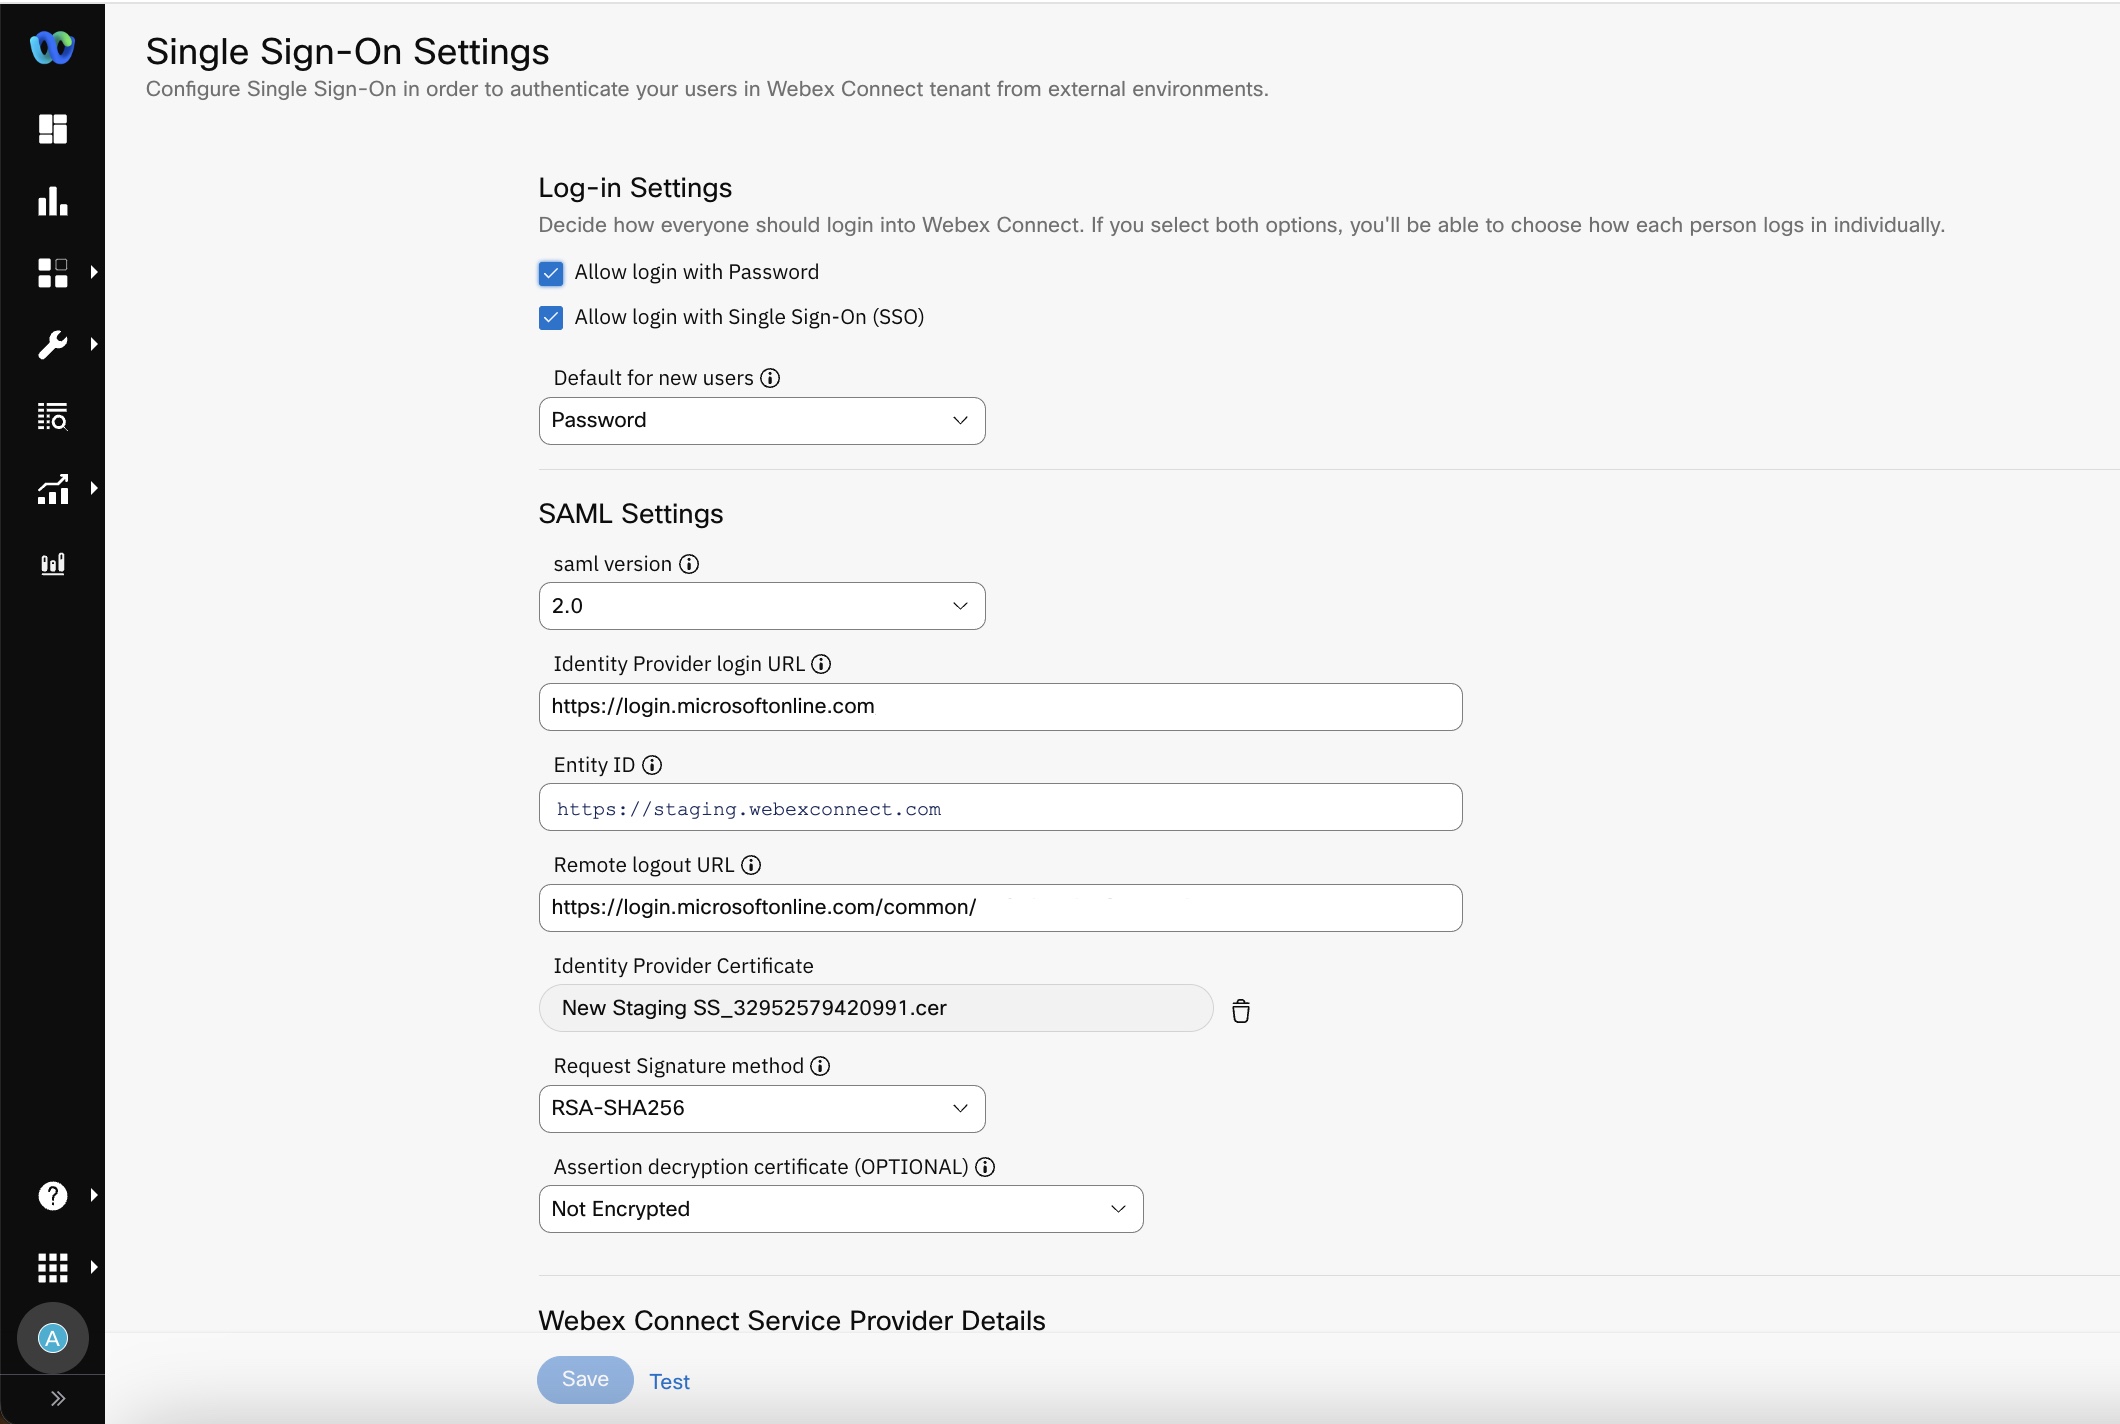
- Navigate to Settings > Single Sign-On Settings.
- Select from the following options under Log-in Settings. The settings you select here are applicable to all users across the platform, except for the owner.
- Allow login with password - this option allows users to log in using an email ID and password-based basic authentication.
- Allow login with Single-sign on (SSO) - this option allows users to log in using their existing organizational (Identity provider) credentials as per single sign-on configurations.
If you select both the options, you can choose how each user logs in individually.
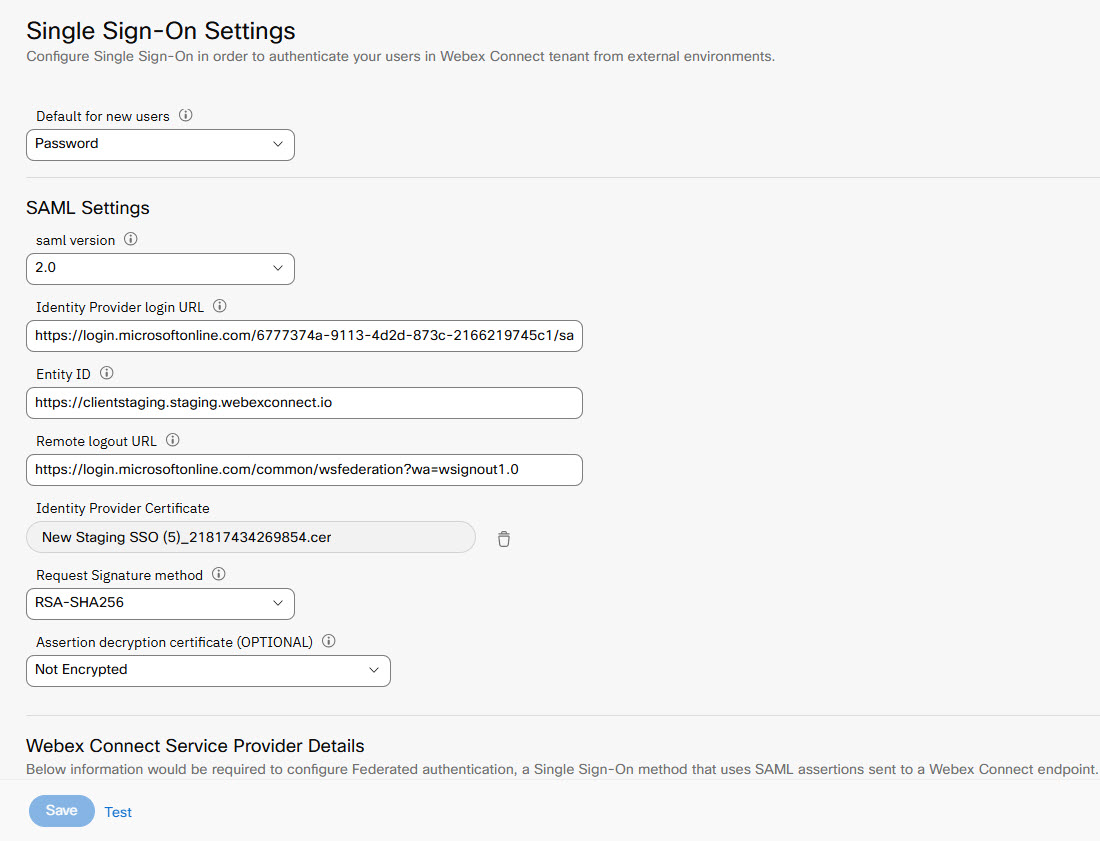
- Select the Default Authentication For New Users. The available options are SSO and Password. The option you select here will be the default login mechanism for all the new users created from now on.

SSO Settings
- Select the SAML Version that the identity provider uses.
- Provide the Identity Provider Login URL. This is the URL to which Webex Connect sends a SAML request to start the login sequence.
- Provide the Entity ID. This is the unique URL that identifies your SAML Identity Provider (IDP). This entity ID must be the same as the
<saml:issuer>attribute in the SAML assertion. You will get this URL at both the IDP end as well as at the service provider end but you would need to use only one of these URLs and use the same URL at both places. - Select a file for the Identity Provider Certificate.
- Select the Request Signature Method. This is the hashing algorithm for encrypted requests. The supported methods are RSA-SHA1 and RSA-SHA256.
- Optionally, if the identity provider encrypts SAML assertions, upload the Assertion Decryption Certificate.
- Provide Webex ConnectService Provider Details. These details are required to configure the federated authentication, a single sign-on method that uses SAML assertions sent to an Webex Connect endpoint.
- Assertion Customer Service URL - the URL that the identity provider uses to verify SAML messages from Webex Connect.
- Identifier - the unique identifier for your tenant. Use it as
entity idin the identity provider configuration.
- Click Save to save the configuration details.
Inviting New Users
After you have configured the SSO settings, when you invite new users, an email will be sent for the invitation. If you have selected SSO as the default option, the new users do not need to create a password. The name and phone number of such users are captured during their first login.
Password Reset
The password reset option is not applicable for users who are configured to login with SSO.
Password vs SSO
The following image illustrates how login works for existing and new users with password and SSO:

Image illustrating login processes for existing and new users with password and SSO
Testing your SSO configuration
Webex Connect allows you to test your SSO configuration by simply clicking a Test button after you have configured the SSO settings. Enter the Login Email ID of the user for whom you have enabled and want to test the SSO option for.
Note
The 'Allow login with SSO' option should be selected to test SSO.
Follow the below steps to test SSO:
- Click Allow login with Single Sign-on (SSO).
- Select SSO from 'Default for New Users' option to enable SSO for the new users.
- Configure the required settings.
- Click Test.
The Test Single Sign-On page appears.

Test SSO
- Enter your Test Email ID (see below).
The entered user ID should match with the user’s records provided to the IDP (Identity Provider) in order to successfully login. - Click Test.

Test Single Sign-On
The user will be directed to the login page of the entered ‘Identity Provider’s Login URL’. In case of a successful login, the user will be provided a ‘test session’ with Webex Connect.
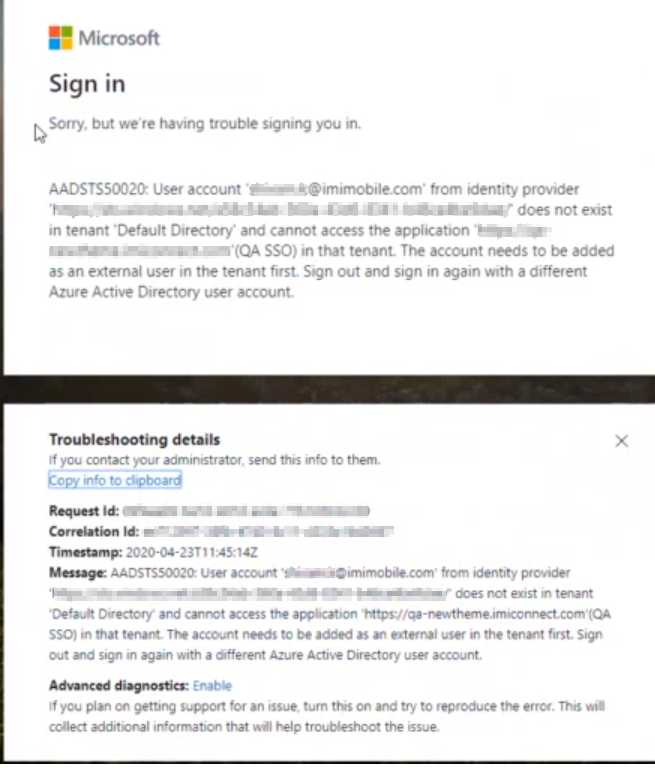
In case, entered data do not match (e.g. due to the wrong id), an error message is thrown as received from IDP. For example:

Screenshot displaying error message for mismatched data due to wrong ID, as received from IDP.
Remote Log-off for SSO
Webex Connect has introduced Remote Logout functionality which allows a user that is active on multiple platforms/products to logout at once from everywhere simply from a single platform.
In order to enable remote logout, you need to provide “Remote Logout URL” under the SAML Settings on the Single Sign-On Settings page.
Remote logout URL is used to terminate session at IDP's end when the user logs out of Webex Connect(SP).”
On successful logout from Webex Connect for SSO enabled users, a session termination request is sent on remote logout URL.
Remote logout URL is used to terminate session at IDP end when user logs out of Webex Connect(SP).
Webex Connect (SP) will not delete any other active SP's session (other than Webex Connect when SSO user logouts of Webex Connect) and IDP should take action to delete other SP's sessions to achieve Single Logout.
Updated 8 months ago
