Intent Node
Understand what an Intent node is and how to configure it
This node is currently in controlled beta. Please get in touch with your account manager if you would like to access this node.
User Intent, also known as search intent or query intent, is the way of recognizing and classifying what a user wants to find or means when they entered their query.
The Intent node provides a no-code interface to configure user intents by feeding training data and generating a machine learning (ML) model corresponding to it. The node can identify the primary intent from incoming messages and selects the appropriate branch for execution based on the message. An Intent node can have up to 100 intents configured in it and each intent has a branch associated with it. In case none of the configured intents match with the message, the node will proceed through a default 'none of the above' branch.
Data that is fed to train the ML model comprises different sentences or phrases that a customer can use to express intent. These sentences or phrases are called Utterances.
Intent Node
Node Configuration
Use this tab to configure the Intent node. You can define the Intent in two steps: Configuring Intent Settings and Transition Actions.
Intent Node Configuration
Perform the following steps to Configure Intent:
- Double-click the Intent node.
The Intent screen appears. - On the Intent screen, click the Configuration tab if it is already not opened by default.
The configuration fields appear. - In the Intent field, enter the message string for which intent is to be identified.
- From the Engine drop-down box, select a machine learning engine name. Currently, only RASA is supported.
- In the Confidence Threshold field, set the cut-off limit for intent’s confidence. This confidence is auto calculated by the platform and it ranges between 1-100. The suggested value of the confidence threshold for optimum performance is 65 and above. If the user’s input is below the specified threshold, it might misunderstand the scenario and present a solution or answer that is not correct or desired by the user.
The confidence level does not appear for default intents. - In the Intent Configuration section:
1. Enter a Name for the intent. The default name is Intent1.
2. (Optional) Enter a Description for the intent.
3. Enter the Utterance word for the intent. It’s the free text a user types when conversing with a bot that will be used as a base phrase for intent classification. You can add more than one utterance for an intent (min. 2 is mandatory).
Note: You can add multiple Intents by clicking the Add New Intent button (min. 2 is mandatory). - Click the Train button to set the intent. You need to click the Train button before saving your intents in order to update the configuration into the platform. In case you click the Save button without, clicking Train, the platform will display a warning message and prompt you to Train first to proceed further.

Untrained Intent Error
7.1 Clicking the Save button on the Warning screen will save the configuration. However, untrained Intent configurations will not be used for intent classification during flow execution.
- Click the Save button at the bottom.
The Intent is configured.
Input Variables
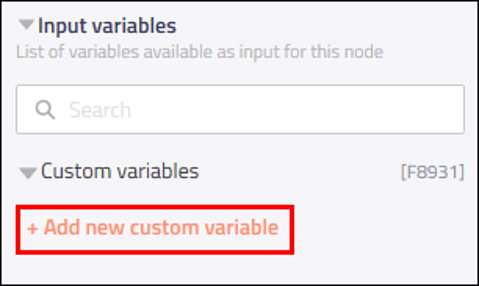
You can see a list of all the flow variables available for use within this node under the Input Variables pane. You can also search for a variable using the Search field.
You can see the list of variables that you explicitly create and configure for this node under the Custom Variables pane. You can also add a custom variable to the flow using the Add New Custom Variable button. For more information, see Custom Variables.

Input and Custom Variables
Output Variables
Click this collapsible panel to view the output variables.
You can see the data that this node generates as output variables. The data generated by the node is displayed as variables here. These variables are available for use in subsequent nodes. The standard output variables for this node are:
- Intent
- intent.intent: Holds the value of intent name identified from user message by the platform.
- intent.confidenceLevels: Holds the value of the platform confidence in the identification of top intent.
Output Variables
Node Outcomes
You can see the list of possible node outcomes for this node under this pane. You can customize the node labels using the Edit (pencil) icon. The node exits through one of the node edges corresponding to the outcome of the node. Each branch corresponds to a node outcome.
| Node Edge | Node Event/Outcome |
|---|---|
| Success (green) | * onSuccess - the flow exits through this node when it is a success. |
| Error (red) | onError - the flow exits through this node outcome when there is an error. onInvalidData - the flow exits through this node when there is invalid data. |
Transition Actions
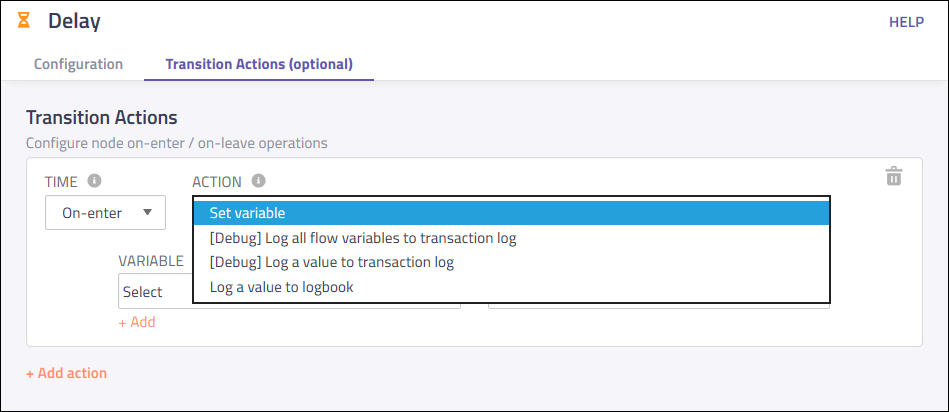
Use this tab to configure the transition actions for On-enter/On-leave events. However, configuring transition actions is optional. For detailed instructions about configuring the transition actions, see Node Transition Actions.

Transition Actions
Testing the Data
Both the Configuration tab and the Transition Actions tab contain a Test button.
Here is what you can do using the Test button:
- Click the Test button on the Configuration tab to test the sample input.
- Click the Test button on the Transition Actions tab to test the configured on-enter / on-leave operations.
- Click the Test button.
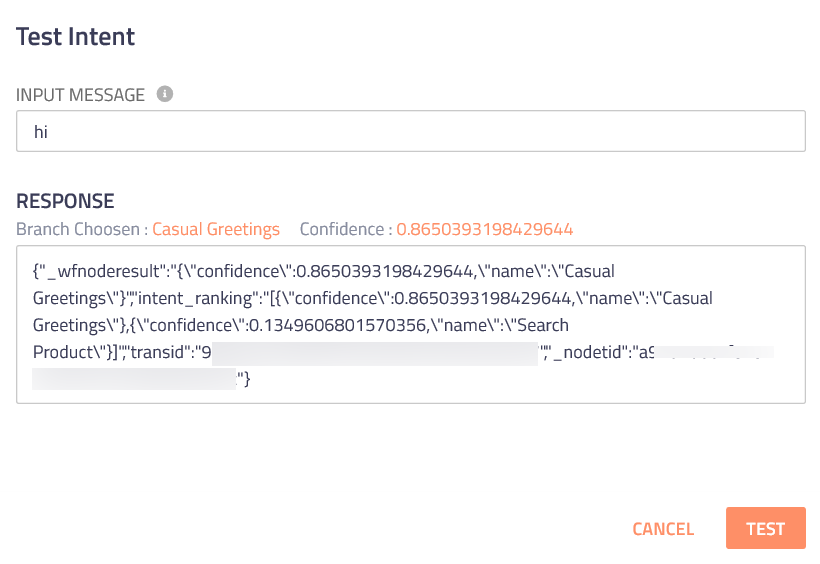
The Test Intent window appears. - On the Test Intent window, enter Input Message like ‘hi’ in the text box and then click the Test button.
- Click the Test button.
Test Intent
The platform compares the data entered in the Input Message field with the utterances and returns the result in the Response text box.

Screenshot of Test Intent
Note
Copy and Paste functionality is not supported for this node
Updated 10 months ago
