Making and Receiving Voice Calls using Sandbox
Understand how to make and receive Voice using Sandbox
By using the Webex Connect Sandbox you can make and receive calls from the interface, APIs, SDKs and advanced flows. In the Sandbox mode, we support one-way communication (make calls) for 19 countries and two-way communication (make and receive calls) for USA, Canada, and UK. By using our pre-defined code snippets for requests and responses, you can seamlessly integrate into your application(s).
Voice Support in Sandbox
- Refer toa list of countries that you can send and/or receive SMS messages in using Webex Connect sandbox mode.
- Please note you can make a maximum of 5000 outbound calls and receive a maximum of 5000 inbound calls over the lifetime of Webex Connect Sandbox usage.
Sandbox Home UI
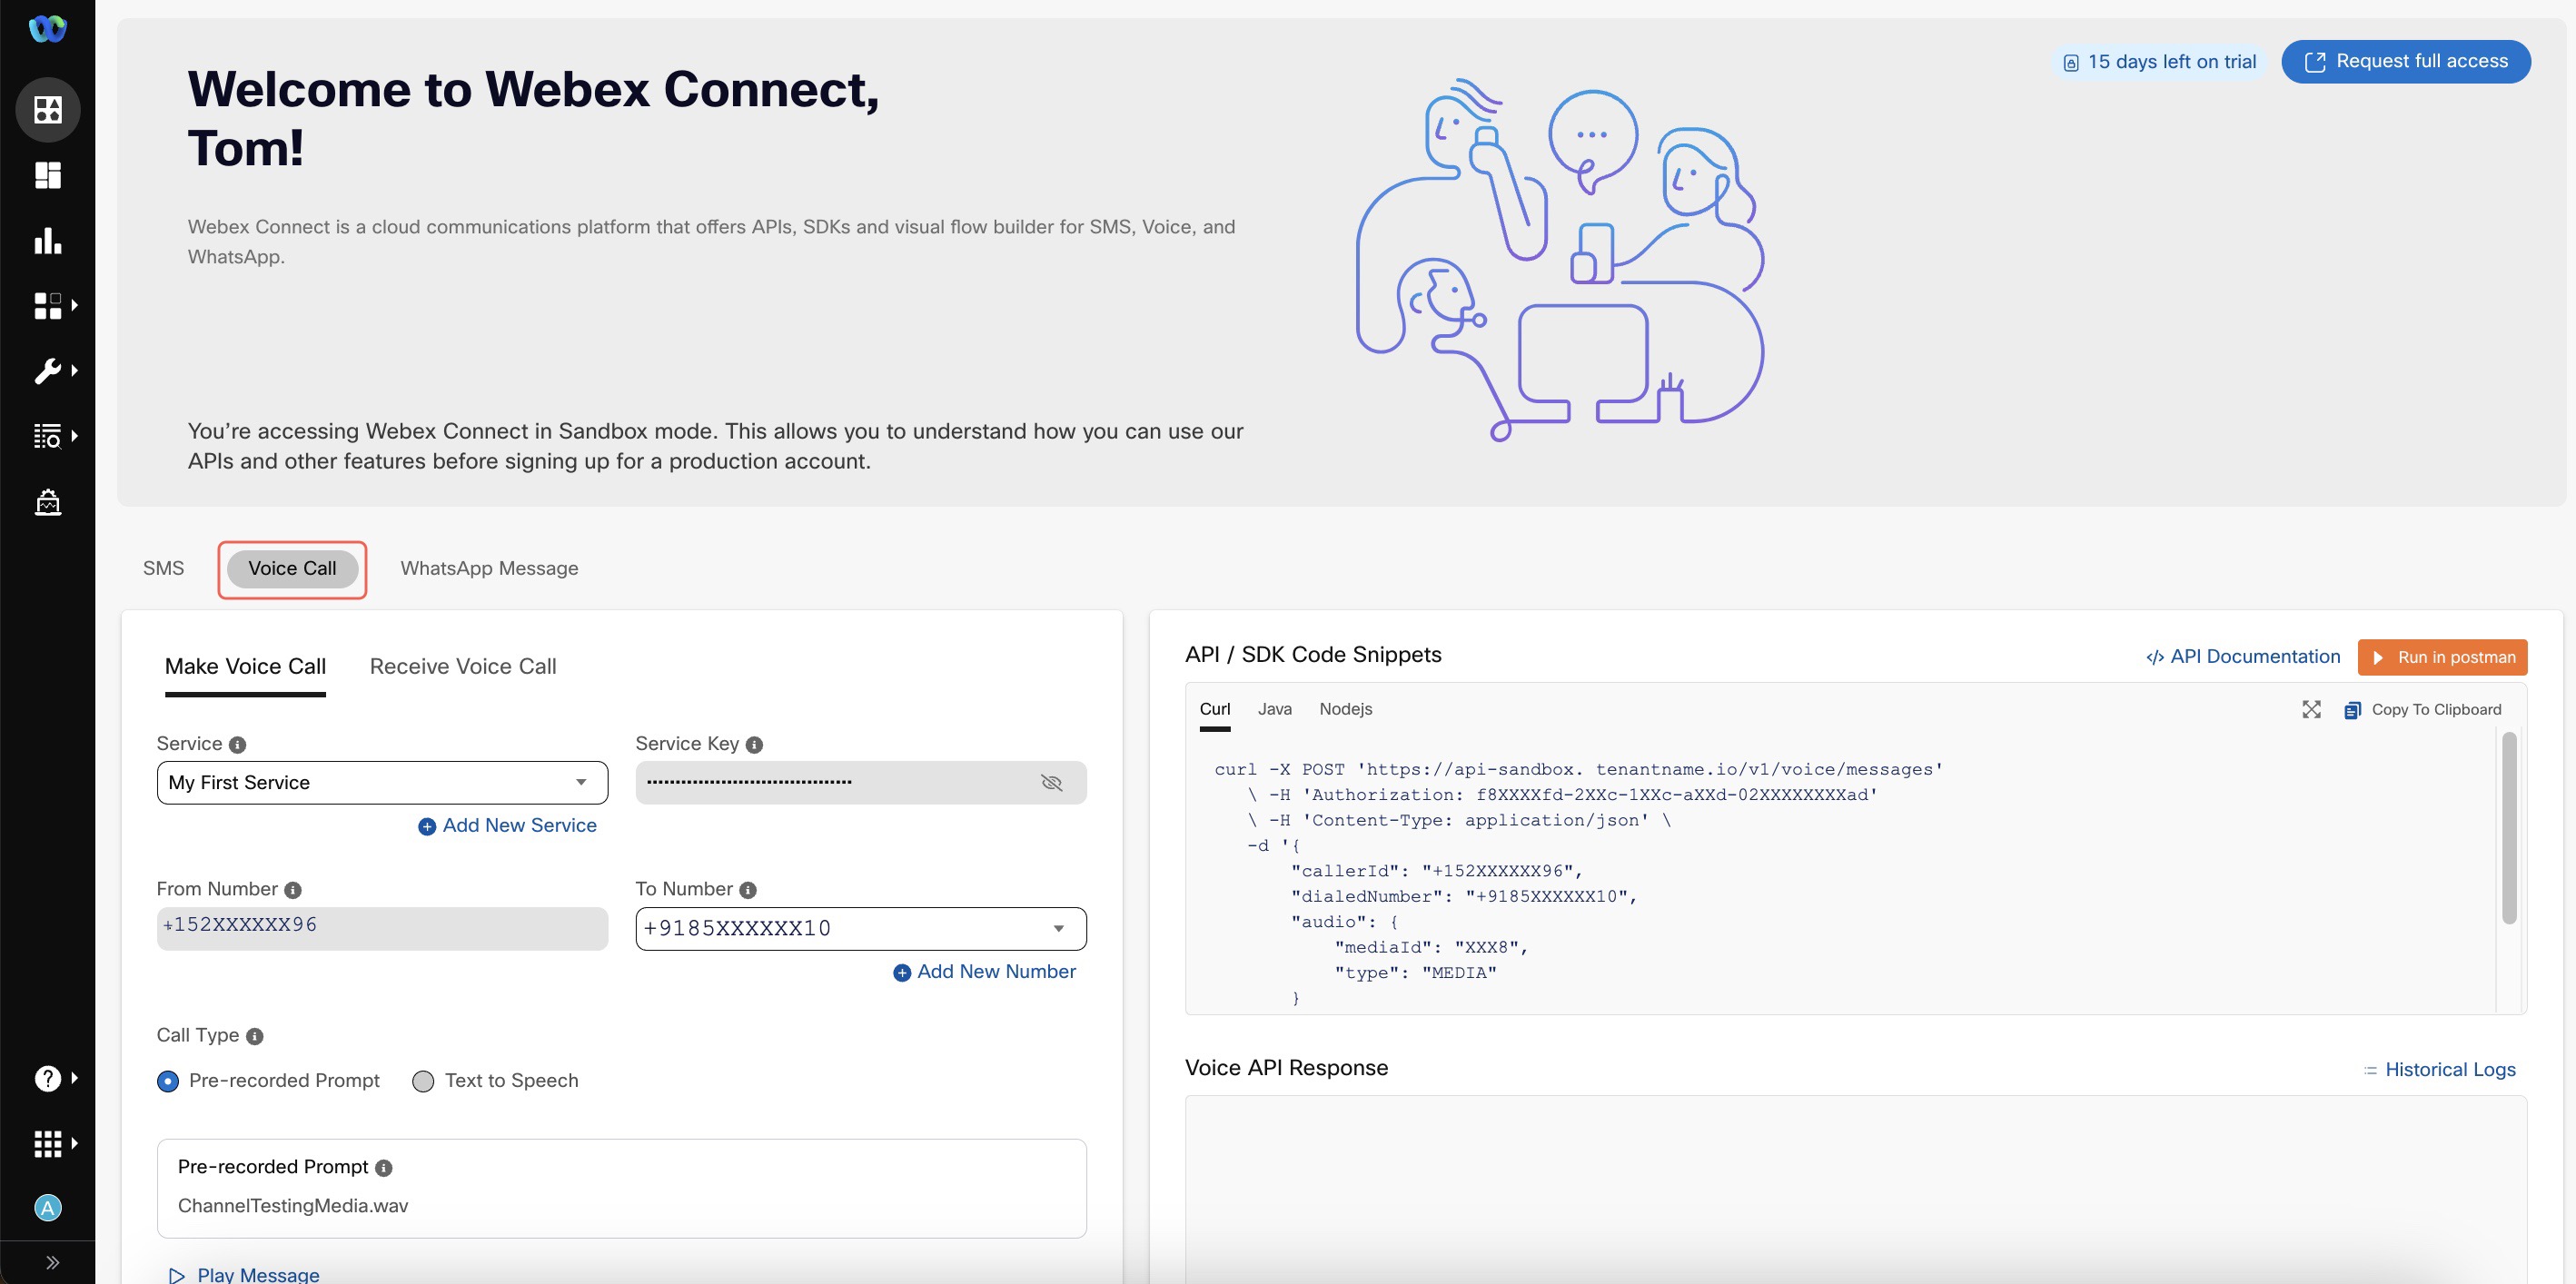
You can make calls and view sample code for your voice requests on the Sandbox Home page by using the Voice tab.

Making a Call from Sandbox Home Screen
Making a Call from Sandbox Home screen
As shown above, Home screen contains explorer interface to help you make a voice call to your registered phone number(s) using pre-provisioned phone numbers, by providing sample voice message and by clicking make voice call. By default the API credentials associated with pre-provisioned 'My First Service' are used to make the calls, and the sample code is visible on the right side of the screen. Additionally, the sample API response once you make a call shows-up in the 'Voice API Response' section on the right side.
Here's a brief description of various parameters / fields that are used for making a call. These values need to be provided when you use Webex Connect sandbox Voice API (please note that Webex Connect sandbox mode offers a separate endpoint for Voice calls) to make outbound calls:
| Field Name | Description |
|---|---|
| Service Key | The unique service key associated with the service selected under the Service Name dropdown. This key is used for authenticating the API request to make the Voice call. |
| From Number | The Phone Number is used for making a call from Webex Connect. This value is automatically populated in Sandbox mode and cannot be changed. Depending on the country you are making a call to, this will be a local phone number. |
| To Number | Phone number of the voice recipient. From the drop-down list, select the number to whom you want to make call. The sandbox limits you to only making calls to your verified phone number(s). You can register up to 5 phone numbers (all belonging to the same country) for making and receiving test calls. |
| Message Type | Select Pre-recorded Prompt or Text to Speech. Select Text to Speech if you want to include special message. |
| Text to speech message | Type the message you want to deliver to the recipient. |
Receiving a Call
Under the Receive Voice Call tab you can test your incoming calls. To test your incoming calls, click the Voice Call tab.
Receiving voice calls is only supported in countries for which the sandbox supports two-way messaging. Check Appendix A for the list of countries that support this function.
To test a call, send a voice call message to the pre-provisioned phone number from one of your registered test numbers. The phone number is shown in the Number to message field. The payload will be shown on the right-side in the Event Payload for Incoming Calls panel once you send the voice call.
You can test your calls using the options below.
- Option 1 - Configure your application webhook within the manage numbers section to receive a notification every time a voice call is received on one of your Webex Connect phone numbers or by enabling the Test Incoming Calls via Default Prompt shown under Option 1.
To configure your own webhook, use the directions below.
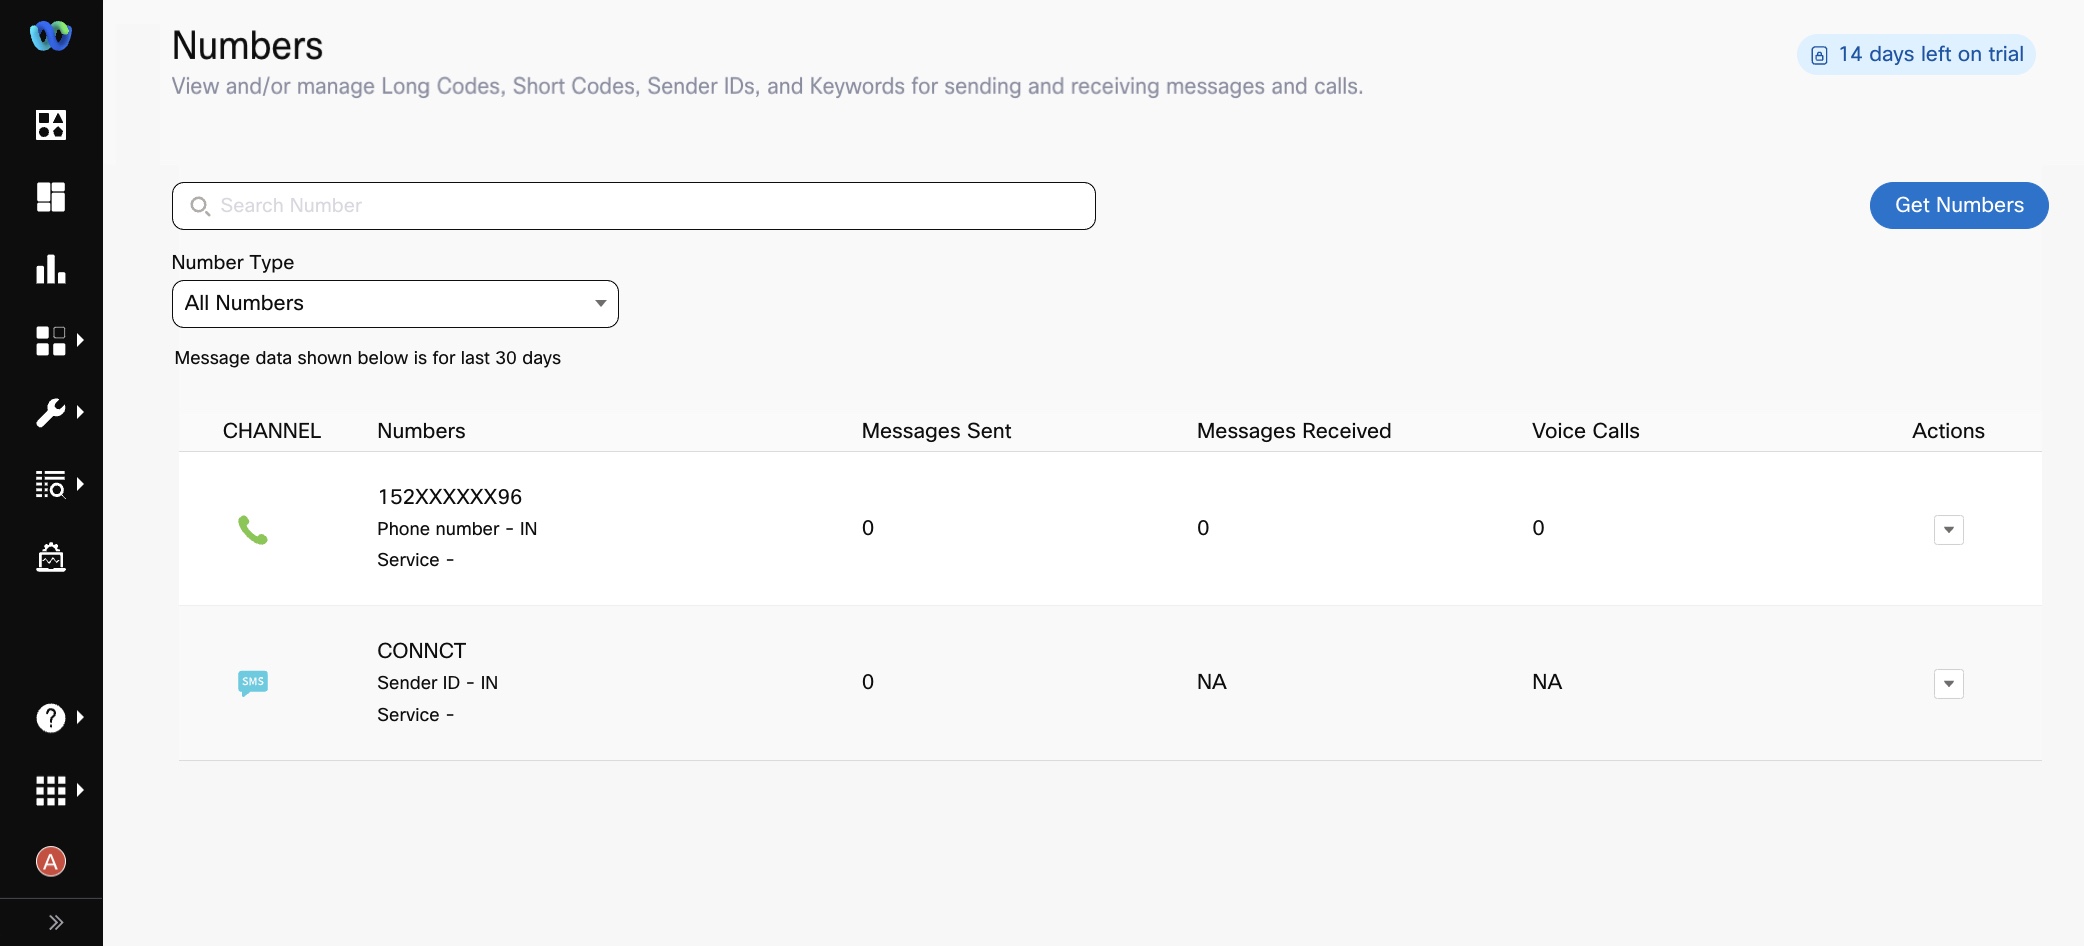
- Click the manage numbers section link that appears under Option 1. The Numbers page appears.

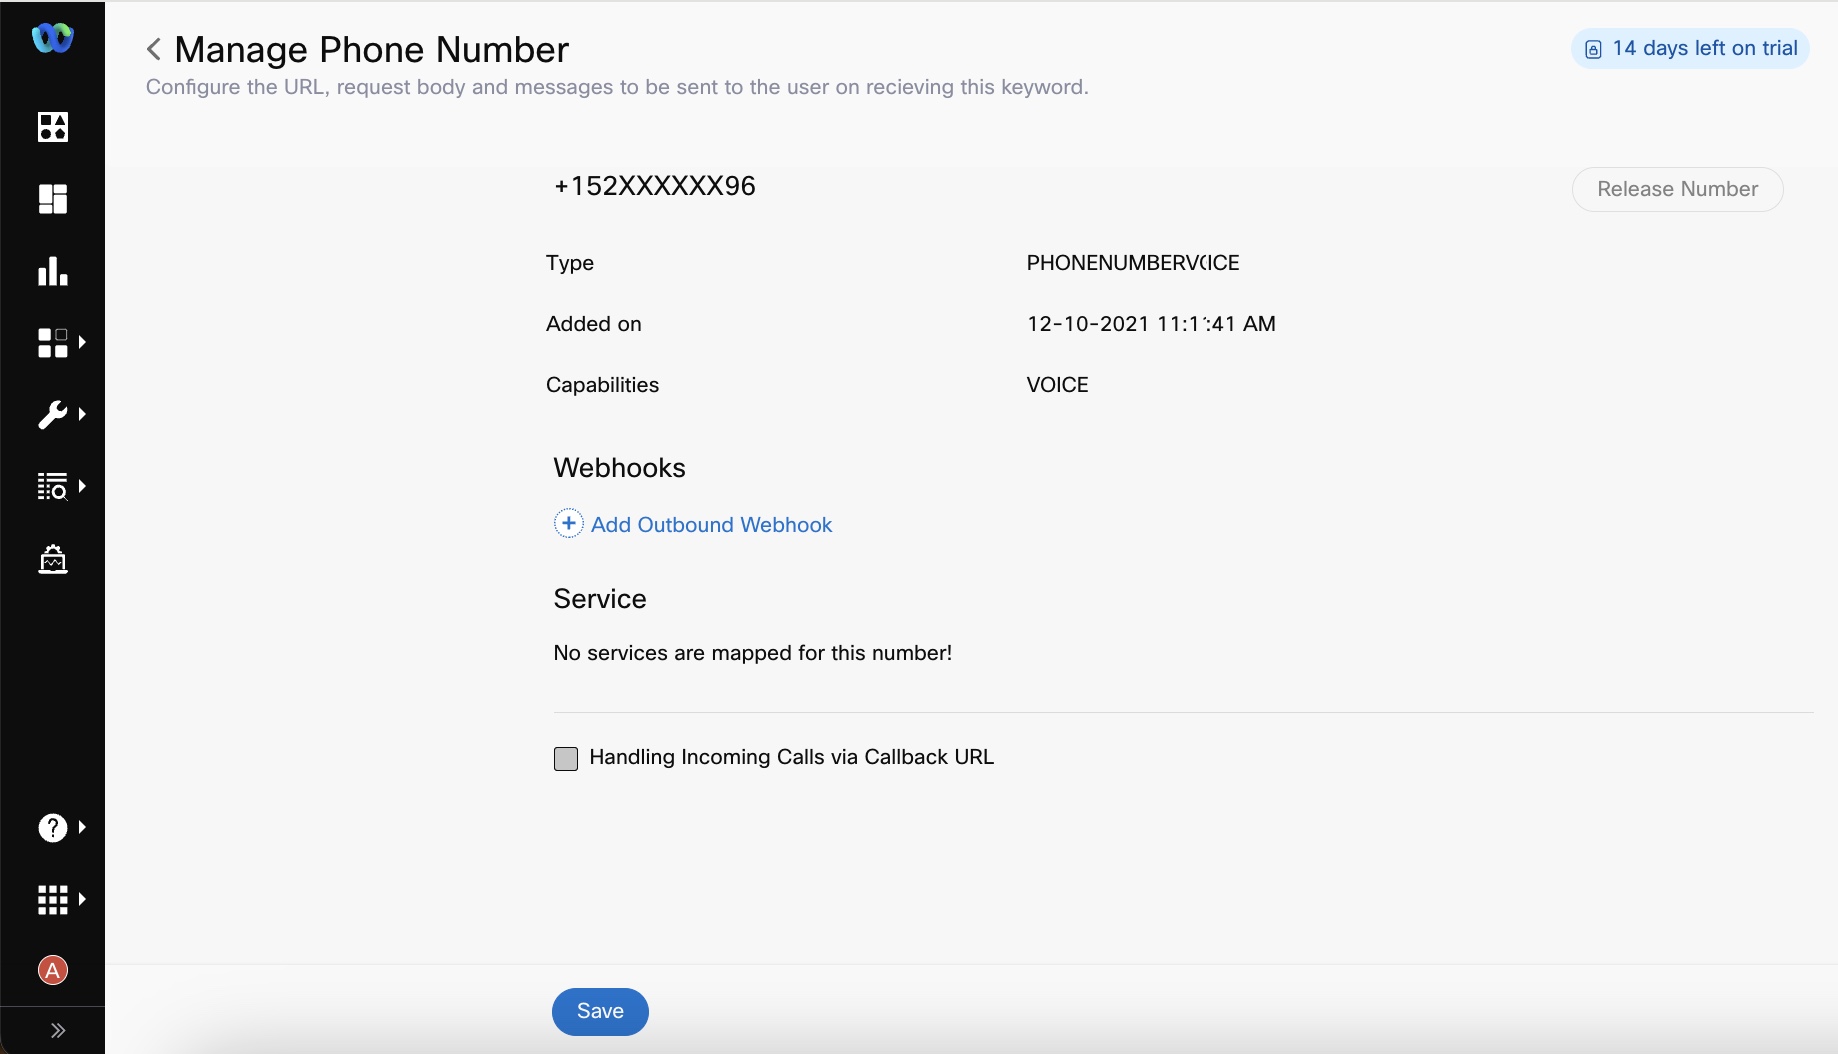
- Select the voice channel number you want to configure a webhook for and under the Actions menu, click Manage. The Manage Phone Number page appears.

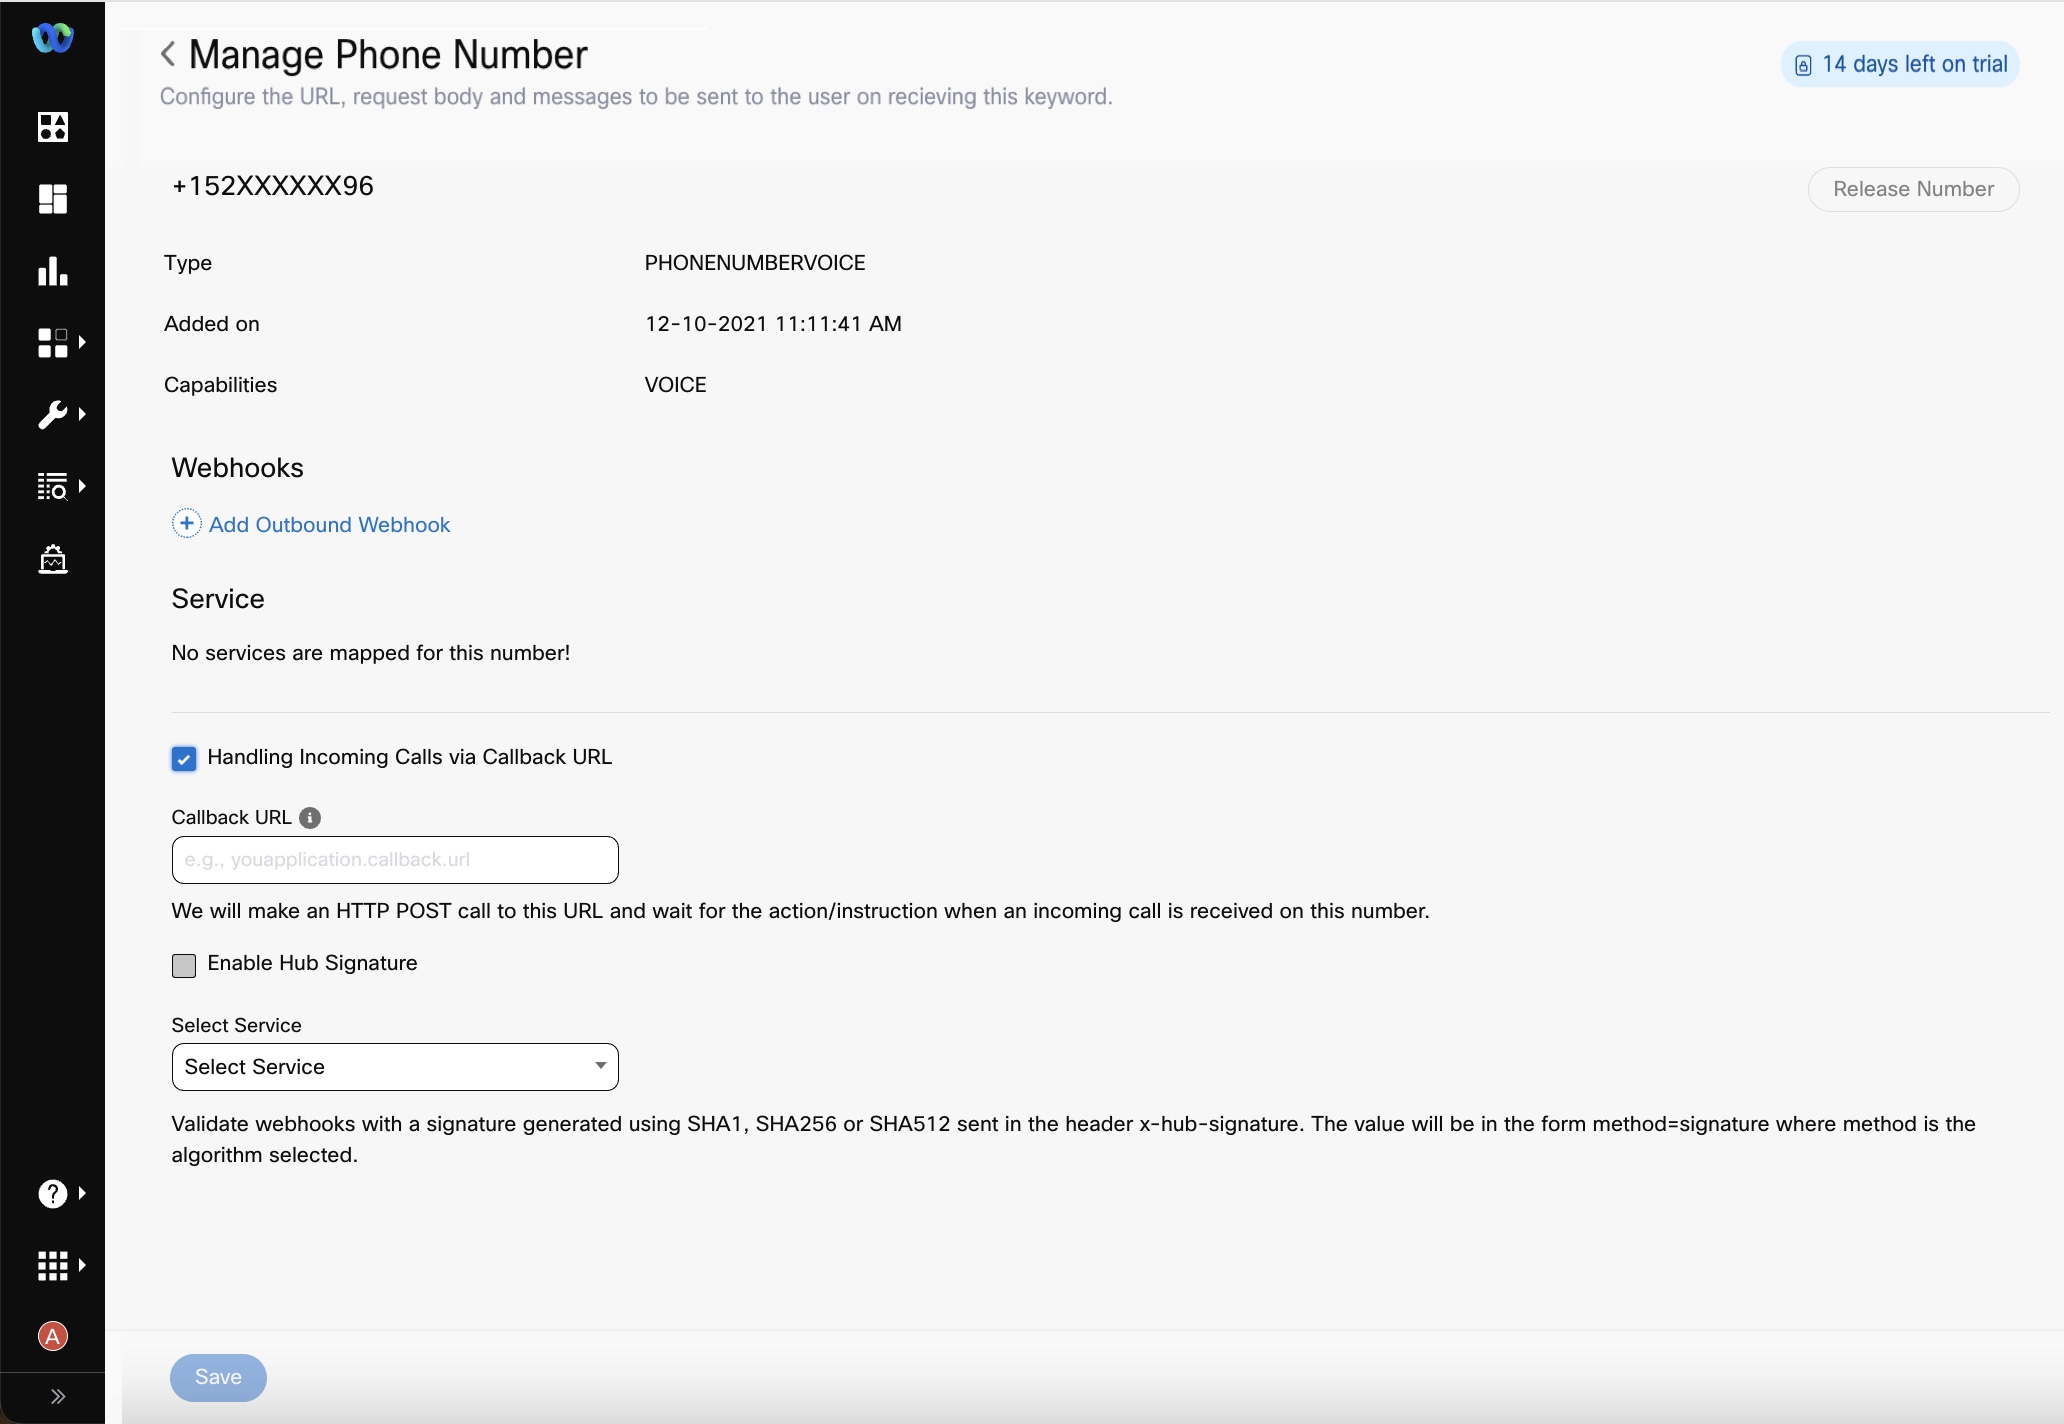
- Select the Handling Incoming Calls via Callback URL check box. The Manage Phone Number page expands allowing you to enter your configuration information.

Provide the information listed below.
- Callback URL – Type your callback URL. An HTTP Post call will be made to this URL and will wait for an action/instruction when an incoming call is received on this number.
- Select Service – From the drop-down list select the service for this URL.
- If you want to validate webhooks with a signature generated using SHA256 or SHA512 sent in the header x-hub-signature, select the Enable Hub Signature check box. The value will be in the form method=signature where method is the algorithm selected.
- Click Save.
Note
If you select to use a URL, you cannot use Test Incoming Calls via Default Prompt option.
- Option 2 - By configuring a flow and selecting Inbound Call as the flow trigger for voice channel.

Updated 5 months ago
