Branch Node
Understand what a Branch node is and how to configure it
The branch node allows you to split your flow based on conditional statements without the need to write any custom code. You can configure multiple branches within a single node with each branch containing a set of logical conditions.
To name a few, you can use the branch node to execute simple conditions like selecting the correct channel based on the user’s preference, evaluate if the OTP authentication is successful, and decide the next action based on a customer's response to an NPS survey.

Branch Node
Define the conditions within a branch using the AND and OR logical operators. The logical operators use the following criteria for evaluation:
AND- the expression is True only if both the relations are TrueOR- the expression is True if either of the relations is True.
You can configure the branch names and use them to tag various node outcomes. The conditions configured within different branches are validated sequentially. If none of the branch conditions evaluate to True, a default None of the above node outcome is generated. You can rename the default branch.
Double-click the branch node to configure it. The Configuration window has two tabs: Configuration and Transition Actions.
Node Configuration
Use this tab to define conditional statements in branches using the AND and OR logical operators. Use only one logical operator to combine two conditions, i.e., you can use either AND or OR to combine one statement with another and form a condition. However, you can use multiple conditions and build a complex logical expression within a branch.
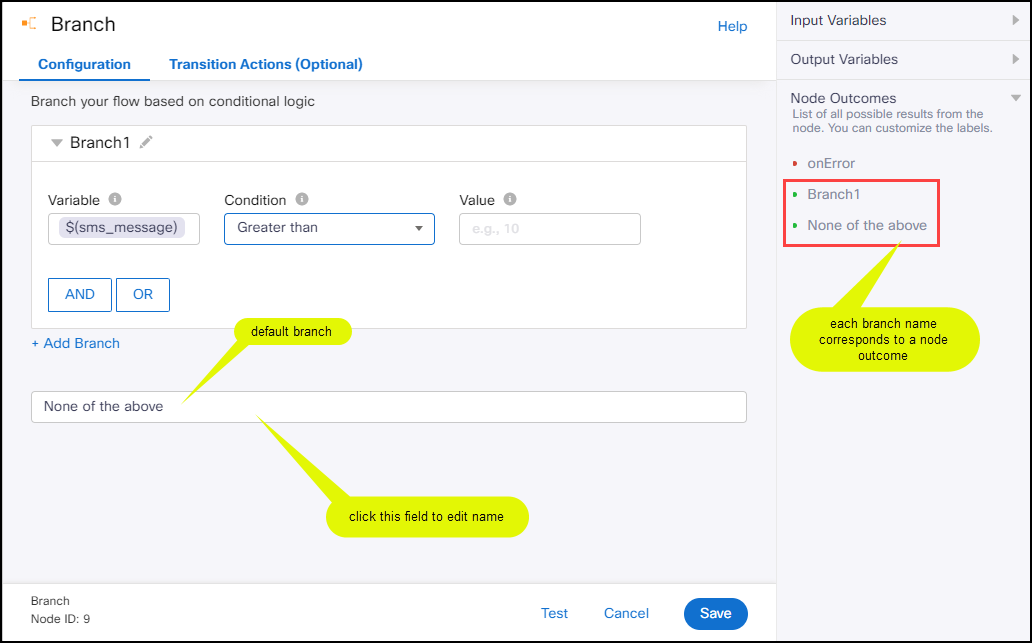
Branch Node Configuration
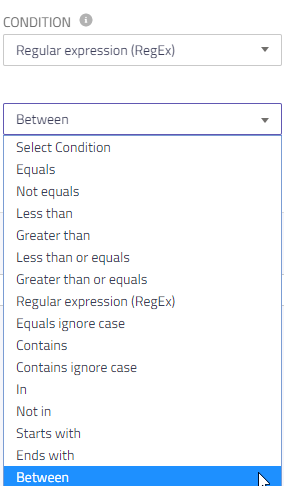
Branch Conditions
Perform the following steps to configure the node:
- Click the pencil icon to rename the branch if required. Please note special characters should not be used in the branch name.
- Enter the input Variable on which you want to apply the condition. For example,
$(sms.message)indicates the message of an SMS. - Select the Condition to apply to the variable. The condition specifies the type of comparison to perform on the variable. The node uses a top-down sequential approach to evaluate the conditions. The supported conditions are:
- Equals
- Not equals
- Less than
- Greater than
- Less than or equals
- Greater than or equals
- Regular expression (RegEx)- for validating data quickly such as checking the syntax of an email address, or searching for a fixed string- pattern in an incoming message, etc. See Common RegEx Examples for more information
- Equals ignore case
- Contains
- Contains ignore case
- In
- Not in
- Starts with
- Ends with
- Between
- Enter a Value for the input variable. Note: For In and Not in, you must press enter after typing each value.
- Select the logical Operator that you want to use.
- Click Save to save the configuration of the branch.
- Click Add Branch and repeat steps 1 to 6 to add more branches.
Input Variables
You can see a list of all the flow variables available for this node under this pane. You can also search for a variable using the Search field. For more information, see the Variable Management section.
Custom Variables
You can see the list of variables that you explicitly create and configure for this node under the Custom Variables pane. For more information, see the Variable Management section.
Output Variables
You can see the data that this node generates as output variables. These variables are available for use in subsequent nodes. The standard output variables for this node are:
- branch.output - the output of the branch, either True or False.
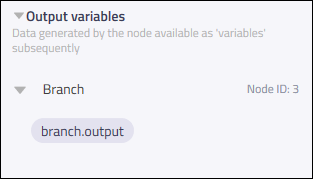
Output Variables
Node Outcomes
You can see the list of possible node outcomes for this node under this pane. You can customize the node labels using the Edit (pencil) icon. The node exits through one of the node edges corresponding to the outcome of the node. Each branch corresponds to a node outcome.
| Node Edge | Node Event/Outcome |
|---|---|
| Success (green) Note: You can see this node edge only when you complete the node configuration. | * Branch1 - the flow exits through this node when it is a success. This node is replaced by the branch name for every branch that you configure. For example, if you configure a branch as Request Detailed feedback, the Branch1 node is replaced by Request Detailed Feedback and likewise for all other branches. For illustration, see the configuration window. |
| * None of the above - the flow exits through this node when none of the conditions are met. This is the default branch and node outcome. If you rename the default branch, you see the renamed node outcome. | |
| Error (red) | * onError - the flow exits through this node when there is an error. This is the default branch and node outcome. If you rename the default branch, you see the renamed node outcome. |
See the example for a use case and configuration of different branches.
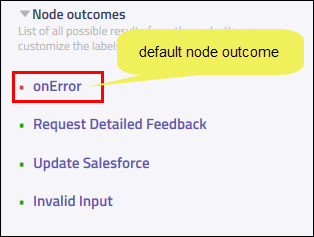
Node Outcomes
Transition Actions
Use this tab to configure the transition actions for On-enter/On-leave events. However, configuring transition actions is optional. For detailed instructions about configuring the transition actions, see Node Transition Actions.
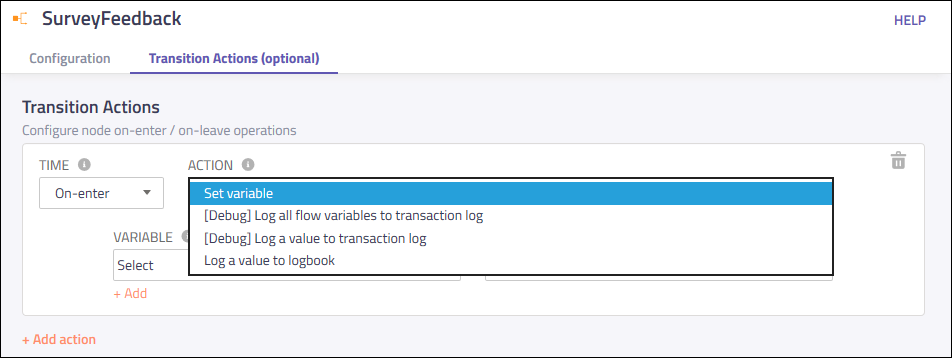
Define Transition Actions
Example 1
Use the branch node to process the user's responses (rating), received through SMS, to a feedback survey using the expression builder in the node.
Define three branches for this use case - Request Detailed Feedback, Update Salesforce, and Invalid Input. See the following configuration to understand the conditions in each branch:
- Request Detailed Feedback (Branch 1 renamed): if the rating is less than or equal to 3, request detailed feedback for further improvement.

Configure the branch to capture user rating
- Update Salesforce (Branch 2 renamed): if the rating is 4 or 5, update the case in Salesforce.

Configure the branch to capture user rating
- Invalid Input (Default branch renamed): if the rating is anything other than 0 to 5, let the user know about it.
Common RegEx Example
| Use Case | RegEx Pattern | Description | Example Matches |
|---|---|---|---|
| Email Validation | ^[a-zA-Z0-9._%+-]+@[a-zA-Z0-9.-]+\.[a-zA-Z]{2,}$ | Validates standard email formats. | [email protected] , [email protected] |
| Phone Number (Digits Only) | ^\\d{10,12}$ | Matches a string of 10 to 12 digits (no spaces or dashes). | 919045670000, 14155550000 |
| Keyword Match (OR) | ._(help|support|agent)._ | Matches if the message contains any of the specified keywords. | "I need help", "Connect to support" |
| Date (DD/MM/YYYY) | ^(0[1-9]|[12][0-9]|3[01])/(0[1-9]|1[0-2])/\\d{4}$ | Validates a date in DD/MM/YYYY format. | 25/12/2024 |
| OTP / Numeric Code | ^\\d{6}$ | Matches exactly 6 digits (useful for verifying OTP inputs). | 123456 |
| Alphanumeric ID | ^[a-zA-Z0-9]{8,12}$ | Matches an ID that is 8-12 characters long, containing letters and numbers. | ABC12345678 |
Tips for Branch Node RegEx:
- Case Sensitivity: By default, RegEx matching in the Branch node is case-sensitive. To make a pattern case-insensitive (e.g., to match "Help" or "help"), use the (?i) flag at the start if supported, or use a range like [hH][eE][lL][pP].
- Partial vs. Full Match:
- Use ^ (start) and $ (end) to ensure the entire input matches your pattern (e.g., for phone numbers).
- Omit them or use .* if you only want to check if a pattern exists anywhere in the string (e.g., for keywords).
Test the Node Configuration
The Test option verifies the node outcome for a given input. You can simulate different input variable values and check the outcome while setting up branch conditions. The test mode automatically lists all variables required as input for running the conditions you have configured. For every input, the branch node evaluates each of the conditions and exits the node when a condition is met.
When you test the node configuration, the branch that evaluates the user input is highlighted.
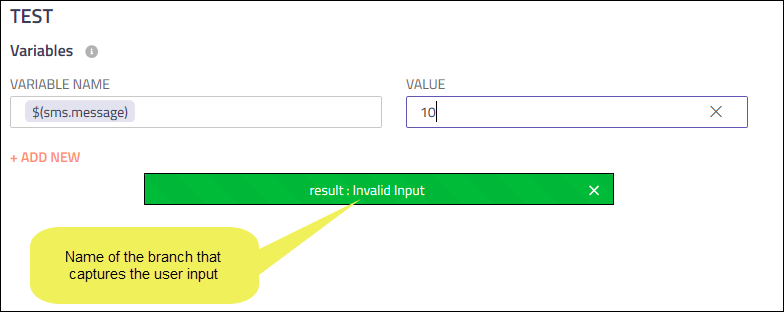
Test the Node Configuration
Updated about 19 hours ago
