Voice: Transfer (deprecated)
This node is used to transfer an inbound or an outbound call based on the response provided by a customer, either a voice or a number input. If the customer's voice response or the number input is invalid, a voice file can be played asking the customer to try again. You can terminate the call if the customer does not provide any input within the defined time.
Using this node in a voice flow
For example, in a bank, customers call may be transferred to an appropriate department once the customer CRN number is validated through voice response or number input.
The older version of voice nodes are deprecated. If you are using an older version and wish to switch to the newer version, contact Customer Support.
The number of exit events available and the appearance will depend on the configuration options for this node.
The options of transfer node are:
| Node Options | Description |
|---|---|
| TRANSFER OPTIONS | Transfer options are used to configure an Outbound or Inbound call and also defines the user experience while transferring a call. |
| DTMF SETTINGS | DTMF values are configured to accept a valid input from the user keypad. If a valid input is not provided, the appropriate voice is played. |
| RECORD OPTIONS | Record options configured under this tab are played once the call transfer is completed. |
| PLAY OPTIONS | Play feature enables you to configure the type of voice prompt to be played. |
| MENU OPTIONS | Menu options help you direct a call to the appropriate branch. |
| TIMER SETTINGS | Timer options help you configure the time-out upon which the control is passed to the selected node. |
| NODE EVENTS | Node options help you configure the events that you want to trigger on this node. |
TRANSFER OPTIONS
These options are used to configure an Outbound or Inbound call and also defines the user experience while transferring a call.
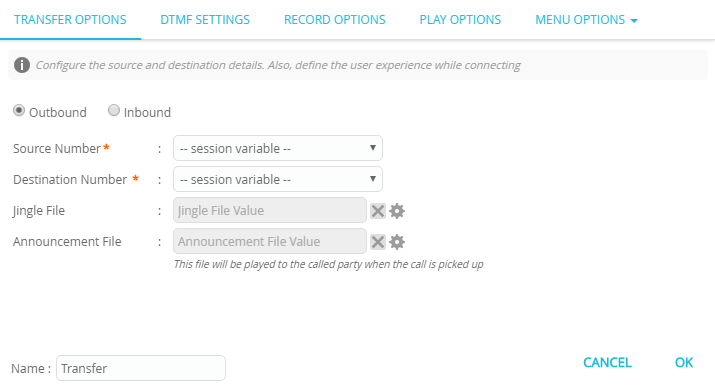
Outbound
| Parameter | Description |
|---|---|
| Source Number | Enter the source number or select a variable from the drop-down. To enter a Source Number, select static variable from the drop-down and enter the number. |
| Destination Number | Enter the destination number or select a variable from the drop-down. To enter a Destination Number, select static variable from the drop-down and enter the number. |
| Jingle File | Select the file to be played during the voice flow. To select a file, follow these steps: 1. Click the Settings icon. 2. Select User Assets. 3. Select language as Static and en from the respective drop-down list. 4. Locate the voice file that was uploaded and select the radio button of the voice file. 5. To close this screen, click x available on the top right corner. You will notice the voice file is configured in the Jingle File field. |
| Announcement File | Select a file to be played to the called party when the call is picked up. To select a file, follow these steps: 1. Click the Settings icon. 2. Select User Assets. 3. Select language as Static and en from the drop-down. 4. Locate the voice file that was uploaded and select the radio button of the voice file. 5. To close this screen, click x available on the top right corner. |
Inbound
| Parameter | Description |
|---|---|
| Destination Device ID | Enter the Destination Device ID or select a variable from the drop-down. To enter a device id, select static variable from the drop-down and enter the number. |
DTMF SETTINGS
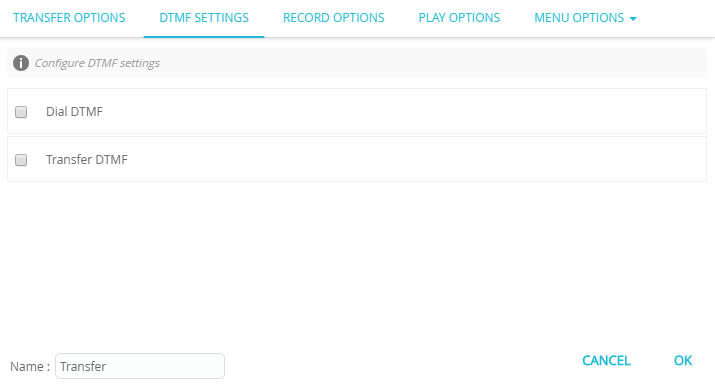
The DTMF values are configured to accept a valid input from the user keypad. If a valid input is not provided, the appropriate voice is played.
| Parameter | Description |
|---|---|
| Dial DTMF | Enter the DTMF number to which the call will be transferred. To enter a DTMF Number, select static variable from the drop-down and enter the number. You can also select a system variable from the drop-down. |
| Transfer DTMF | Select Transfer DTMF to enable additional options. |
| DTMF Encryption | Select this option to enable DTMF encryption. This option is used to carry-out secured transactions. |
| Direction | Select the direction of DTMF. The options are: Single Both If the option Both is selected, then additional options appear to configure DTMF. DTMF: Select the DTMF number from the drop-down. Value: The value that is configured through settings is displayed. Settings: To select a file, follow these steps: Click the Settings icon. Select User Assets. Select language as Static and en from the drop-down. Locate the voice file that was uploaded and select the radio button of the voice file. To close this screen, click x available on the top right corner. * Click + icon to configure additional numbers. |
RECORD OPTIONS
The options configured under this tab are played once the call transfer is completed.
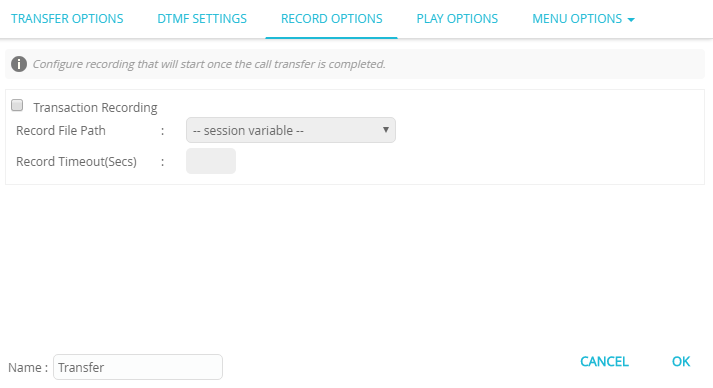
If DTMF SETTINGS is configured, then RECORD OPTIONS are disabled.
| Parameter | Description |
|---|---|
| Transaction Recording | Check this option to record the file. |
| Record File Path | When the above option is selected, the voice file path is displayed. |
| Record Timeout(Secs) | Enter the record timeout in seconds. |
PLAY OPTIONS
This feature enables you configure the type of voice prompt to be played.
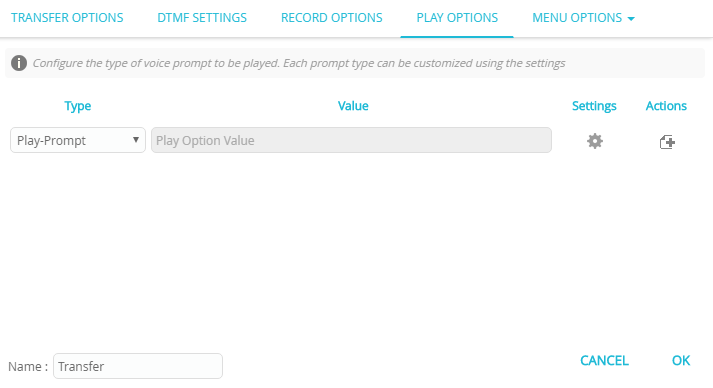
To configure the play options, follow these steps:
- Select Type from the drop-down.
- Click Settings icon. A popup screen is displayed with additional configuration options.
*   **Session Variables**: If you select **static variable**, the text box is enabled to enter the value.
*   **Offset (Secs)**: Enter the offset time in seconds after which the voice will start playing.
*   **Duration**: Enter the value in seconds. The voice file will be played for the specified duration.
*   **User Assets**: Select this option to select the language and voice file.
*   **+**: Click **+** option to configure additional options.
- Click x to close the screen.
- Click + icon to add additional options.
MENU OPTIONS
The menu options help you direct a call to the appropriate branch.
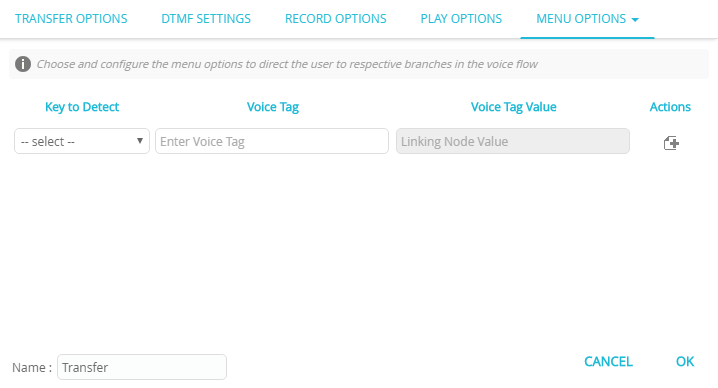
| Parameter | Description |
|---|---|
| Key to Detect | Select the key from the drop-down. |
| Voice Tag | Enter the voice tag. |
| Actions | Click + icon to add more keys. |
TIMER SETTINGS
Timer options help you configure the time-out upon which the control is passed to the selected node.
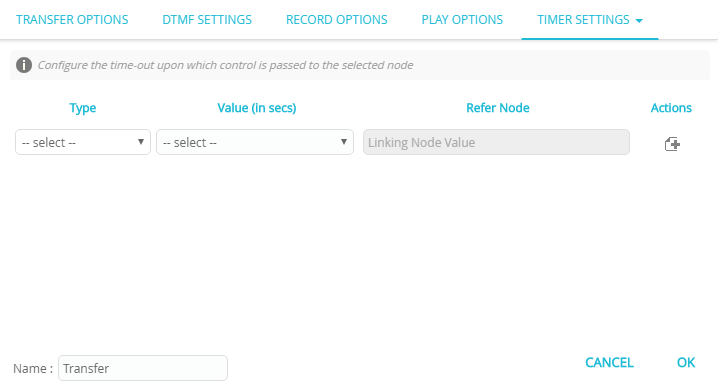
| Type | Description |
|---|---|
| call | This option helps you terminate the flow from this node after the specified time-out seconds. To enter the time in seconds, follow these steps: 1. Select call from the Type drop-down. 2. Select static variable from the Value (in secs) drop-down. 3. Enter the value in seconds. 4. Click + icon to add other fields. |
| menu | This option helps you terminate a menu after the specified time-out seconds. To enter time in seconds, follow these steps: 1. Select menu from the Type drop-down. 2. Select static variable from the Value (in secs) drop-down. 3. Enter the value in seconds. |
| dtmf | This option helps you accept the DTMF response and terminate the call after the specified seconds. To enter time in seconds, follow these steps: 1. Select dtmf from the Type drop-down. 2. Select static variable from the Value (in secs) drop-down. 3. Enter the value in seconds. |
| transfer | This option helps you transfer the call to a number after the specified seconds. To enter time in seconds, follow these steps: 1. Select transfer from the Type drop-down. 2. Select static variable from the Value (in secs) drop-down. 3. Enter the value in seconds. |
NODE EVENTS
Node options help you configure the events that you want to trigger on this node.
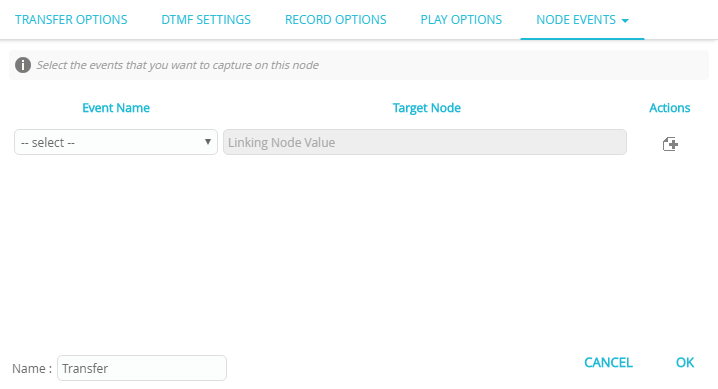
| Event Name | Description |
|---|---|
| onplaycomplete | This event is triggered when the voice file is played completed. |
| ontransferrelease | This event is triggered when the call transfer is complete. |
| ontransfererror | This event is triggered when an error occurs during the call transfer. |
| onrecordcomplete | This event is triggered when the call recording is complete. |
| oninvalidchoice | This event is triggered if an invalid choice is made (an undefined choice). |
| onnoinput | This event is triggered when an input is not provided. |
| ontrombonefailed | This event is triggered when trombone filed. |
Properties / Params configuration
Properties
| Property | Description |
|---|---|
| Label | The name of the node represented as a string. A node can be renamed by changing the contents of the Label field. |
Params
| Parameter | Description |
|---|---|
| Session Data | The Session Data shortcut leads to the Session Data / Custom Logs configuration. Session Data can set one or more Session Params upon entering or leaving the node. Custom Logs can record one or more Session Params upon entering or leaving the node. This is useful for debugging purposes. |
Updated 11 months ago
