Defining and Executing the Test Cases of a Bot
As the scope of a bot increases over time, sometimes the changes we make to improve one or more areas of the bot’s logic and NLU may negatively impact other areas in the same bot. IMIbot platform provides a built-in one-click bot testing framework that is extremely helpful in testing a large set of test cases easily and quickly.
The test cases can be configured by entering a message and an Expected Template in the respective columns. A test case may consist of a series of messages, which can be useful for testing flows.
Defining tests
Tests can be defined in the Test cases tab on the Testing screen of a Q&A, task, and smart bot as shown below.
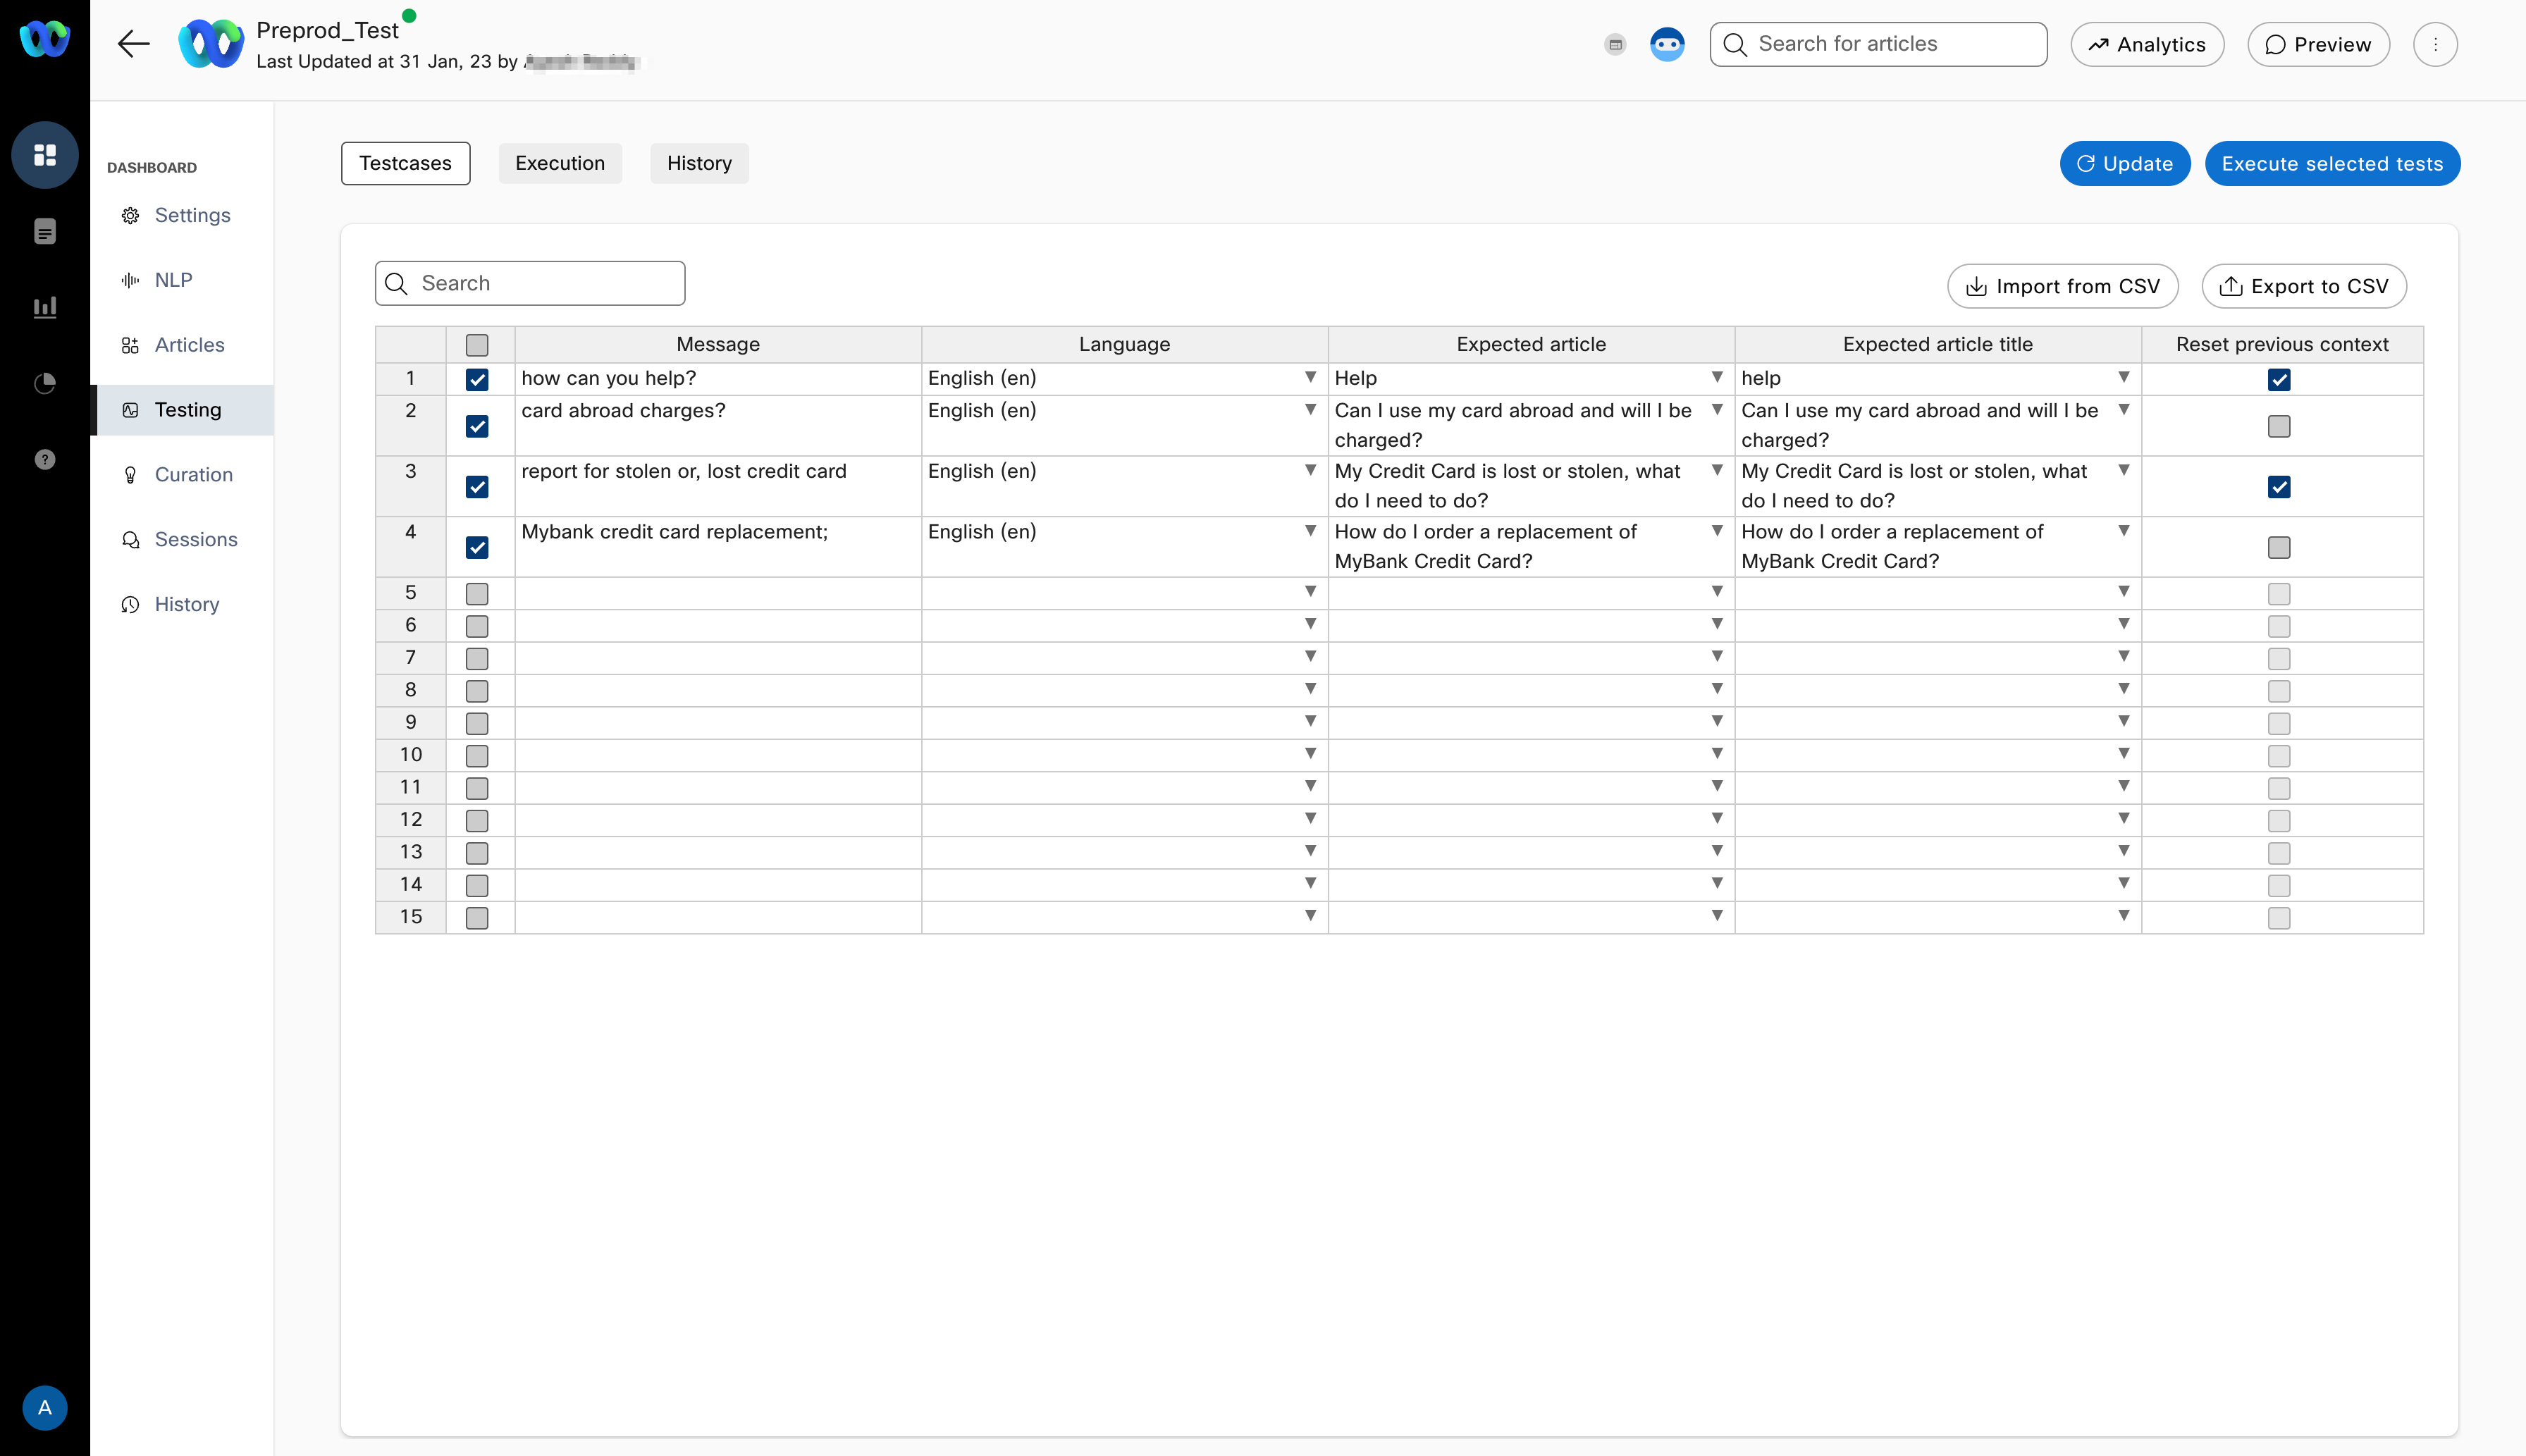
Defining and managing test cases in Q&A bots
Each row in the above table is an individual test case where you can define:
- Message: This is the sample user message and should contain the kind of messages you expect users to send to your bot
- Expected article: The article whose response should be displayed for the corresponding user message. This column comes with a smart auto-complete feature to suggest matching articles based on the text typed to that point.
- Reset previous context: Whether the bot’s existing context at that point should be cleared before executing the test case or not. When the context is set to be cleared in the last column for a given test case, that user message will be simulated in a new bot session so that there is no impact of any pre-existing context (in the data store, etc.) in the bot.
For task bots and smart bots, the process for defining test cases is very similar to that of Q&A bots with the only difference being that instead of selecting an article against a sample user message, a response template key needs to be defined there.
For all bots, users can now run selective testcases.
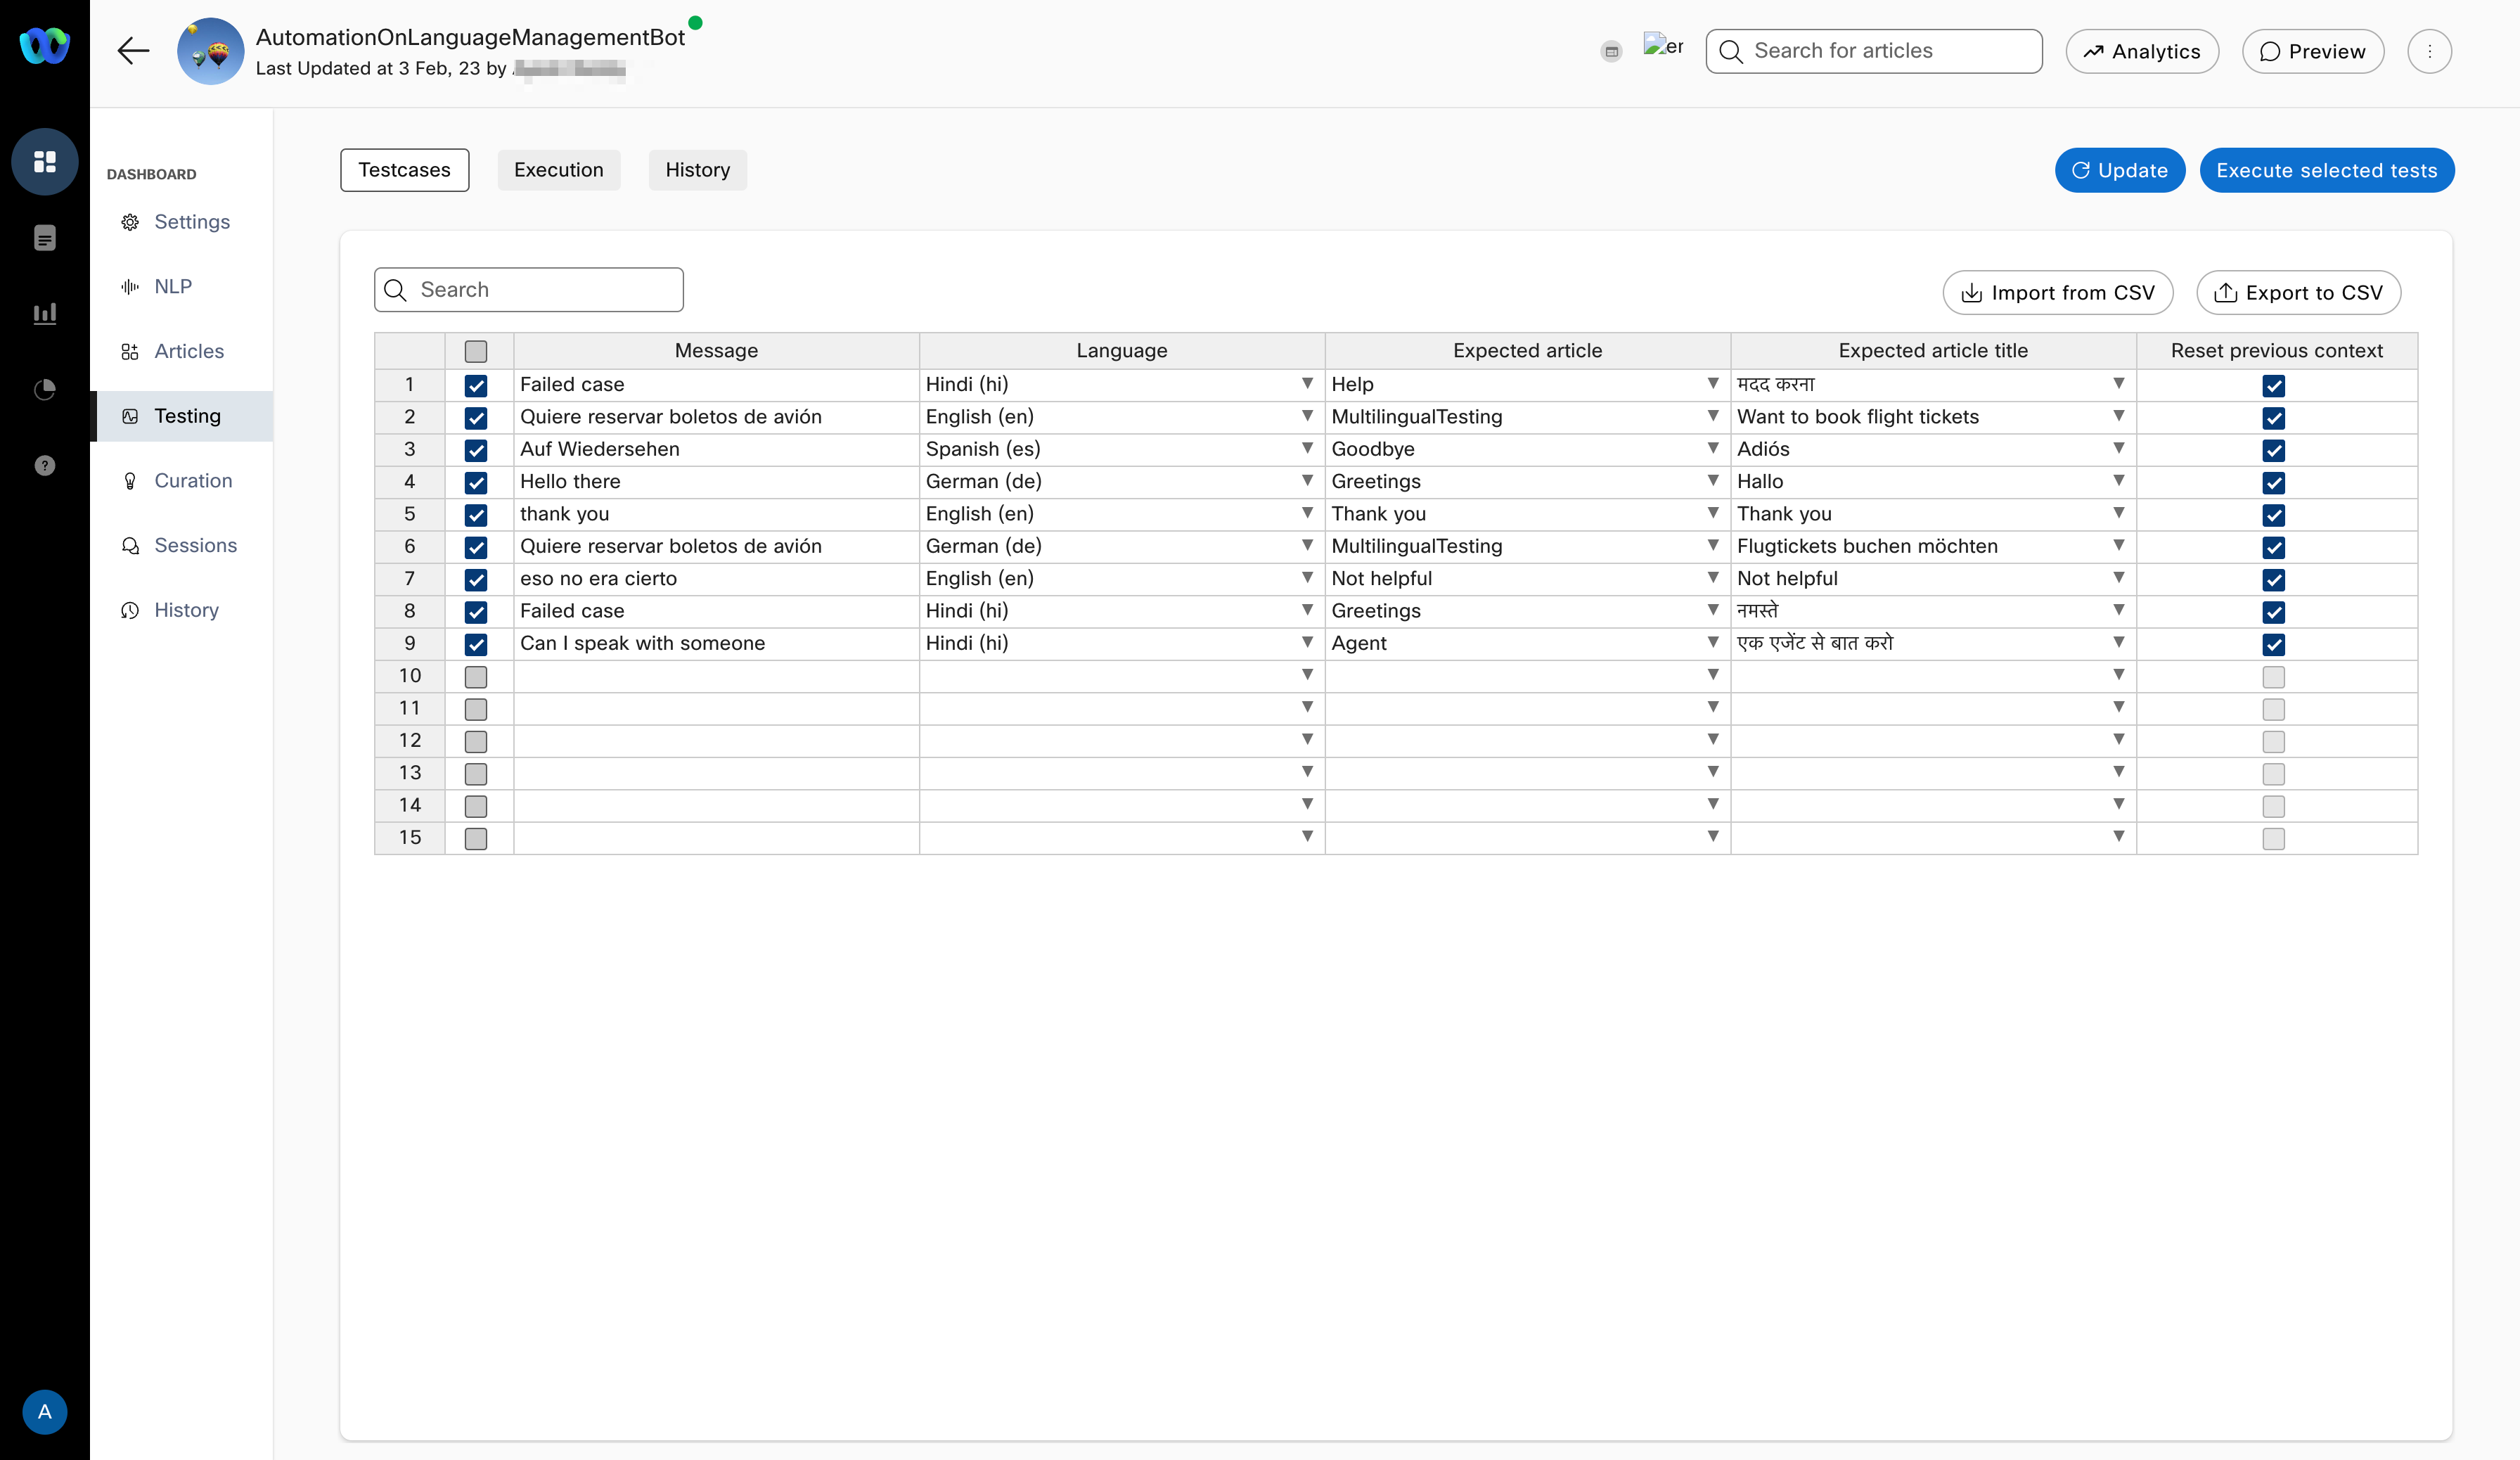
Defining and managing test cases in Task bots
Advanced task bot flows that use our workflows feature can also be tested by switching on the “Test callbacks” toggle on the top right. Switching this toggle on brings up 2 new columns into the table as shown below.
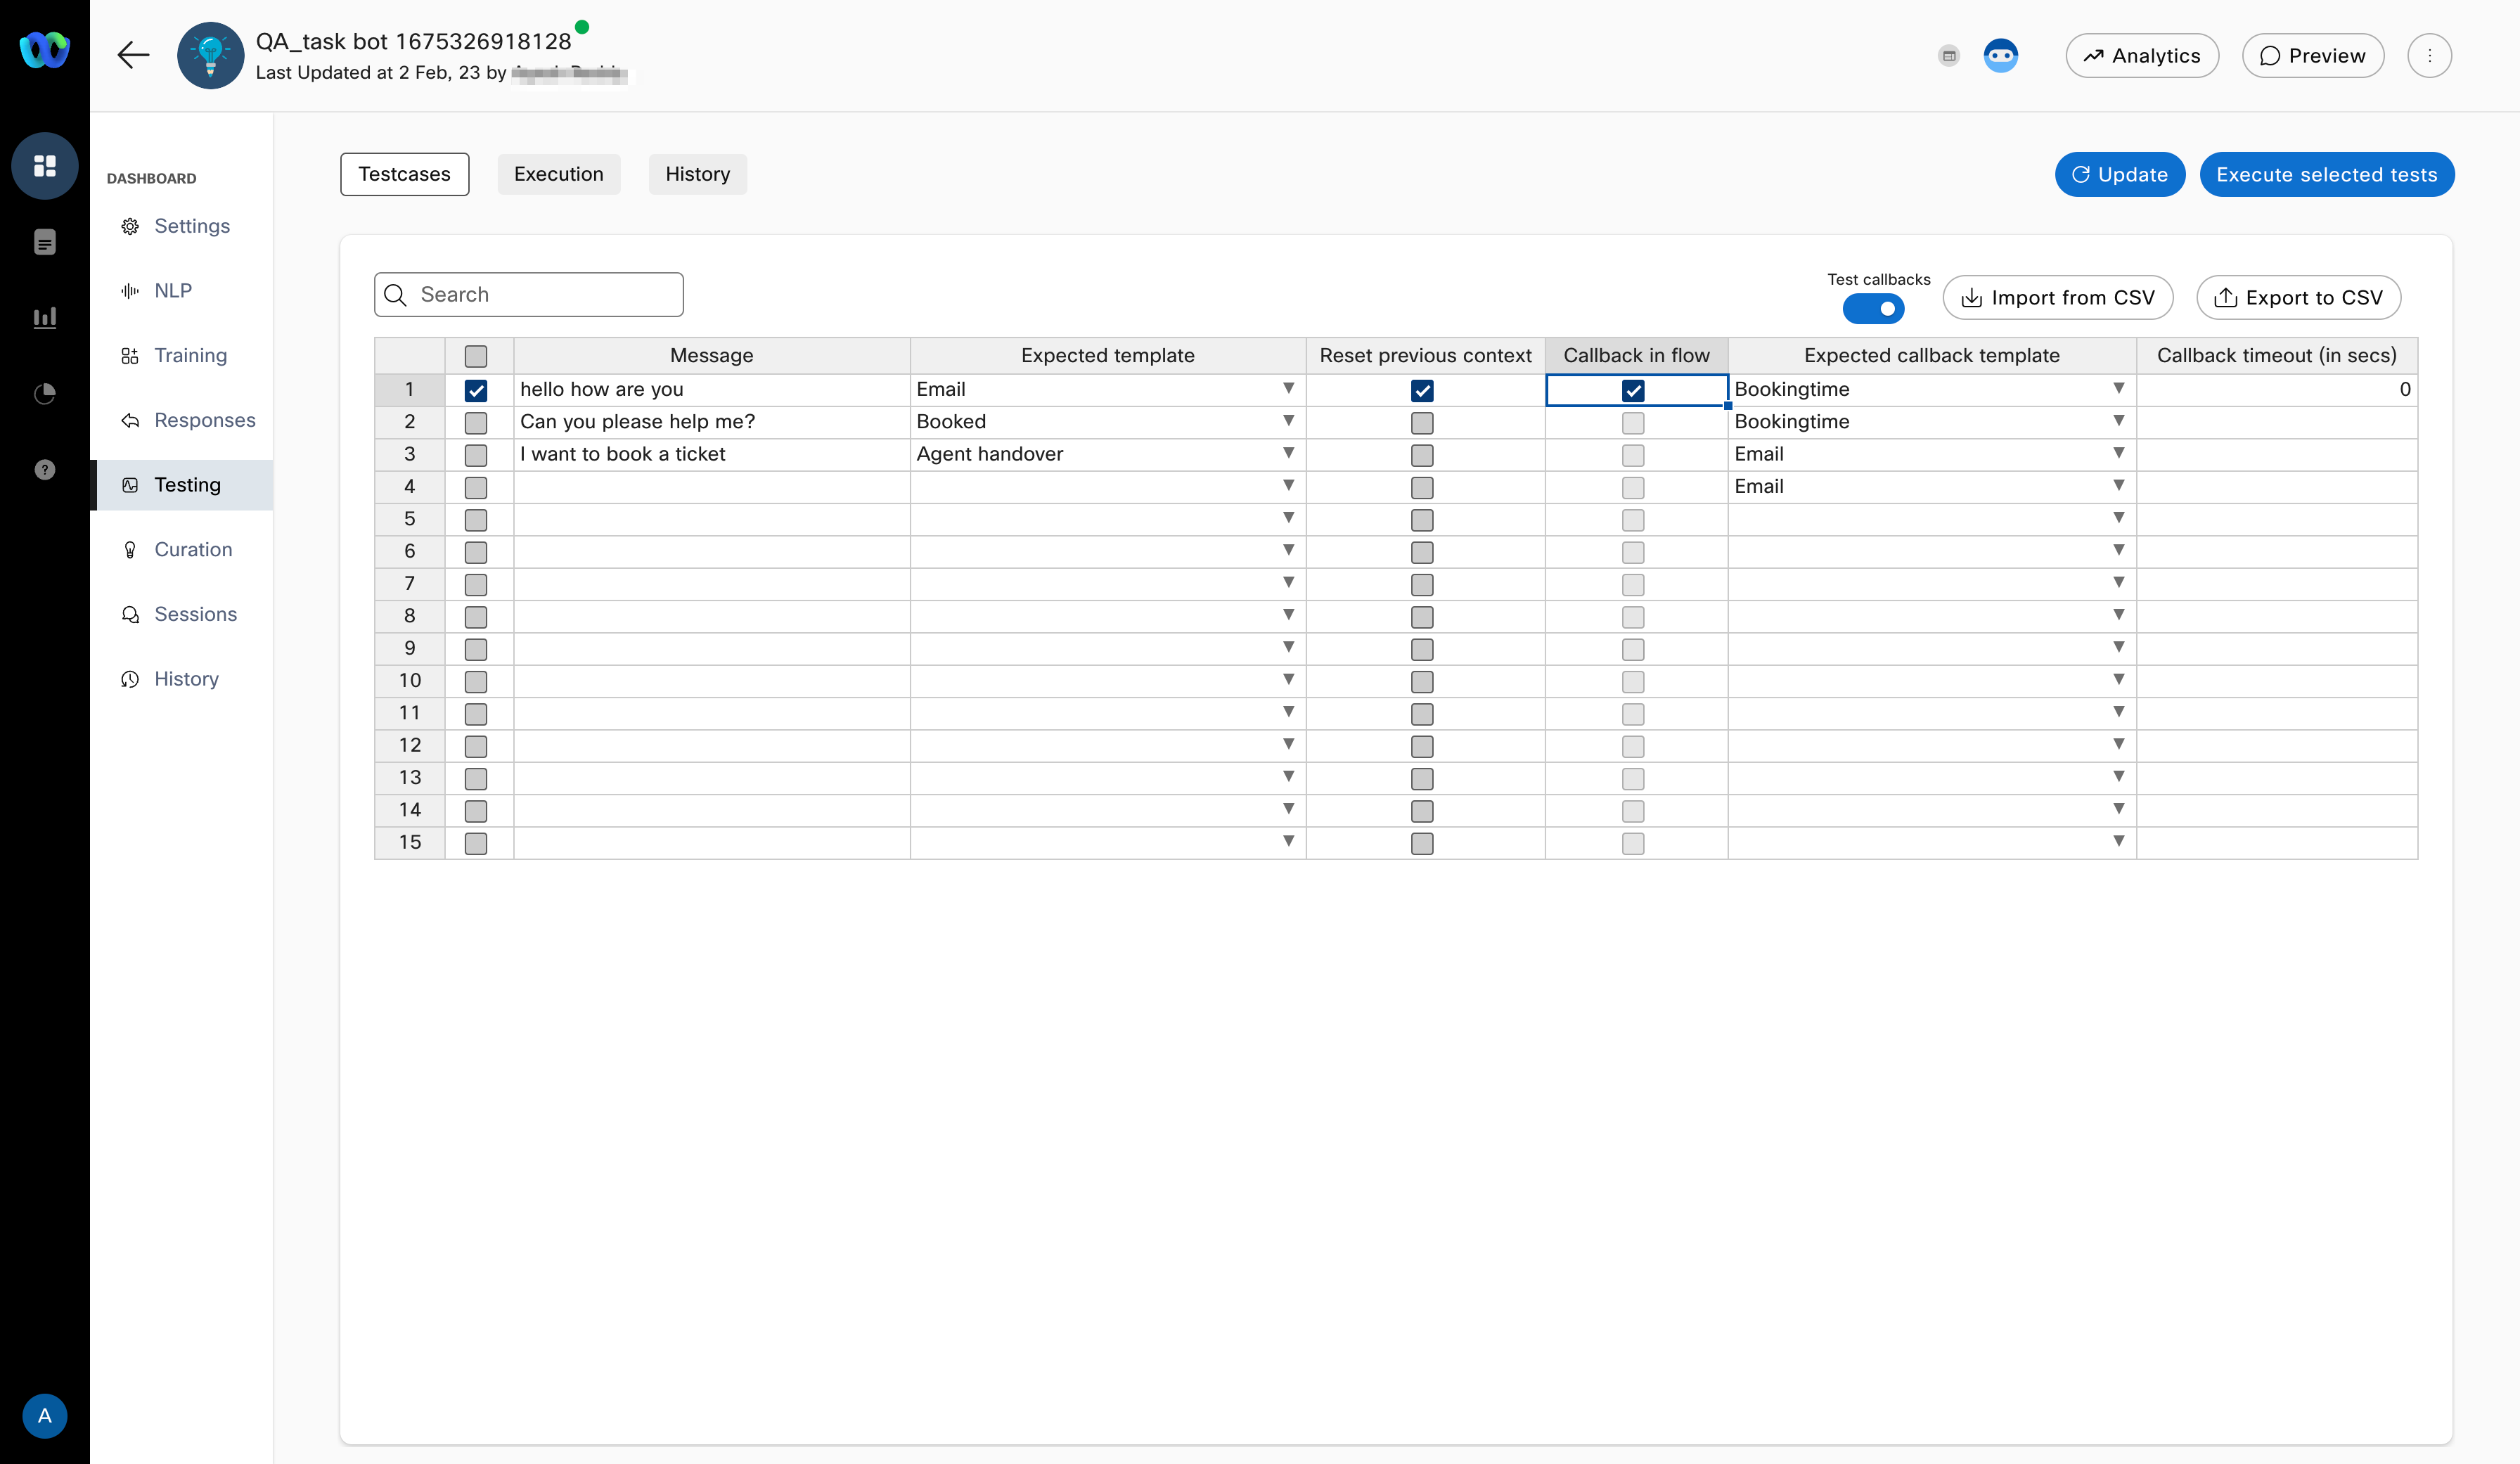
Test cases in Task bot with callback testing enabled
For those intents that are expected to result in a callback path, you just need to check the “Callback in flow” box in that row and configure the template key that is expected to be triggered in the “Expected callback template” column as shown in the image above.
For all the above scenarios, in addition to manually defining the test cases, users can also import test cases from a CSV file. Please note that all existing cases will be overwritten whenever test cases are imported from CSV.
Executing tests
Tests defined on the “Test cases” tab can be executed from the “Execution” tab. By default, this screen shows the result of the last test execution or loads up empty if it is the very first time that screen is loaded for a given bot. Upon clicking the “Execute tests” button, all the test cases defined on the previous tab will be run sequentially and the result of each test case run is shown next to the test case as and when execution for that test case is completed.
A test run can be aborted midway if needed by clicking on the “Abort run” button on the top right.
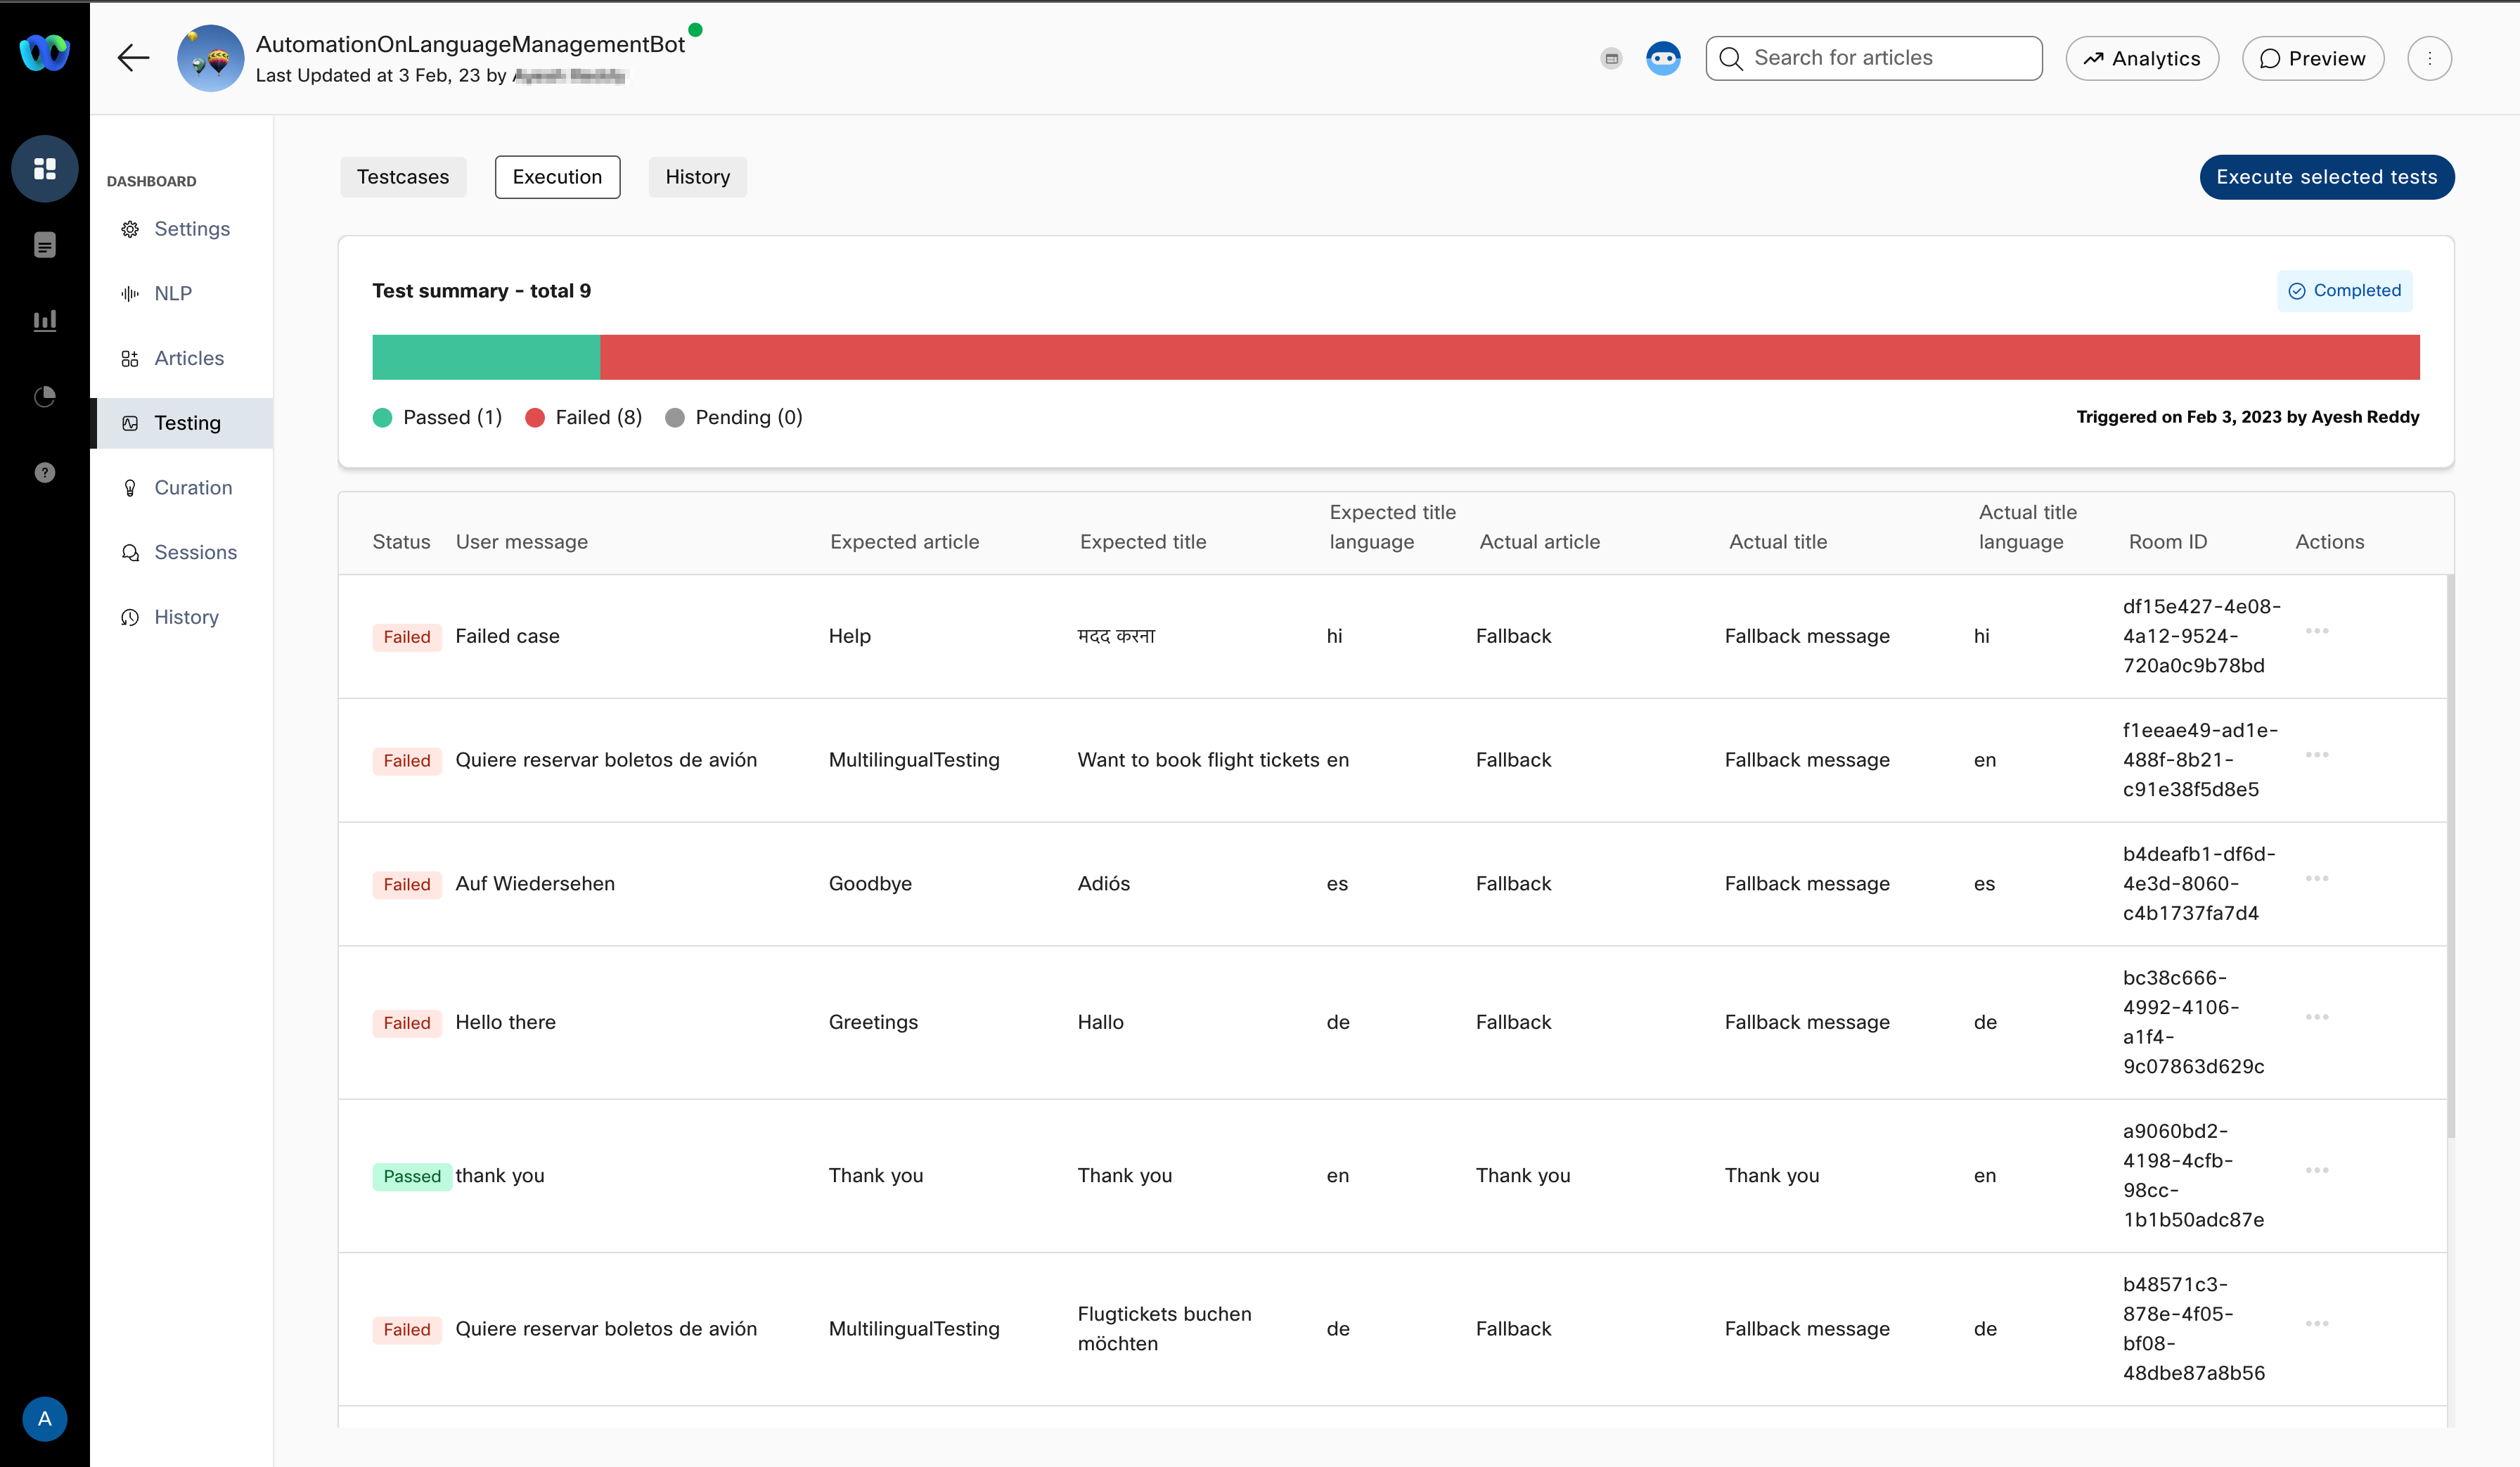
Test execution in Q&A bots
The session id in which a test case is run is also displayed in the results for quick cross-reference and all these transactions can be viewed in a session view by selecting the Transaction details menu option in the _Actions _column.
Each test case can also be launched in preview for testing manually by selecting the Test in preview menu option in the _Actions _column.
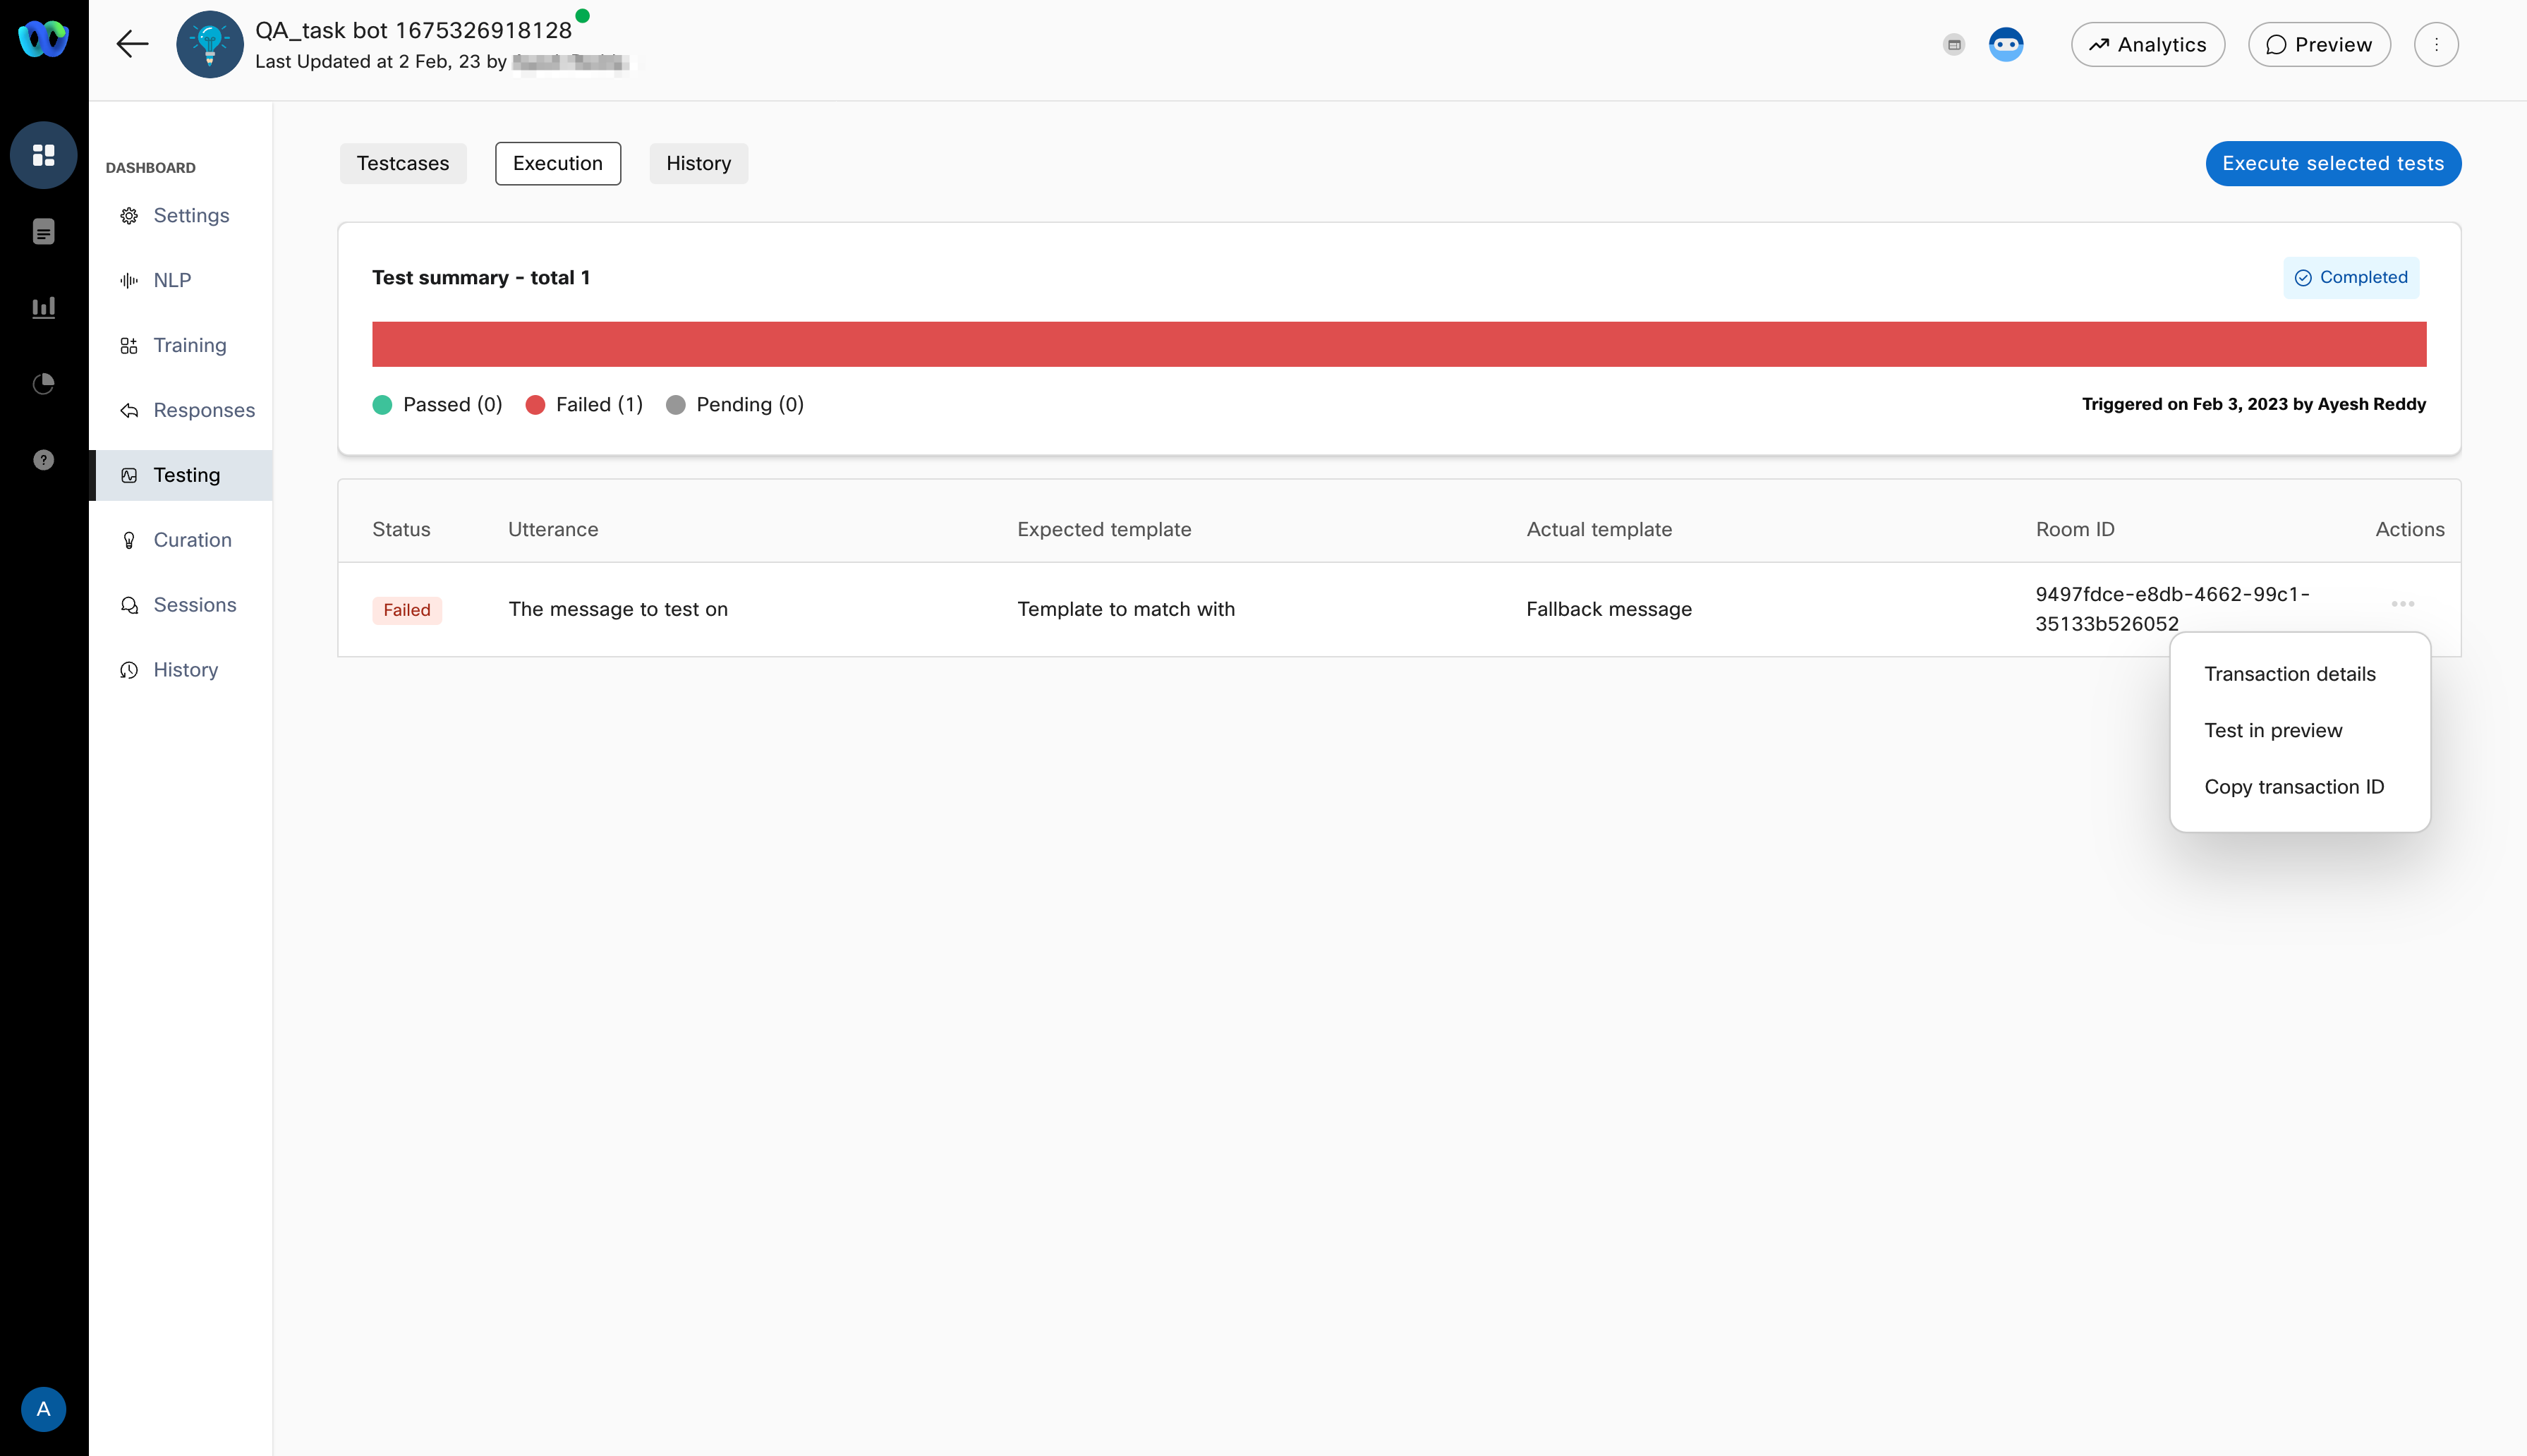
Actions in test case execution
Execution with callbacks
There is a 20-second timeout imposed by the platform to wait for a callback to be triggered beyond which the test case will be marked as failed.
Execution history
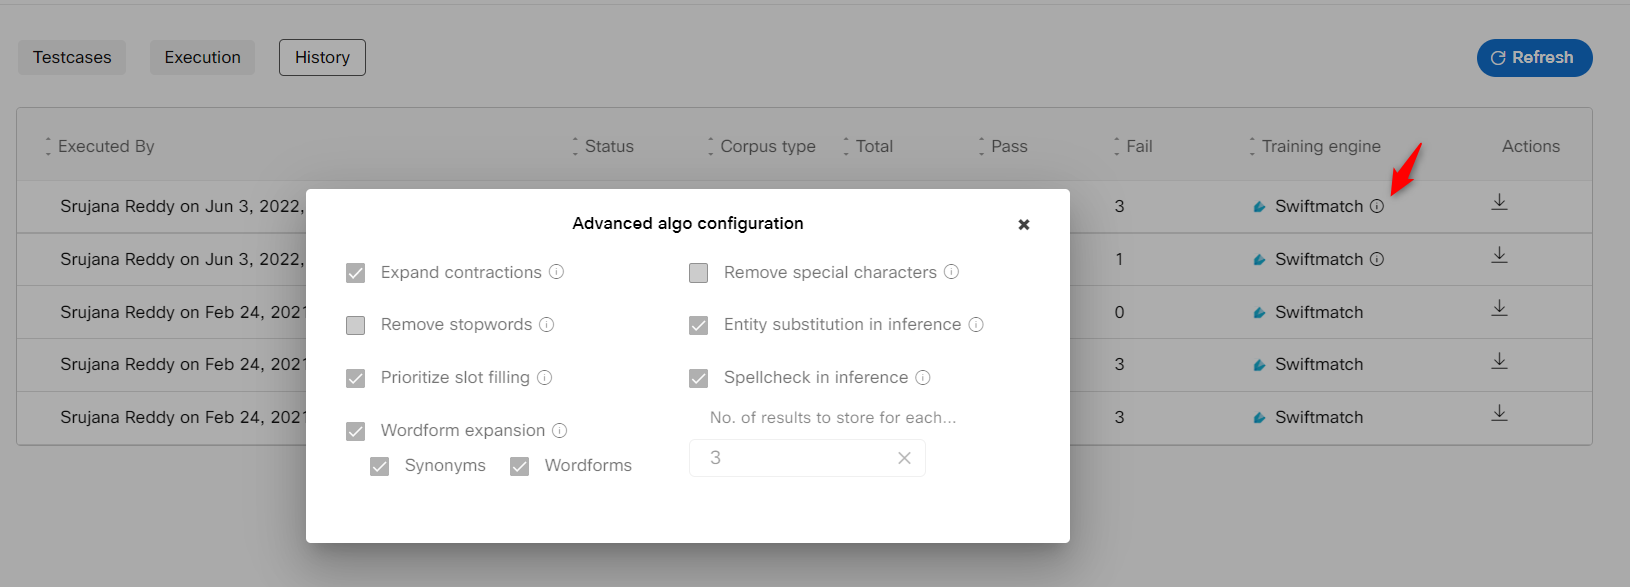
All test case executions are available to be viewed on-demand in the “History” tab. All the relevant data corresponding to execution can be downloaded as a CSV file for offline consumption, like attaching it as a proof of success. Bot developers can view the engine and Algo configuration settings that were used at the time of
executing test cases for each execution instance. This allows developers to choose the optimal engine and config for the bot.

History of test executions
Click on the Info icon corresponding to the training engine with which the corpus was trained to view the Advanced algorithm configuration settings that were configured at the time of test case execution.
Updated 3 months ago
